


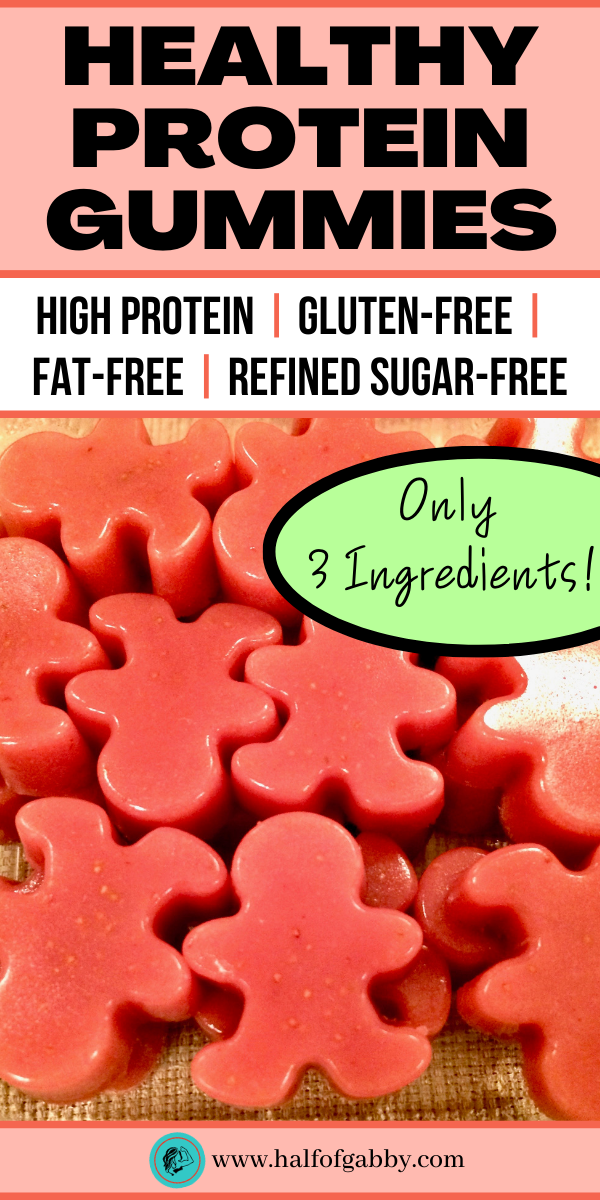
PROTEIN GUMMIES: Only 3 Ingredients!
GLUTEN-FREE | HIGH PROTEIN | FAT FREE | REFINED SUGAR-FREE
I started making these yummy gummies for my munchkins... and they've become my favorite snack! I just can't stop. And you know what? It's okay! Because these suckers are not only delicious, they're healthy. I'm not talkin' just a little bit healthy either, I'm talkin' REALLY healthy!
These gummies are packed with protein!
The fruit snacks you buy in the store are loaded with chemicals, preservatives, and fruit 'flavors'. These gummies are straight up goodness. You are using REAL fruit. No fake flavorings, no chemicals, no nonsense. These snacks are something you can be proud to give your little ones... if you don't eat all of them first ;)
If you sit them out at snack time, trust me, they will disappear!
They're great to put in the kiddies' lunches too! (and yours too.)
I'm tellin' you, these are certainly not just for kids. I have made at least a half-dozen batches that I've hid in the back of the fridge so I could have them all to myself. Don't judge. You'll be doing the same thing. Just wait and see.
How easy are these to make? Uh, three ingredients. That's it! You know what this mama has to say about that? HELL TO THE YES!
I heart these gummies :)
You know what else is totally awesome about these 3-ingredient tasty treats?
One of the three ingredients is a superfood! Yup. Gelatin.
Did you know that in just one tablespoon of gelatin there are 11 grams of protein? That's a lot of protein!
Most people have no idea how amazing gelatin is for our bodies and how many health benefits it provides for us.
I've provided some links at the end of this post if you'd like to read more in-depth explanations behind gelatin's many health benefits. But for right now, I'm simply going to list some of the benefits just to give you an idea of how incredible gelatin really is for us.
HEALTH BENEFITS OF GELATIN
High in Protein
Aids in Weight Loss
Boosts Fat Burning
Boosts Metabolism
Curbs Appetite
Prevents Stretch Marks
Strengthens Bones
Reduces Arthritis Pain
Improves Sleep
Fights Aging/Reduces Wrinkles
Balances Hormones
Improves Digestion
Detoxes Liver
Maintains/Preserves Muscles
Reduces Cellulite
Heals Kidneys, Bladder, Adrenals
Reduces Allergies
Strengthens Hair, Nails, Teeth
Makes Skin Glow
Speeds Up Wound Healing
Heals Joints
Reduces Inflammation
Heals Leaky Gut
So now you can see why gelatin is a superfood!
Okay, now we're going to jump right into this recipe. It's time you know how to make this delicious snack!
~~~
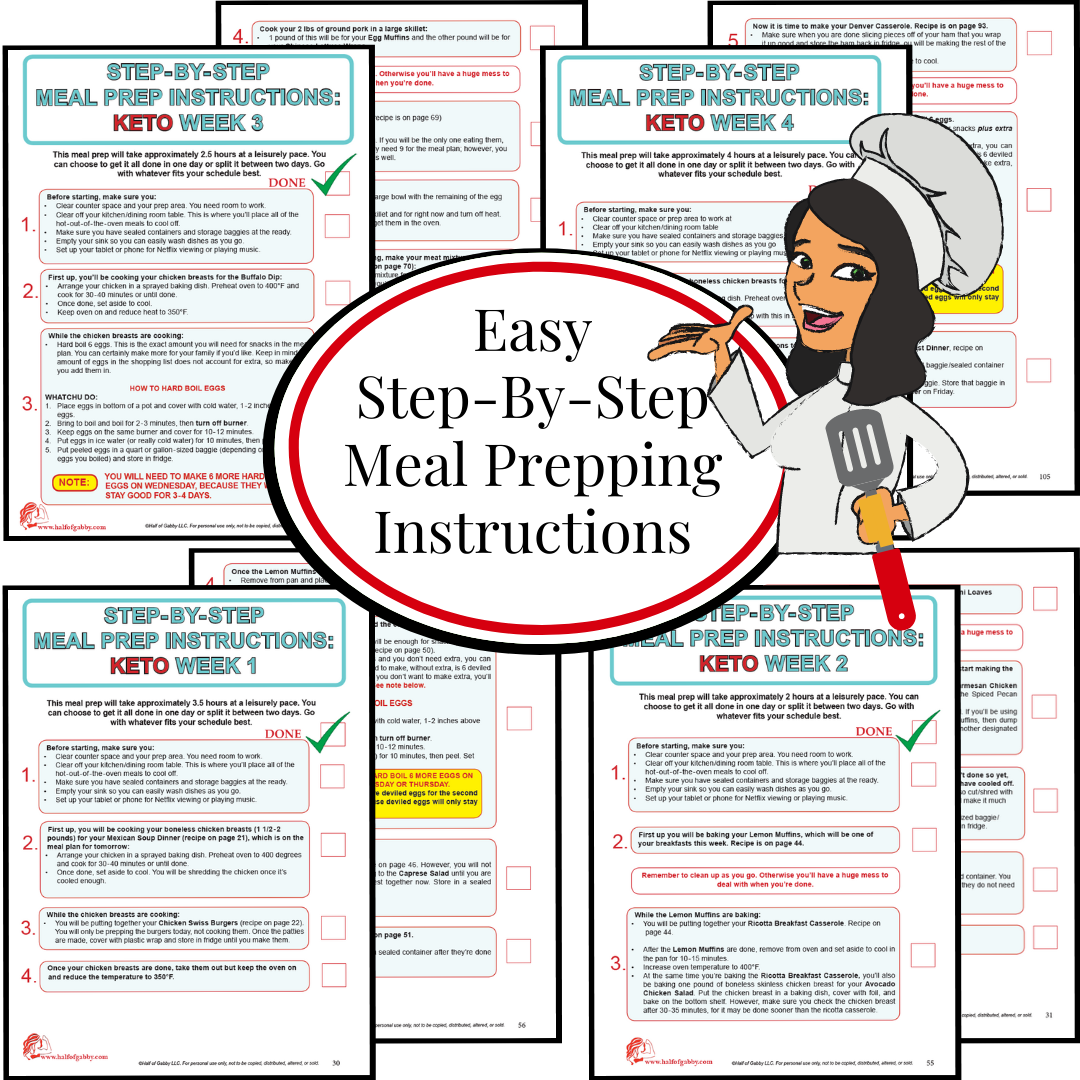
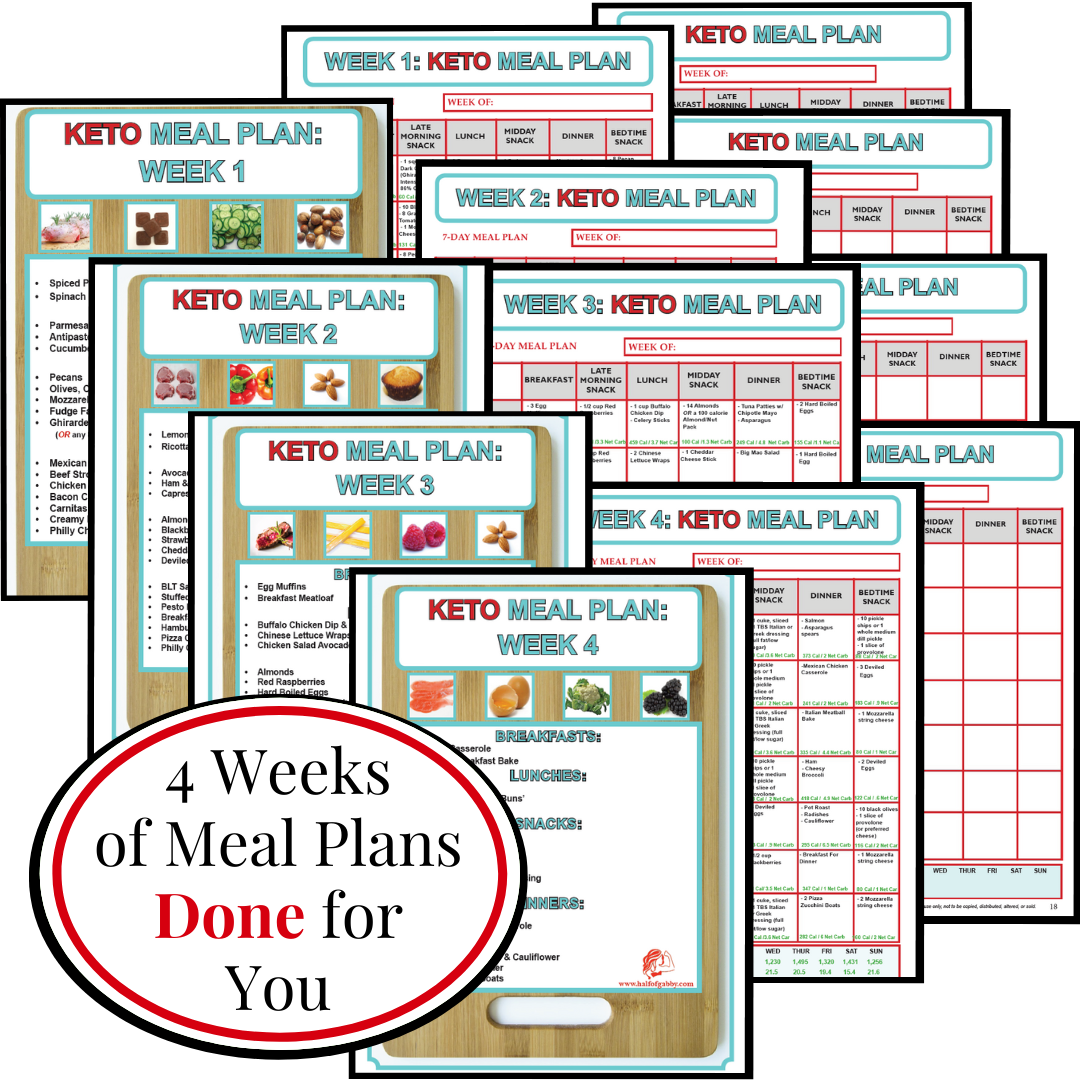
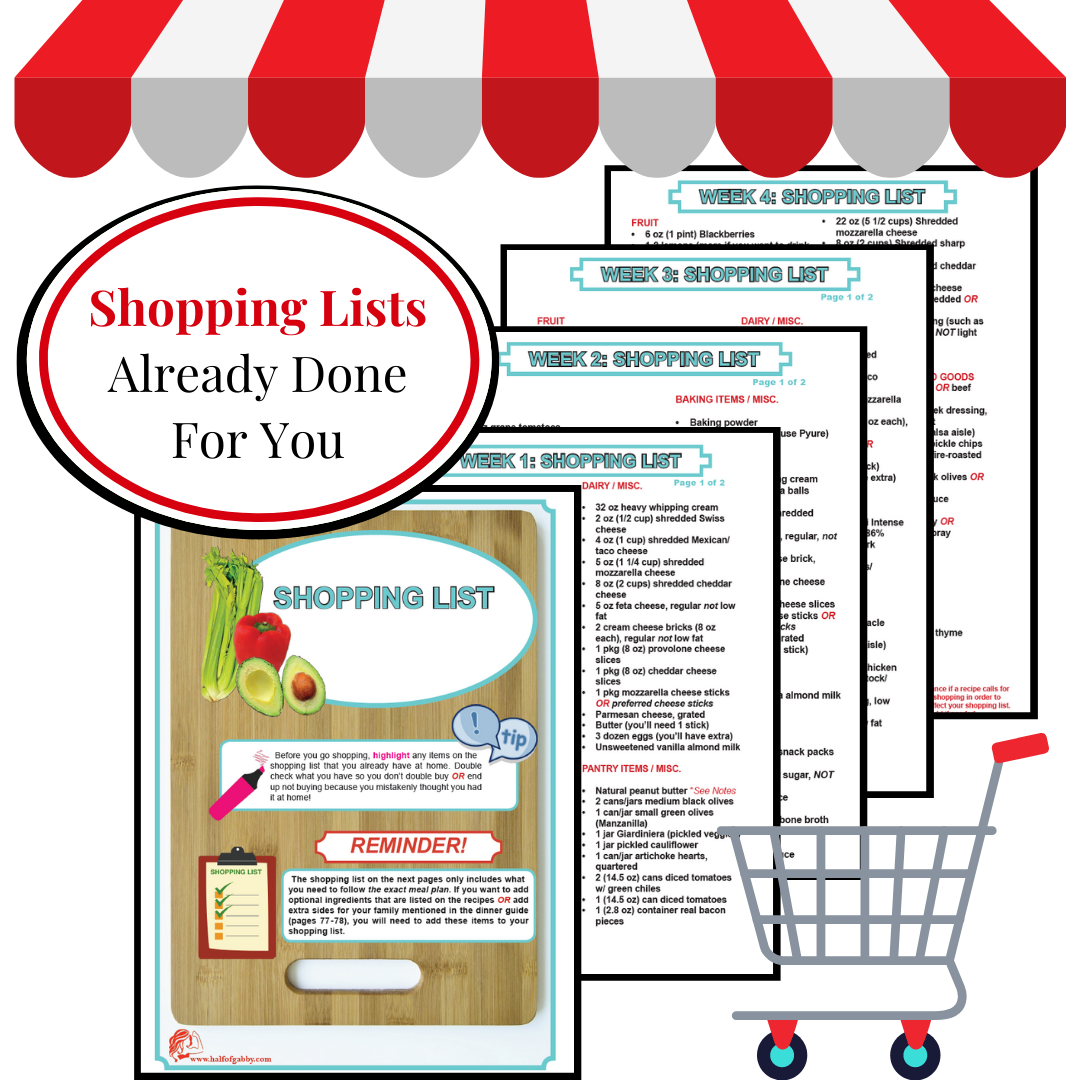
Do you need some guidance in meal prepping or need a healthy meal plan?
TRY MY
4 Week KETO Meal Plan & Meal Prepping Guide


WHATCHU NEED:
2 cups of Puréed Fruit (Fresh or Frozen)
5 TBS Gelatin (Grass-fed is best)
6-8 Stevia Packets OR 1/4c Raw, Organic Honey
*NOTE: If not using recommended Grass-Fed Gelatin and using store-bought packets instead, protein count will be significantly less.
THE MOLDS:
Note:
You can use most any fruit you'd like; however, there are a few fruits that will NOT work. Kiwis, mangoes, guava, papaya, and pineapple will NOT work. These fruits break down the gelatin and won't let it set up.
I use gelatin from a grass-fed source. It's harder to find and if you don't find it in a local health store, you can order it online. This is the gelatin that I use.
But you can certainly use the grocery brands as well.
In my opinion, I think these gummies are the perfect consistency. They are softer than the rock hard fruit snacks you buy in the store, but they are more dense than Jello Jigglers. However, you can change the consistency to whatever you'd like. But my family and I love the gummies the best with this recipe as is.
Note:
If you want them more jiggly, use less gelatin and if you want them harder, use more. Using 3 TBS of gelatin will give you more of a Jello Jiggler consistency.

WHATCHU DO:
1. Purée the fruit in the blender.
You'll need around 3-4 cups of sliced fruit to have 2 cups of puréed fruit depending on what fruit you're using. Purée until the fruit is liquified and smooth. I thaw my frozen fruit in the microwave before puréeing.
I'll buy big frozen bags of fruit at Sam's Club or Costco's. Make sure if you're buying frozen fruit that it's just straight up fruit and doesn't have any sugar added!
2. Pour puréed fruit into a small saucepan.
Some fruits will purée smoother than others.
For instance, strawberries will purée super smooth...
... but blueberries on the other hand, will end up much thicker.
But no worries, they ALL come out delicious!
3. Sprinkle gelatin on the fruit and let sit for a few minutes.
*DON'T turn the heat on yet!
After a few minutes, the fruit will look really wrinkled. This is good. This is supposed to happen. Not all of the gelatin will be absorbed. That's okay too.
This is what your wrinkled fruit will look like:
4. Whisk the fruit and gelatin until it's completely blended.
5. Warm up your purée on low-medium heat.
You just want to warm it up enough to blend the flavors. If you can't put your finger into the purée because it's too hot to touch, then it's too hot! Once you have your fruit warm, turn the heat on the lowest setting.
IMPORTANT: Do NOT let your fruit come to a boil!
6. Mix in your sweetener and keep on heat for 2-3 minutes.
Don't use artificial sweeteners! You'll end up turning an incredibly healthy snack into a chemical-laden, unhealthy one.
Whether you're using honey or stevia (or both), you can test the sweetness and add more if you prefer a sweeter taste.
7. Pour fruit purée into silicon molds or a glass baking dish.
To make it easier if I'm using molds, I pour the mixture from the saucepan into a pourable 4-cup measuring bowl. This step isn't necessary if you're using a baking dish.
The silicone molds work like magic!
The only thing you have to worry about when using the silicone molds is that they are super flimsy, so you have to set them inside of a baking dish so you don't spill your purée everywhere.
IMPORTANT:
Put the empty mold inside of your baking dish (or on a baking sheet) BEFORE you fill them!
I love the size of these little squares in this silicone mold. It's the perfect bit-size! You can get this mold here.
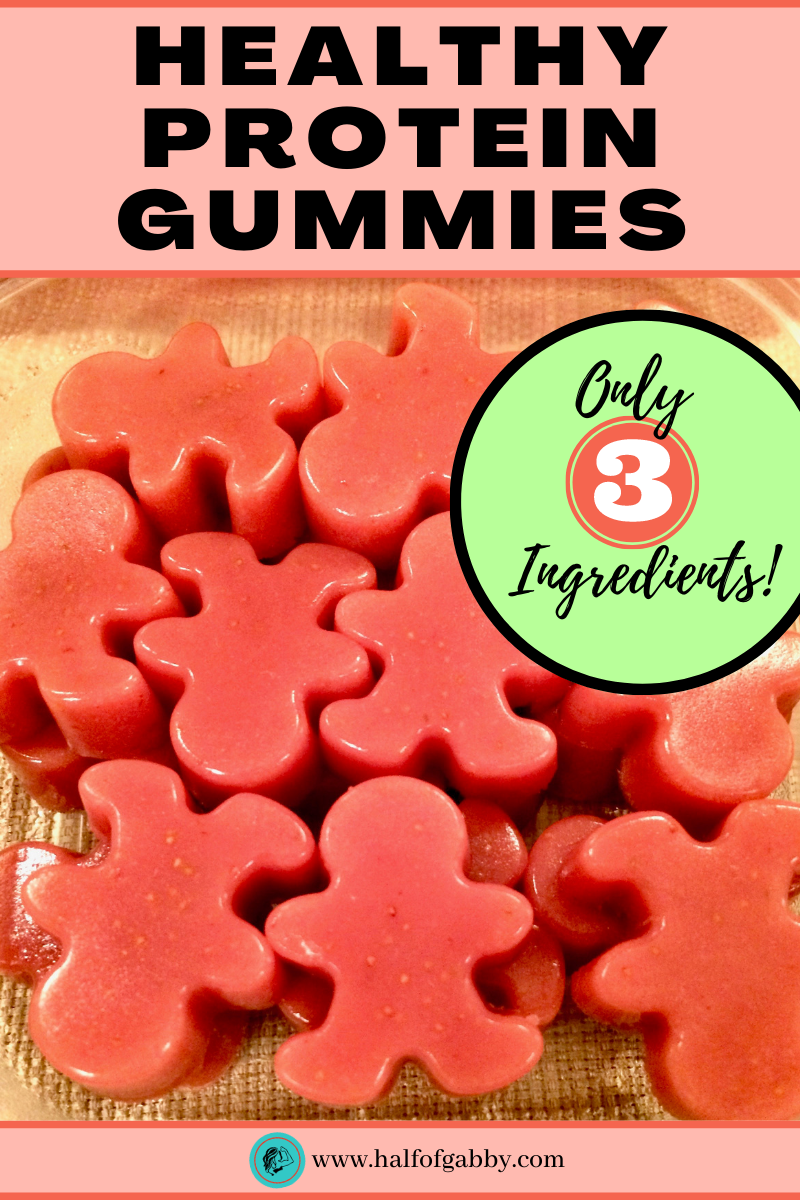
My kids love these little people/gingerbread men molds. I mean, come on, they are so cute! I love them too! You can get this little people mold here.
8. Let the gummies set up either in the fridge for 2-3 hours OR put them in the freezer for around 20-25 minutes.
I always put mine in the freezer so we can eat them up sooner!
*If you put them in the freezer, you'll want them to stay in until they start to form a little bit of ice around the edges. It'll look like this:
You can use any size mold you'd like.
9. Pop the gummies out of the molds (or cut squares from baking dish).
Immediately put the gummies into a sealed container. If you let the gummies sit too long in the molds or baking dish, it'll be harder to get them out later.
*The gummies should pop out of the molds like magic. The molds will be clean and free from gummie residue. Same with using a baking dish, the squares should easily be able to be lifted out intact.
Note:
If your gummies are coming out flaky or leaving residue behind, they aren't done setting up yet. Put them back in the fridge/freezer and check them in a little bit.
If they look like the pic below, they aren't ready yet.
10. Store your gummies in a sealed container in the fridge.
They will stay fresh for 5-7 days. But believe me, they won't last that long! They'll be eaten up in a flash :)
ADDED NOTES:
1. Where did I get my silicone molds?
I got my heart molds from Target. However, I got them around Valentine's Day so I'm not sure if they're a regularly stocked item or if they were available just as a seasonal item. They may have them online though. You can find comparable silicone heart molds here.
I got both my square and little people/gingerbread man molds on Amazon. Wilton makes a lot of really cool molds too. Joann Fabrics, Michaels, or any kitchen store usually carries silicone molds as well.
2. My absolute favorite gummies are banana!
I use super ripe bananas, you know, the brown ones you usually throw away.
Note:
If you make banana gummies, the outsides will turn brown. IT'S OKAY! They are perfectly fine to eat and their taste doesn't change!
3. You can mix fruits to make countless flavors of gummies!
One of our favorites is Strawberry Banana. As long as you have 2 cups of puréed fruit, you can use any combination. You can experiment and find your family's favorites.
I hope you and your family enjoy these healthy gummies as much as we do!
~
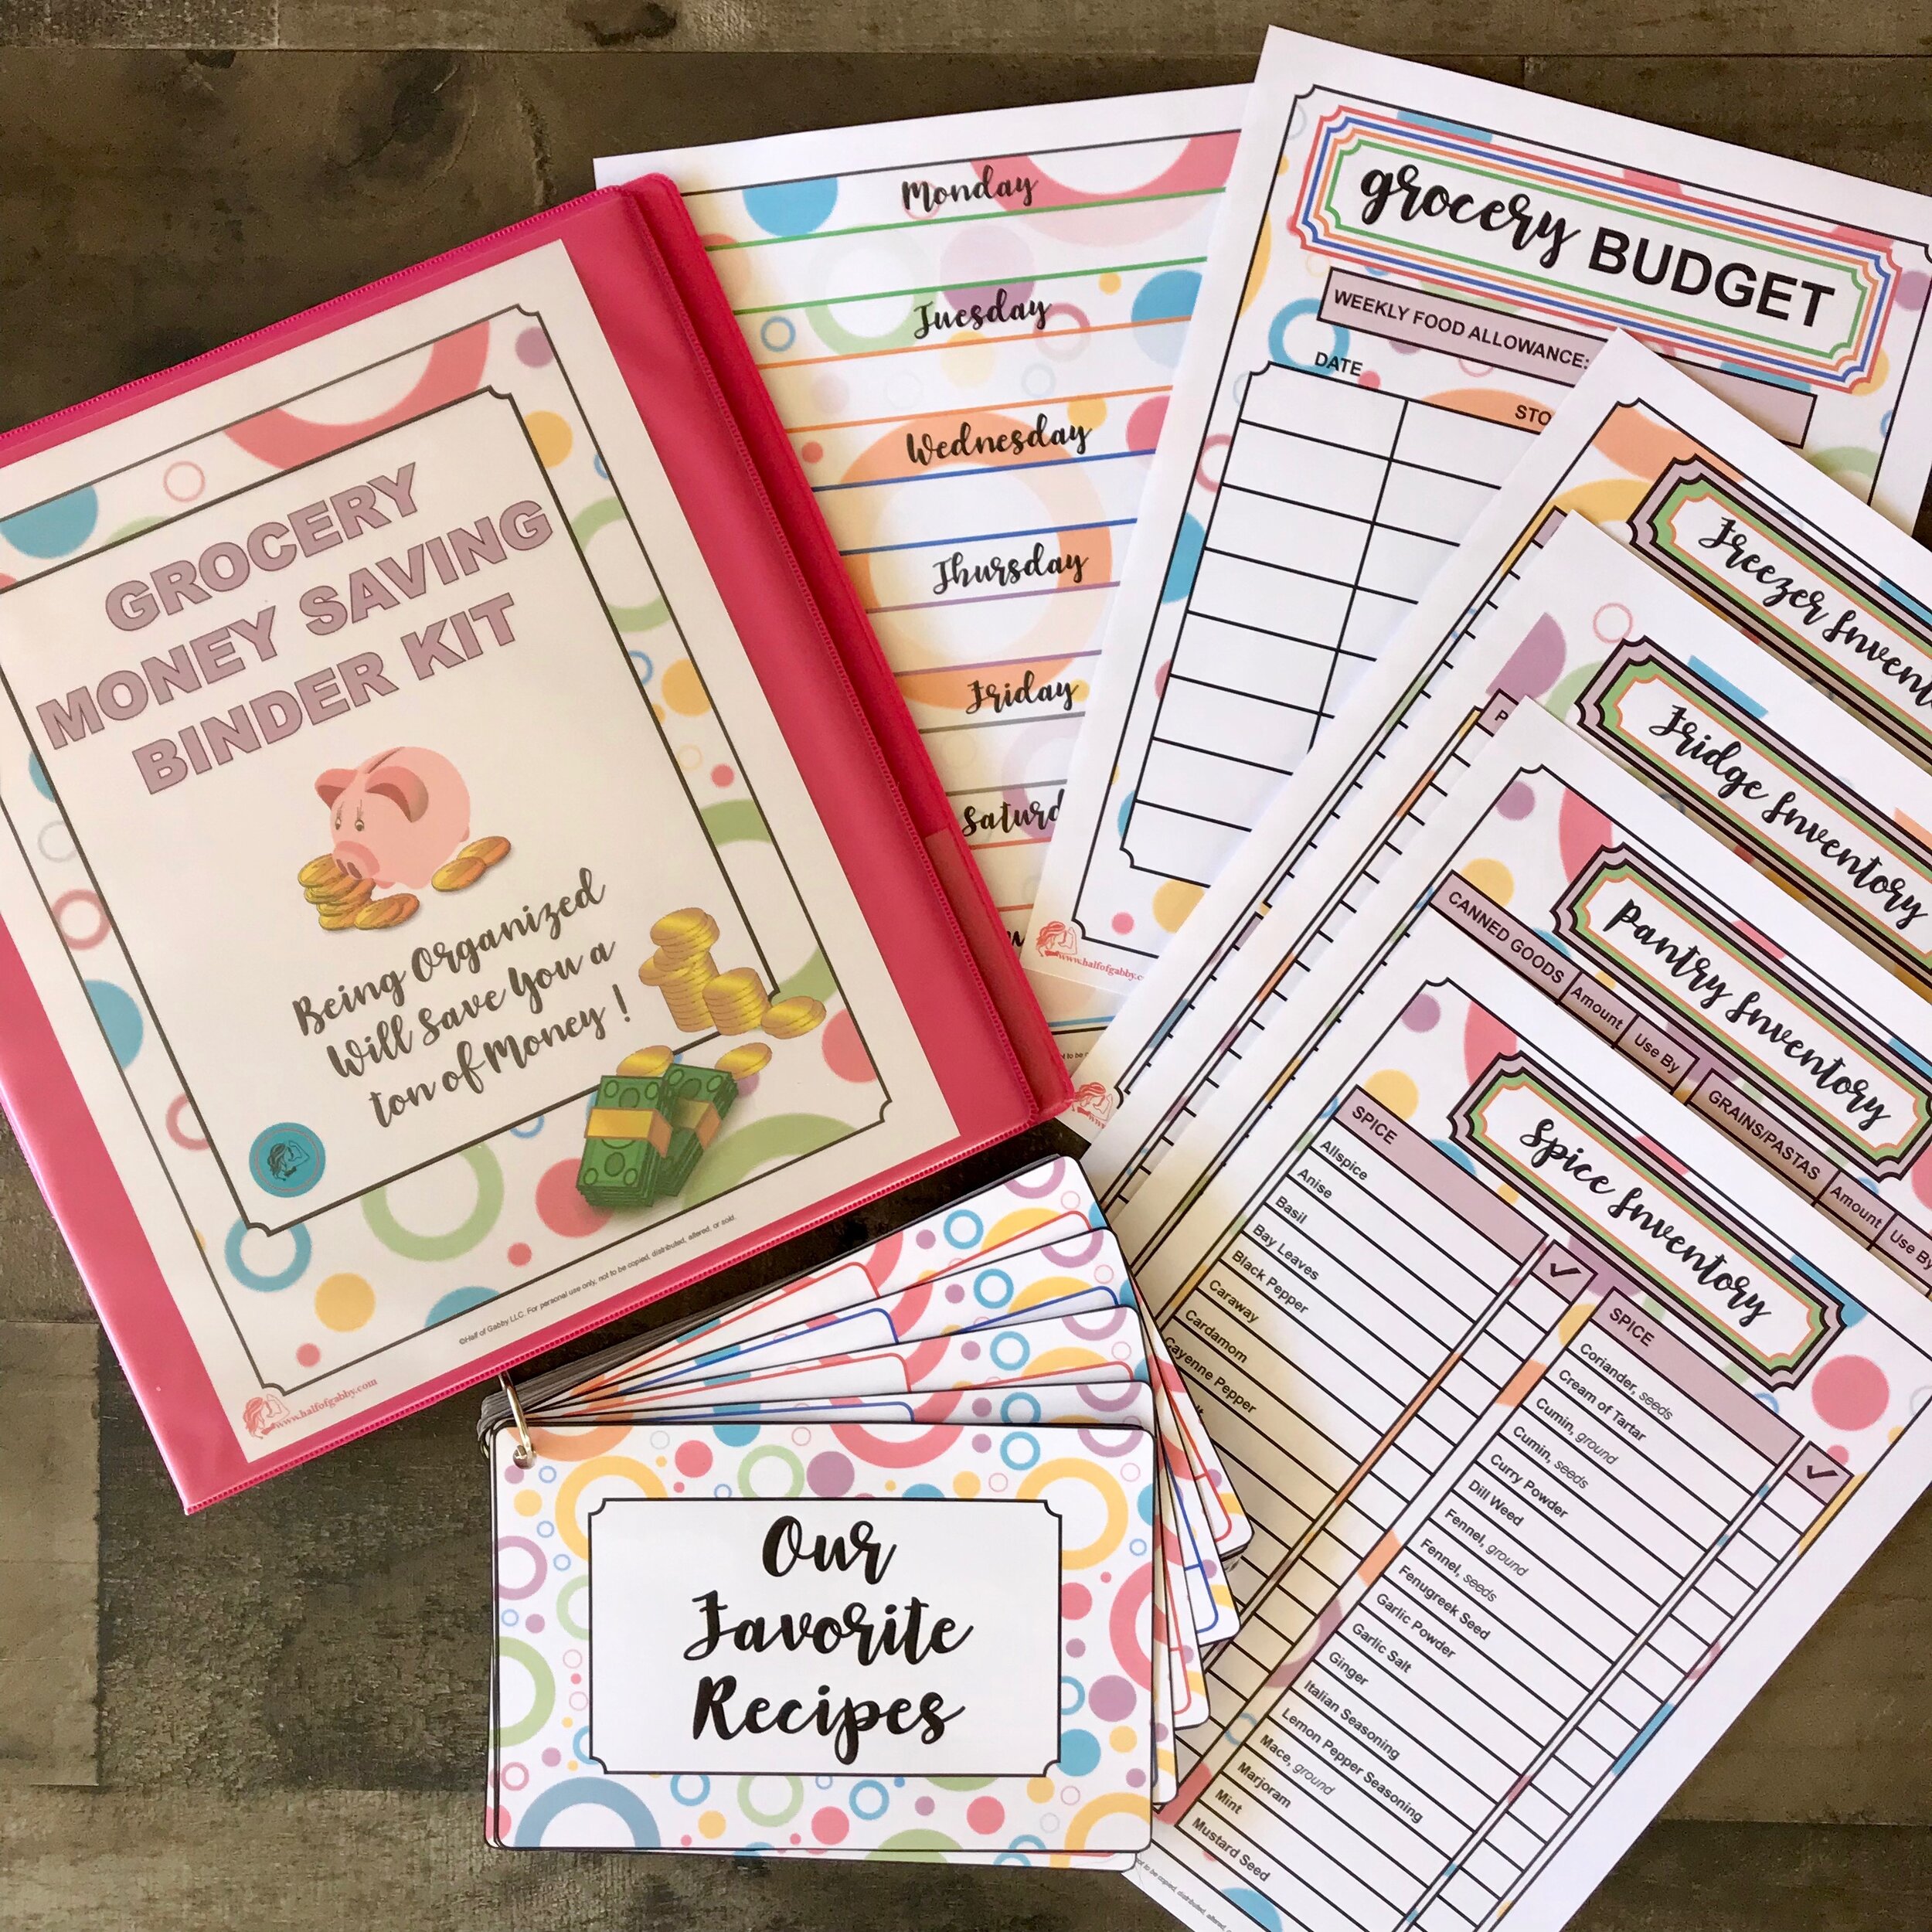
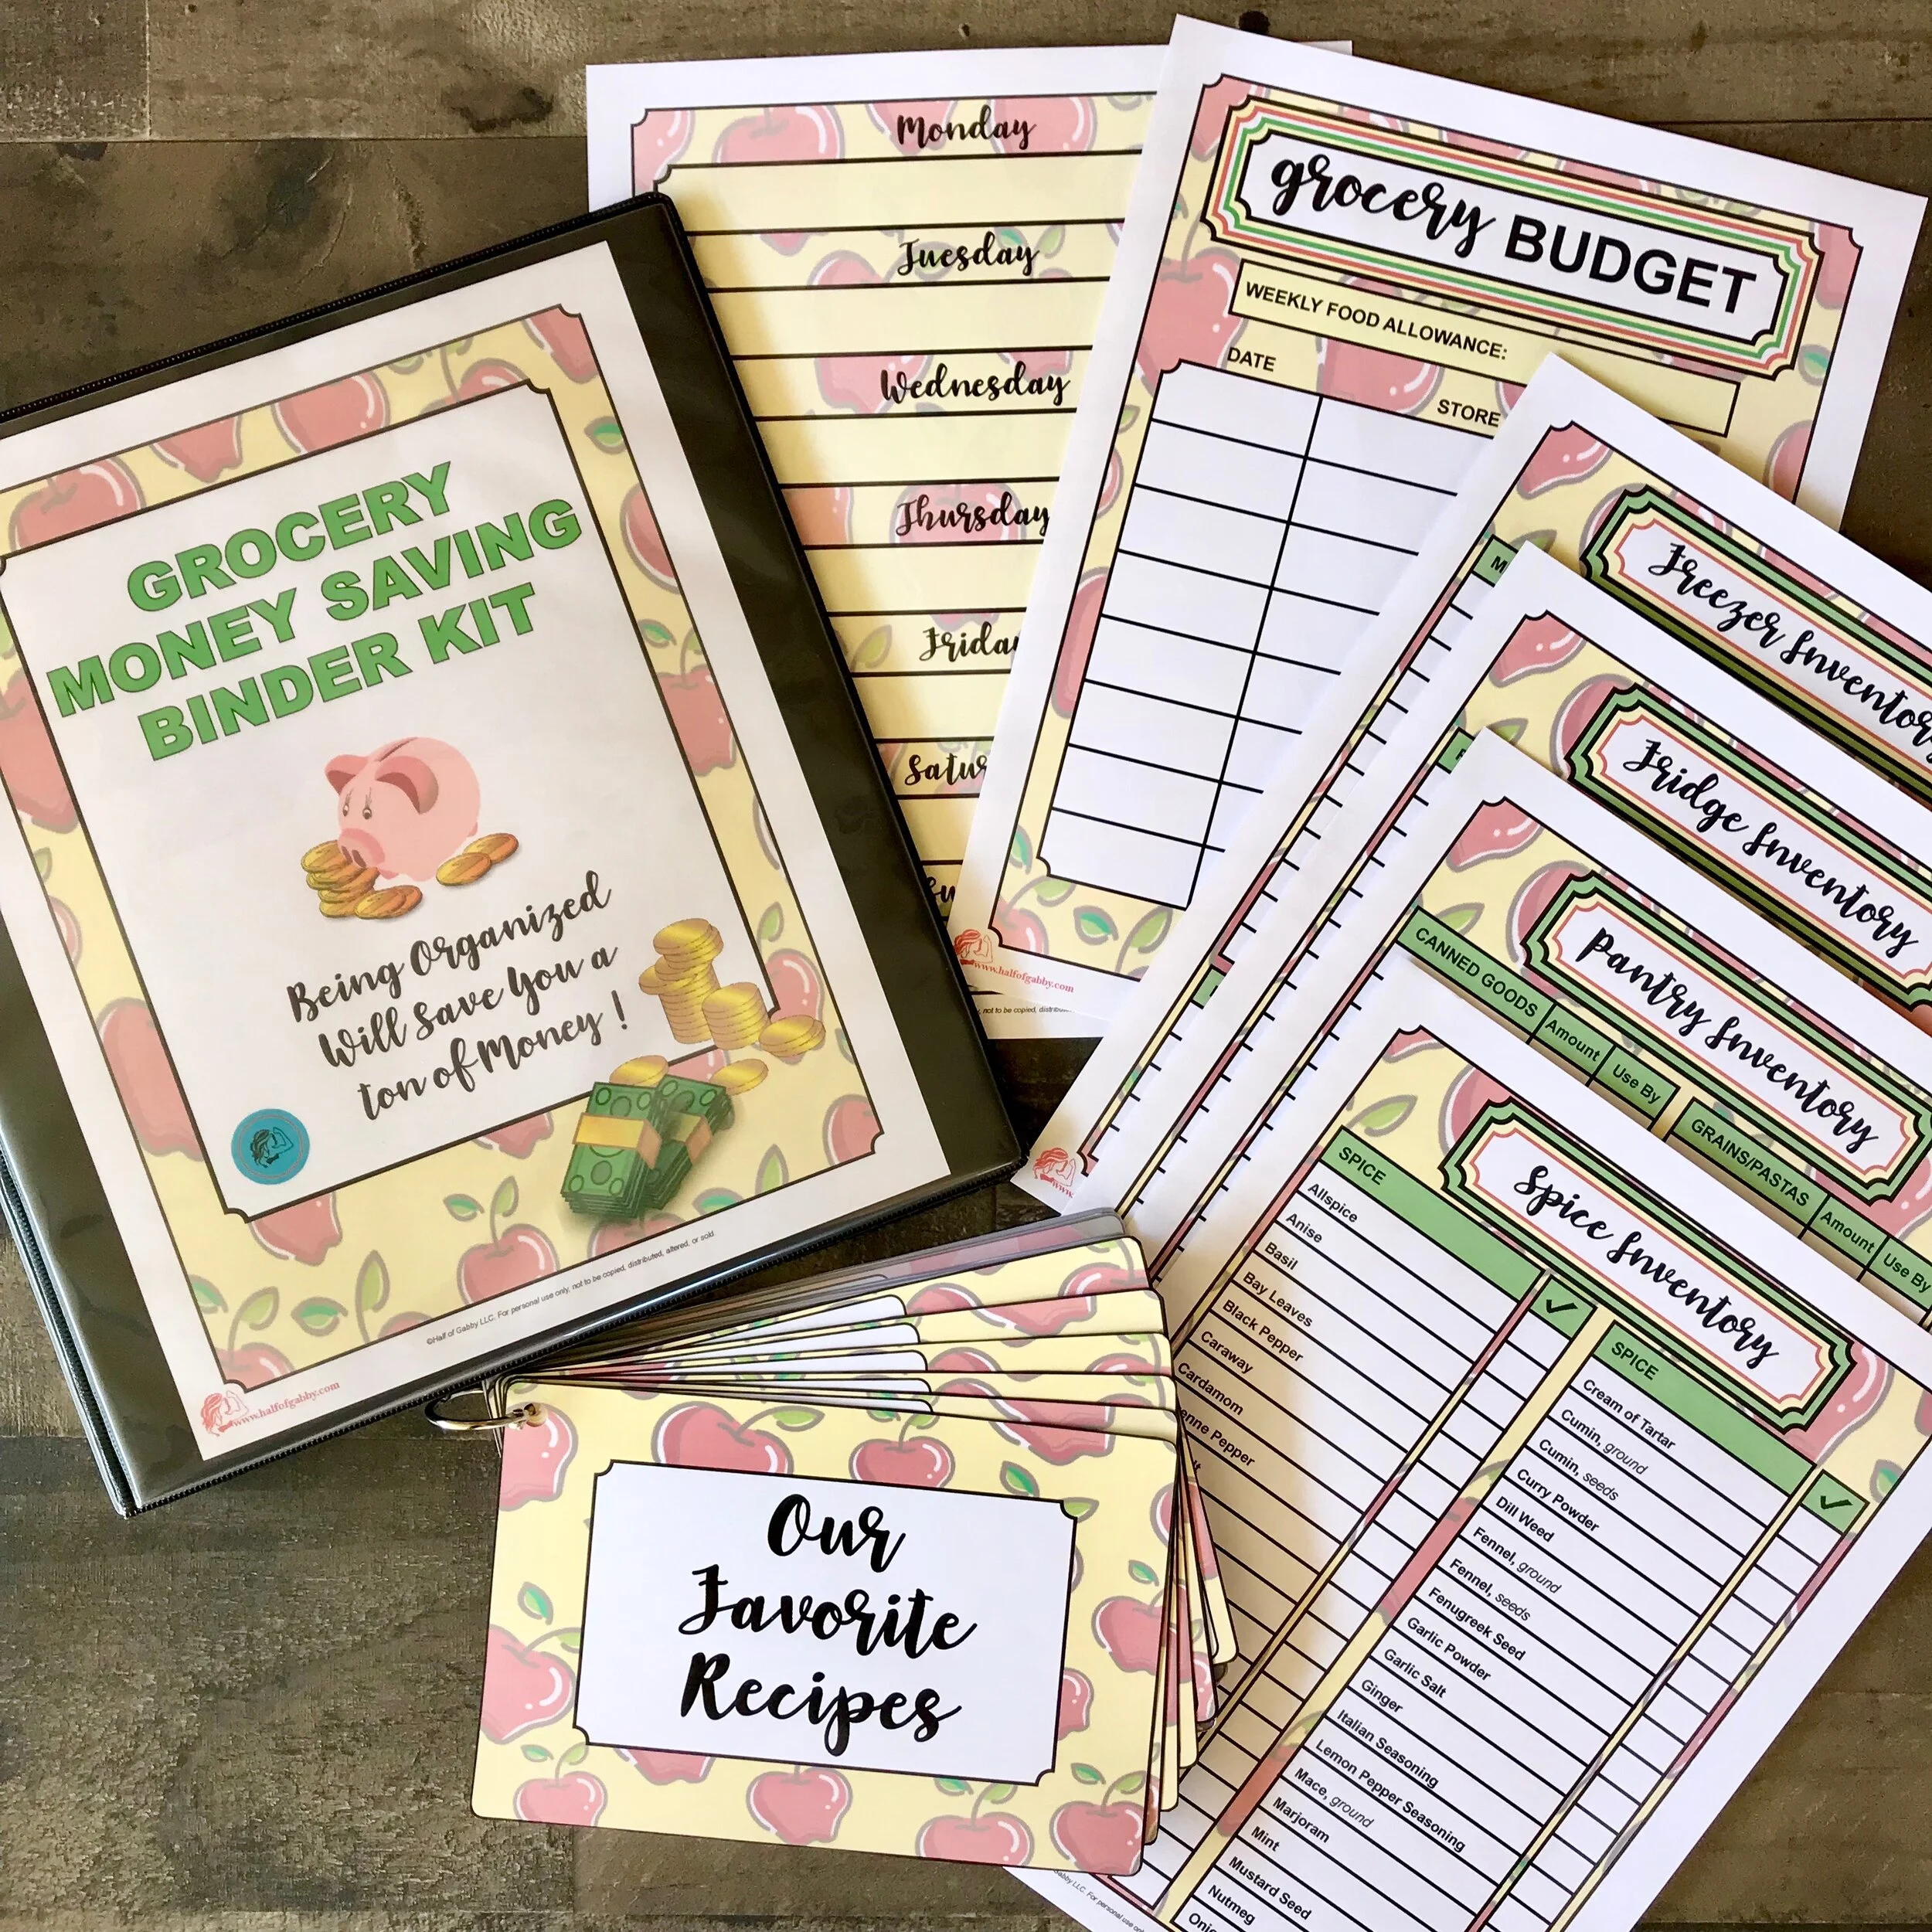
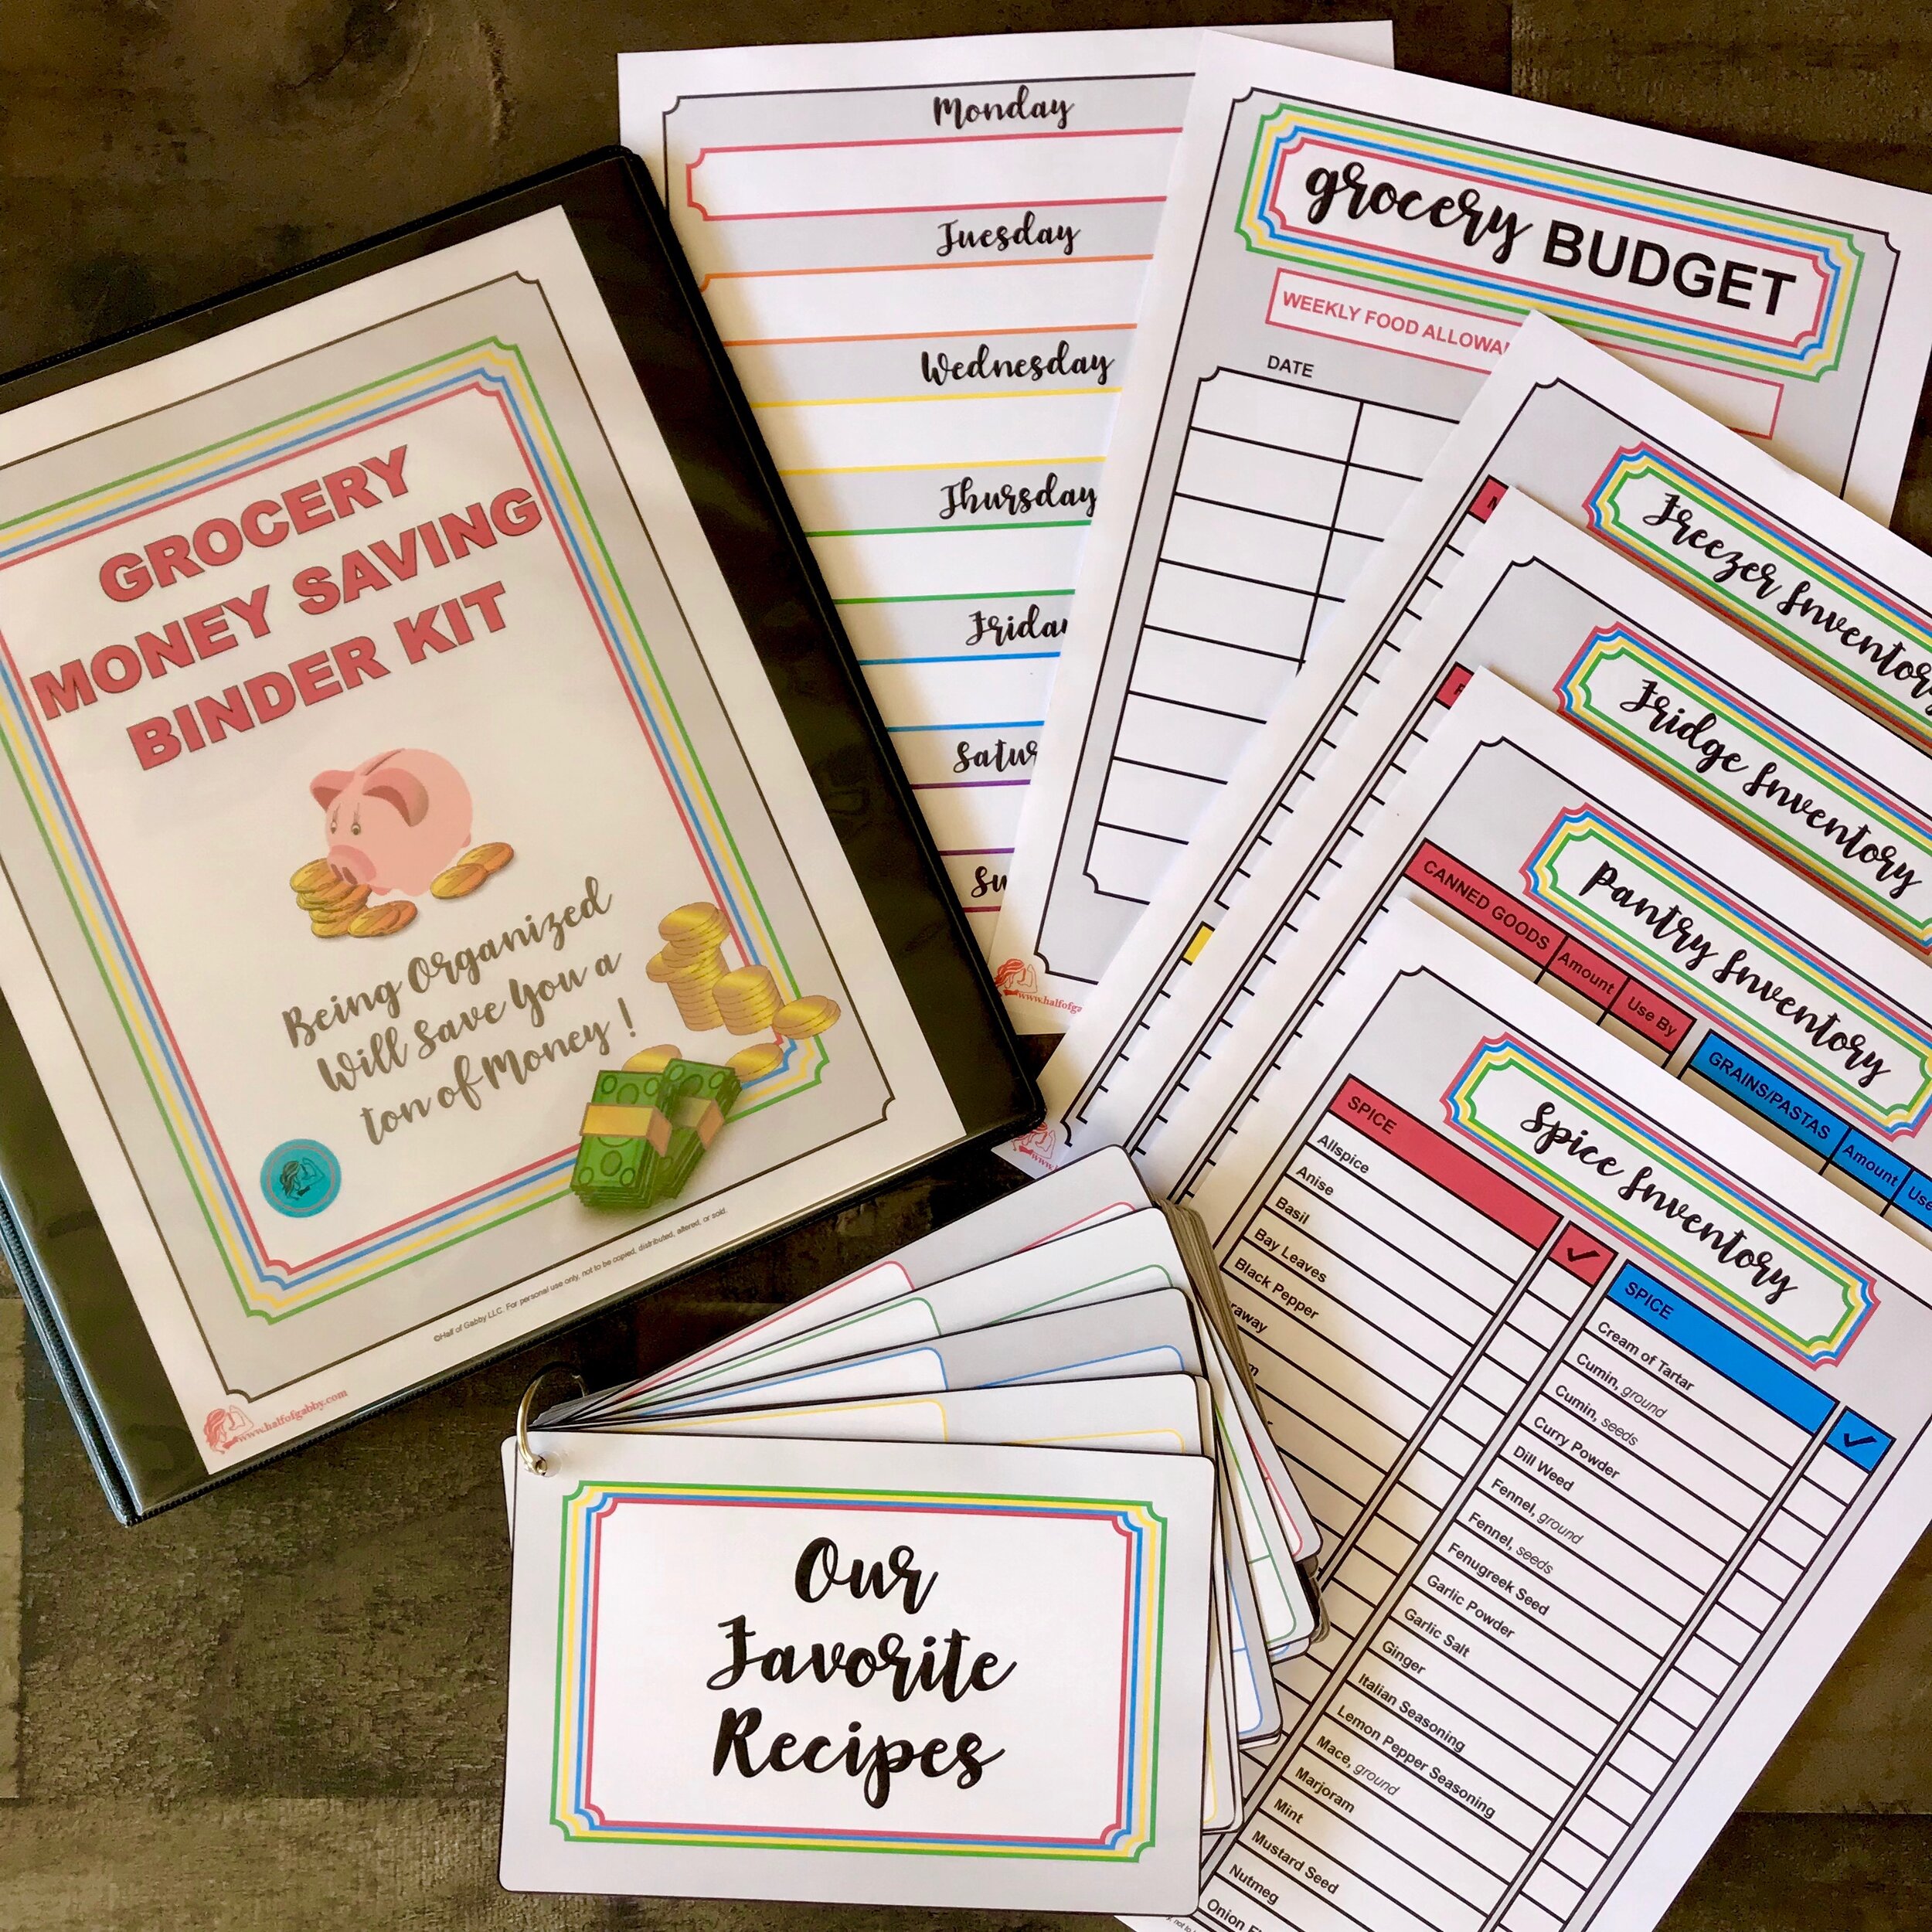
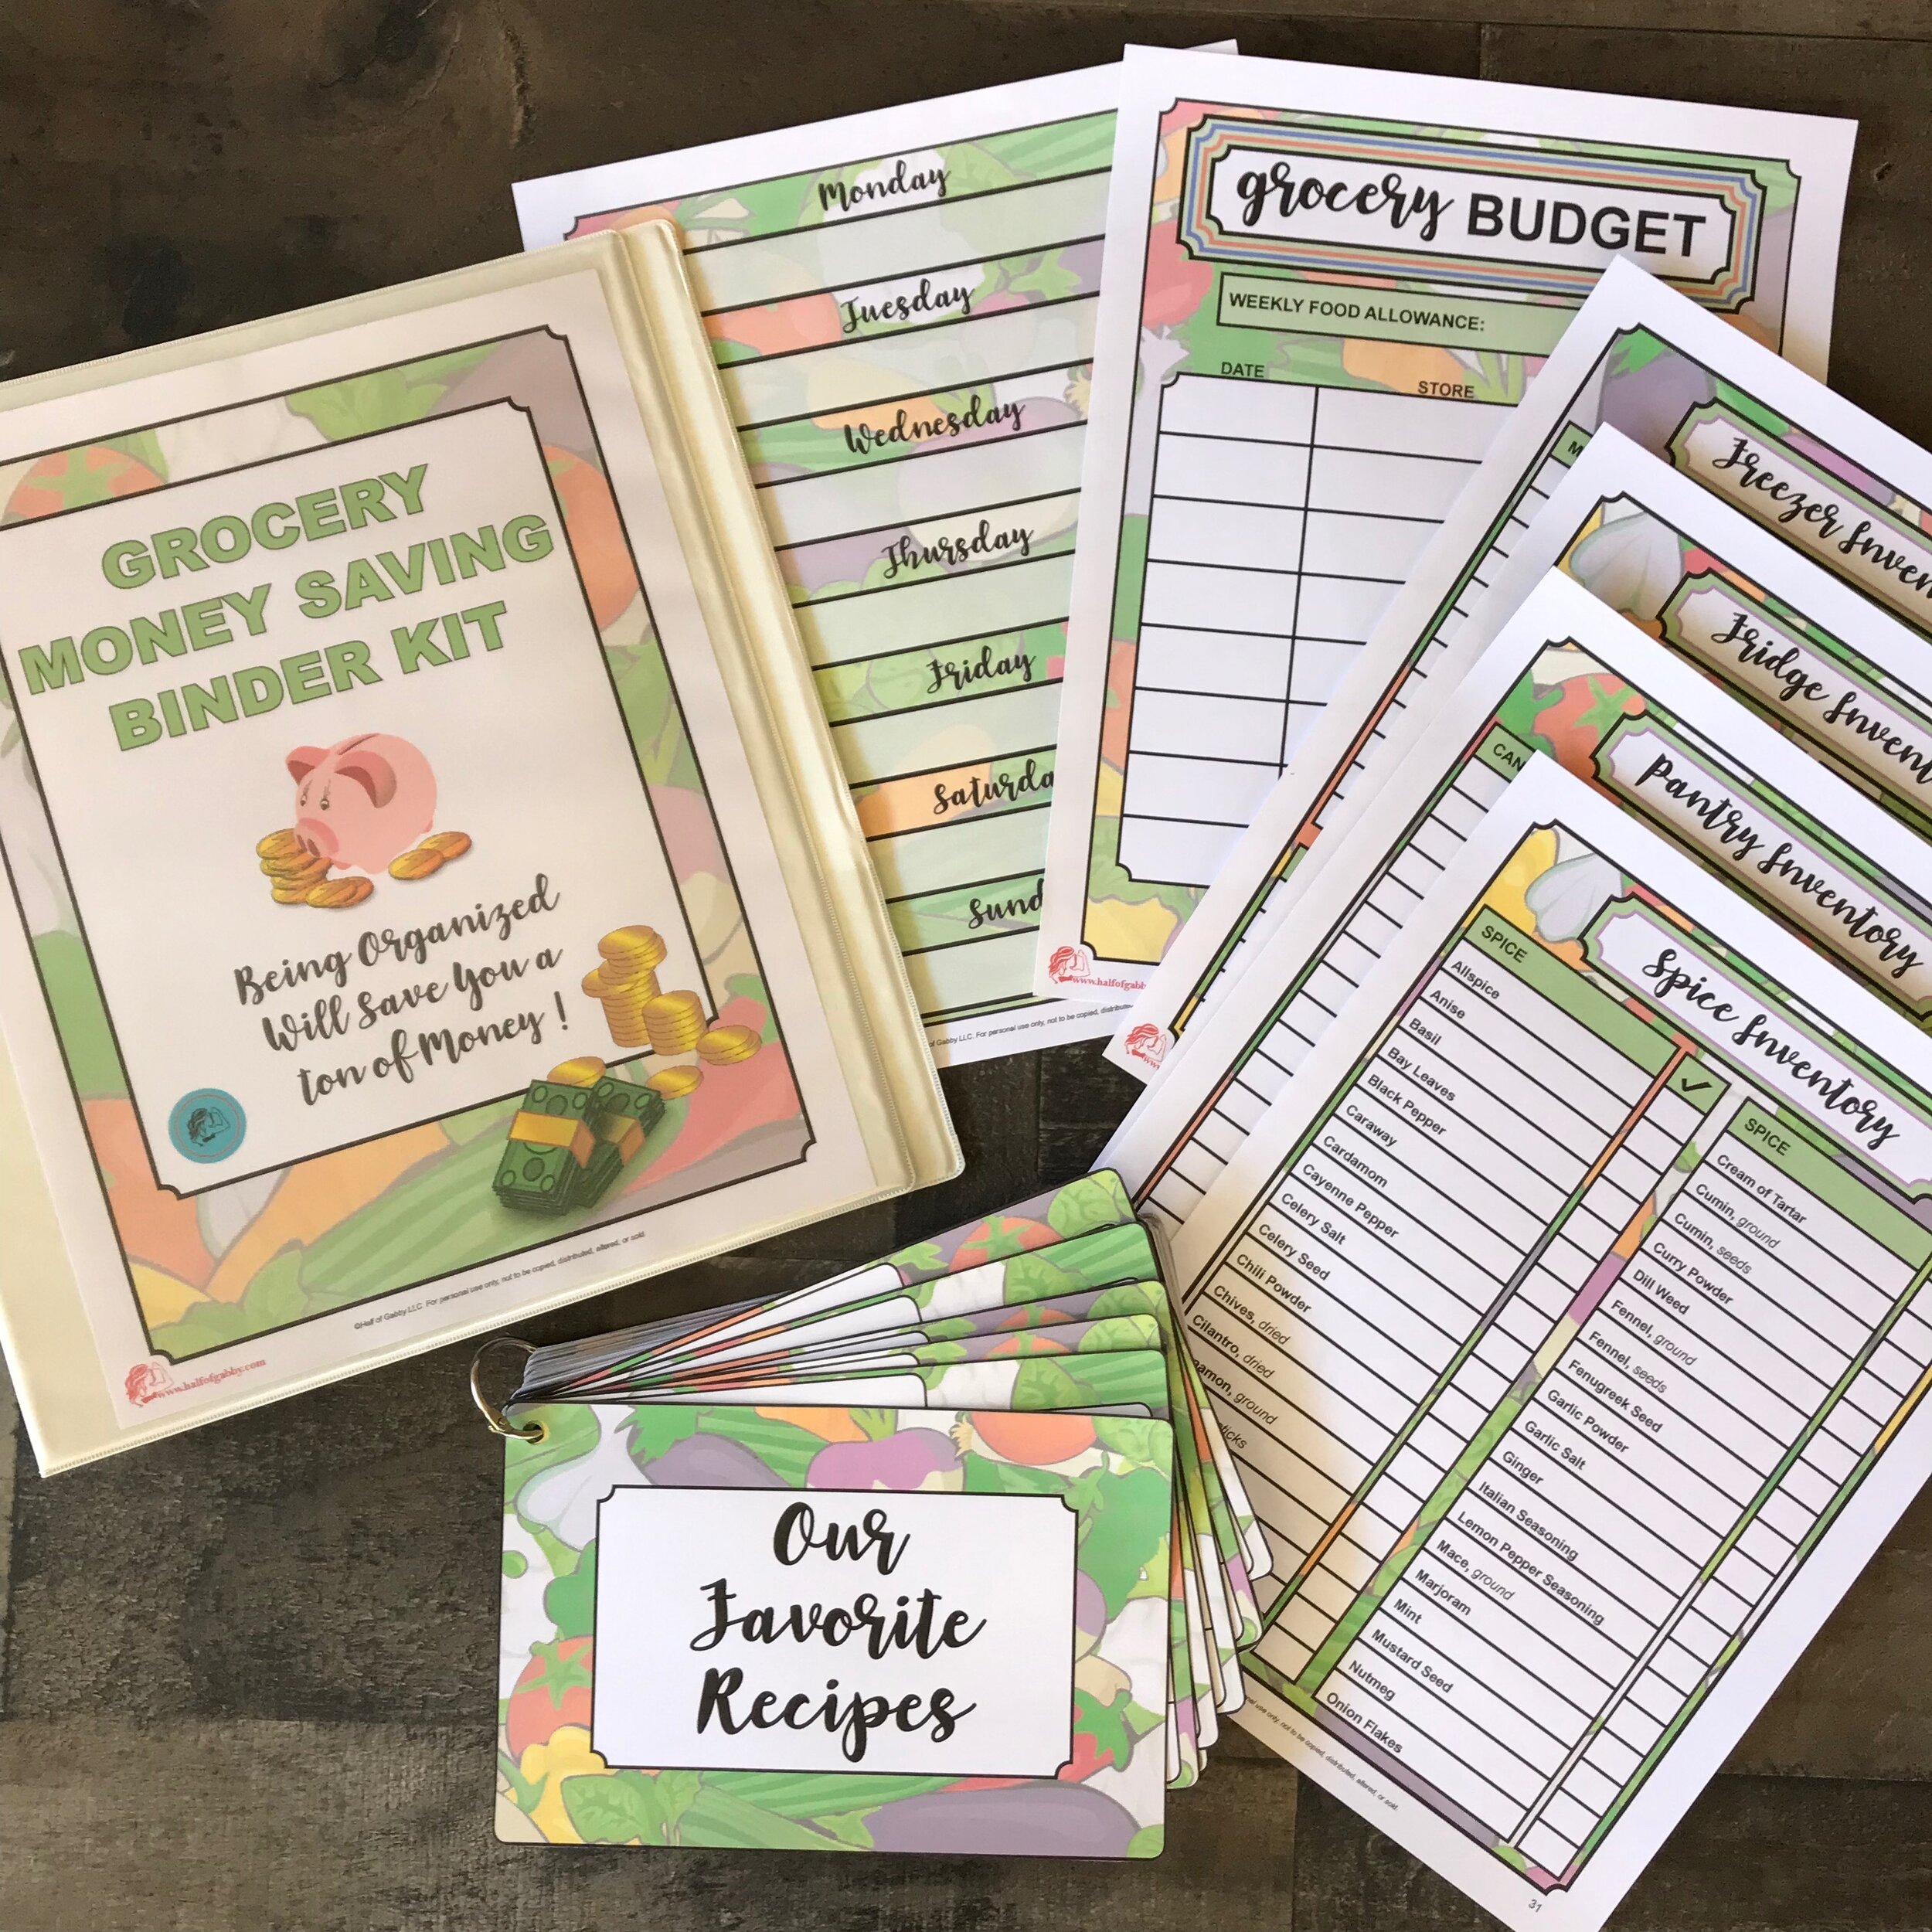
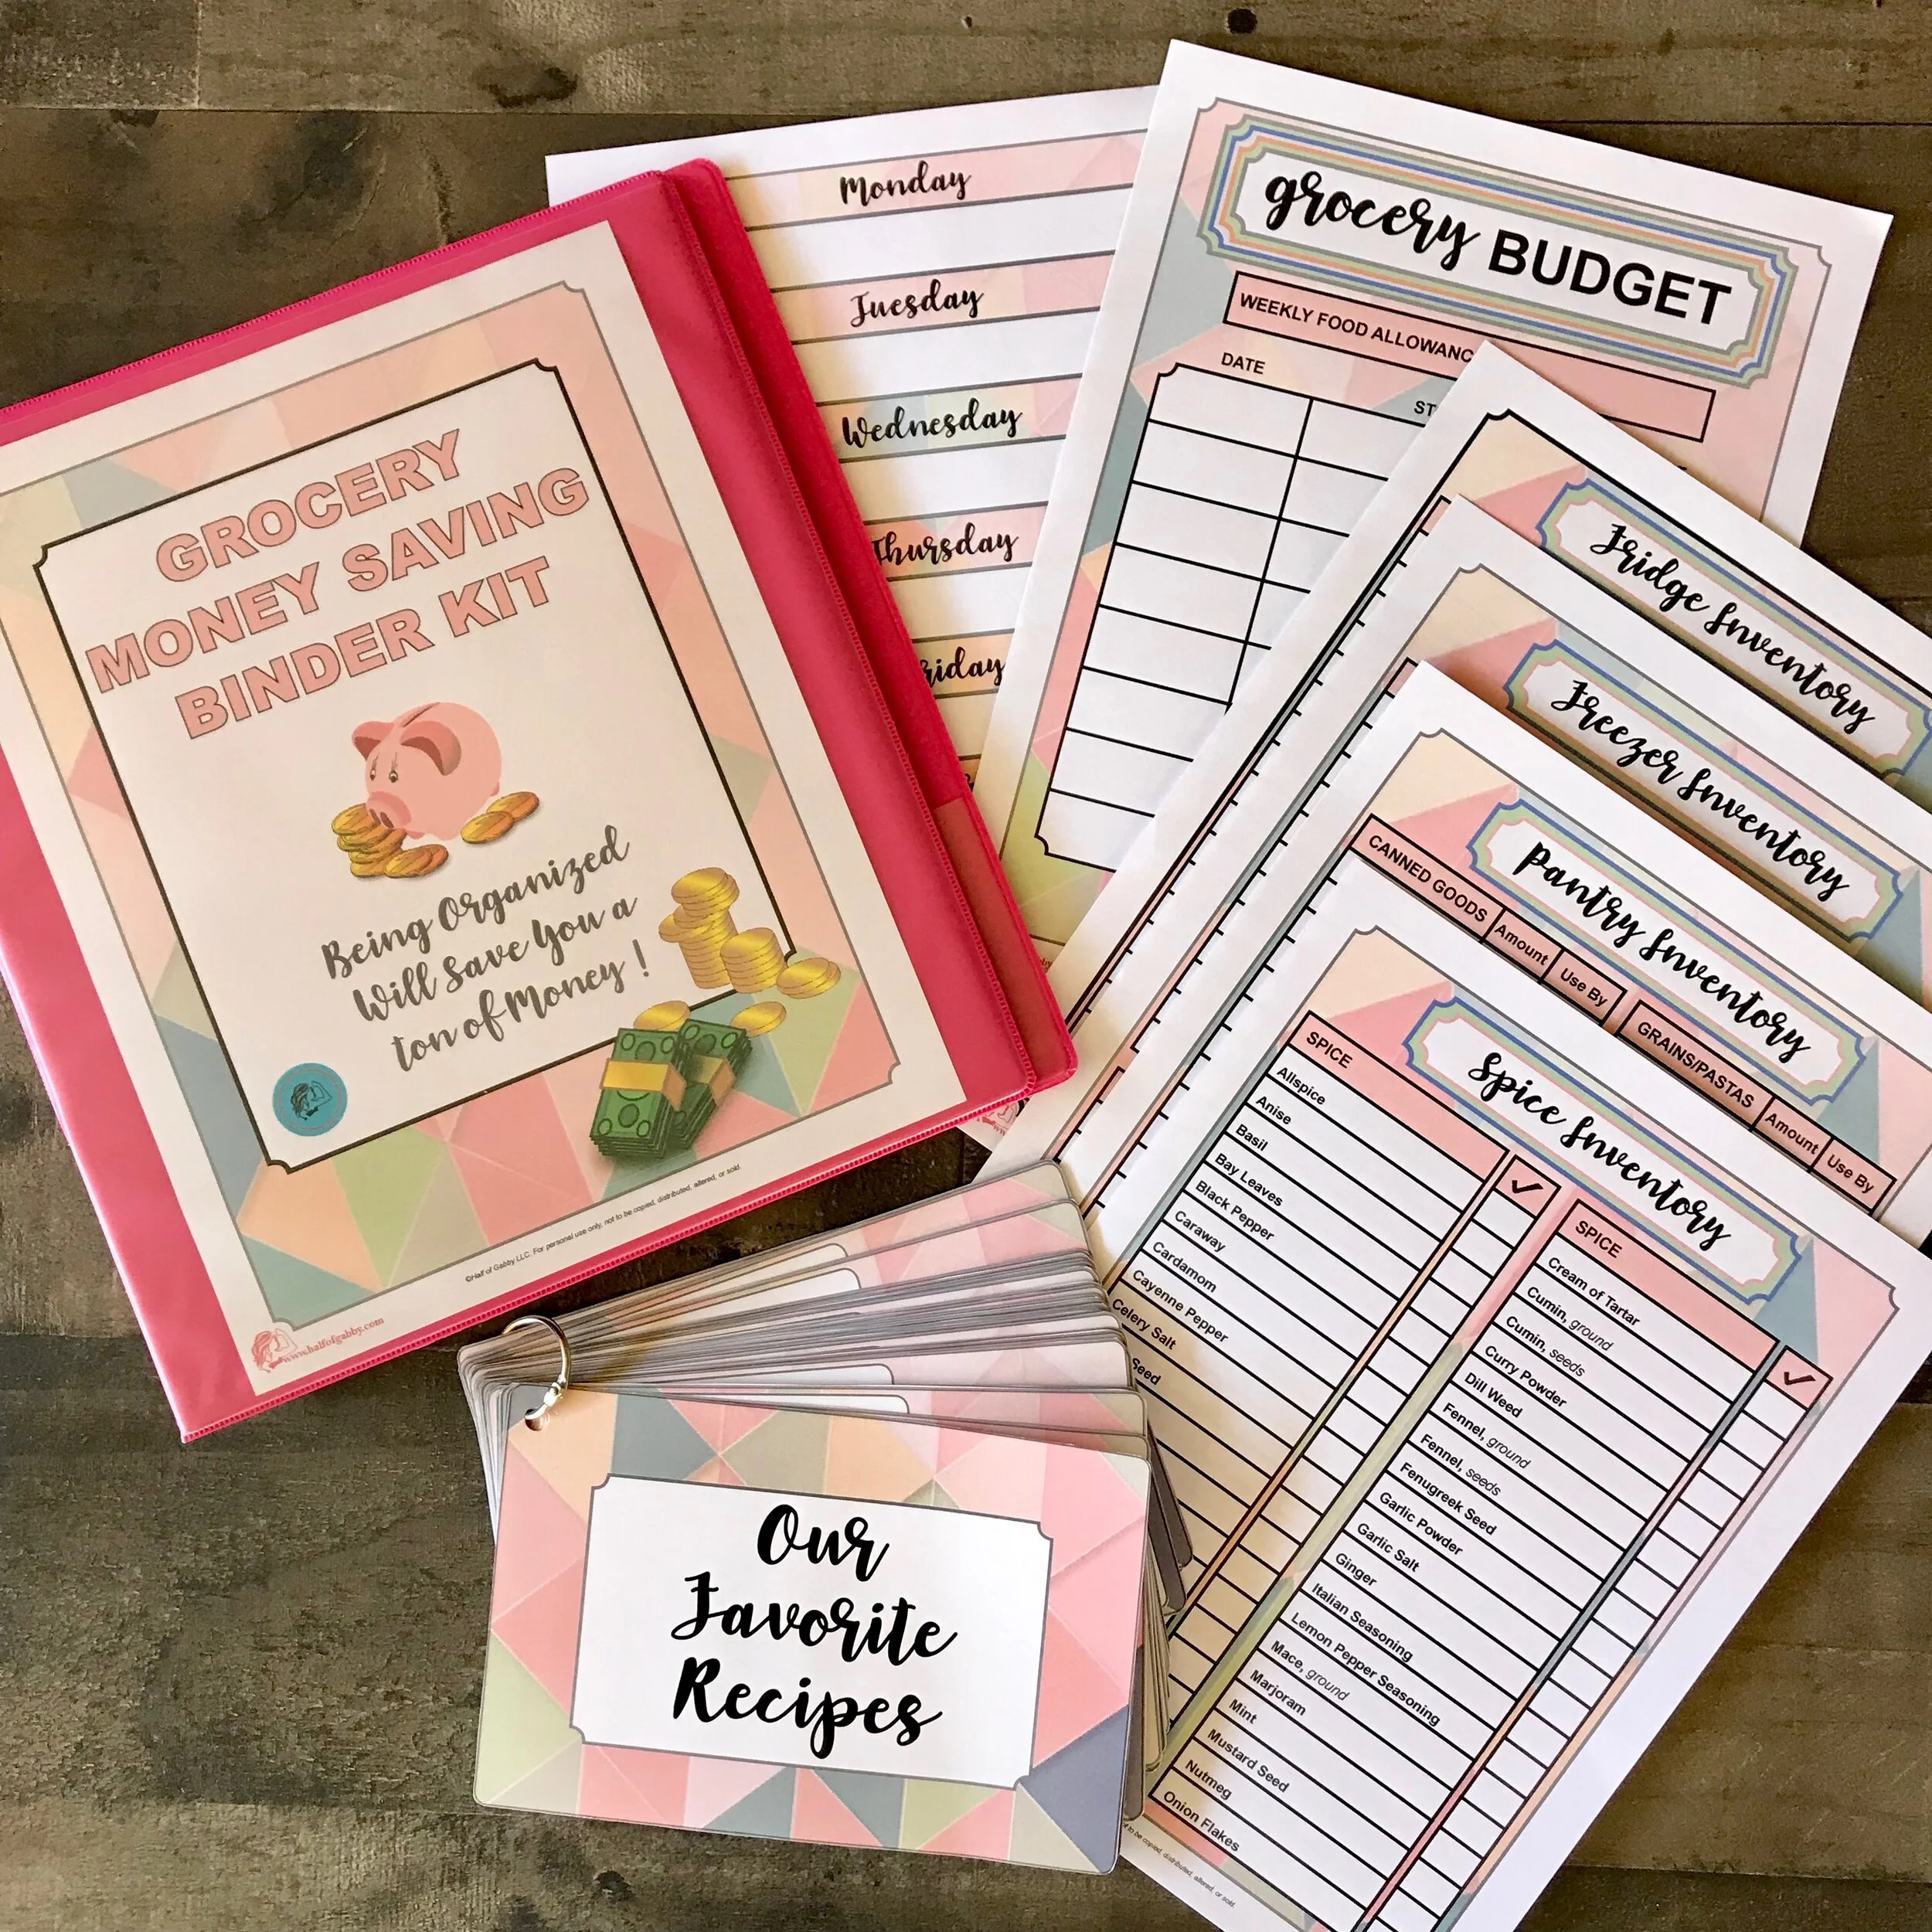
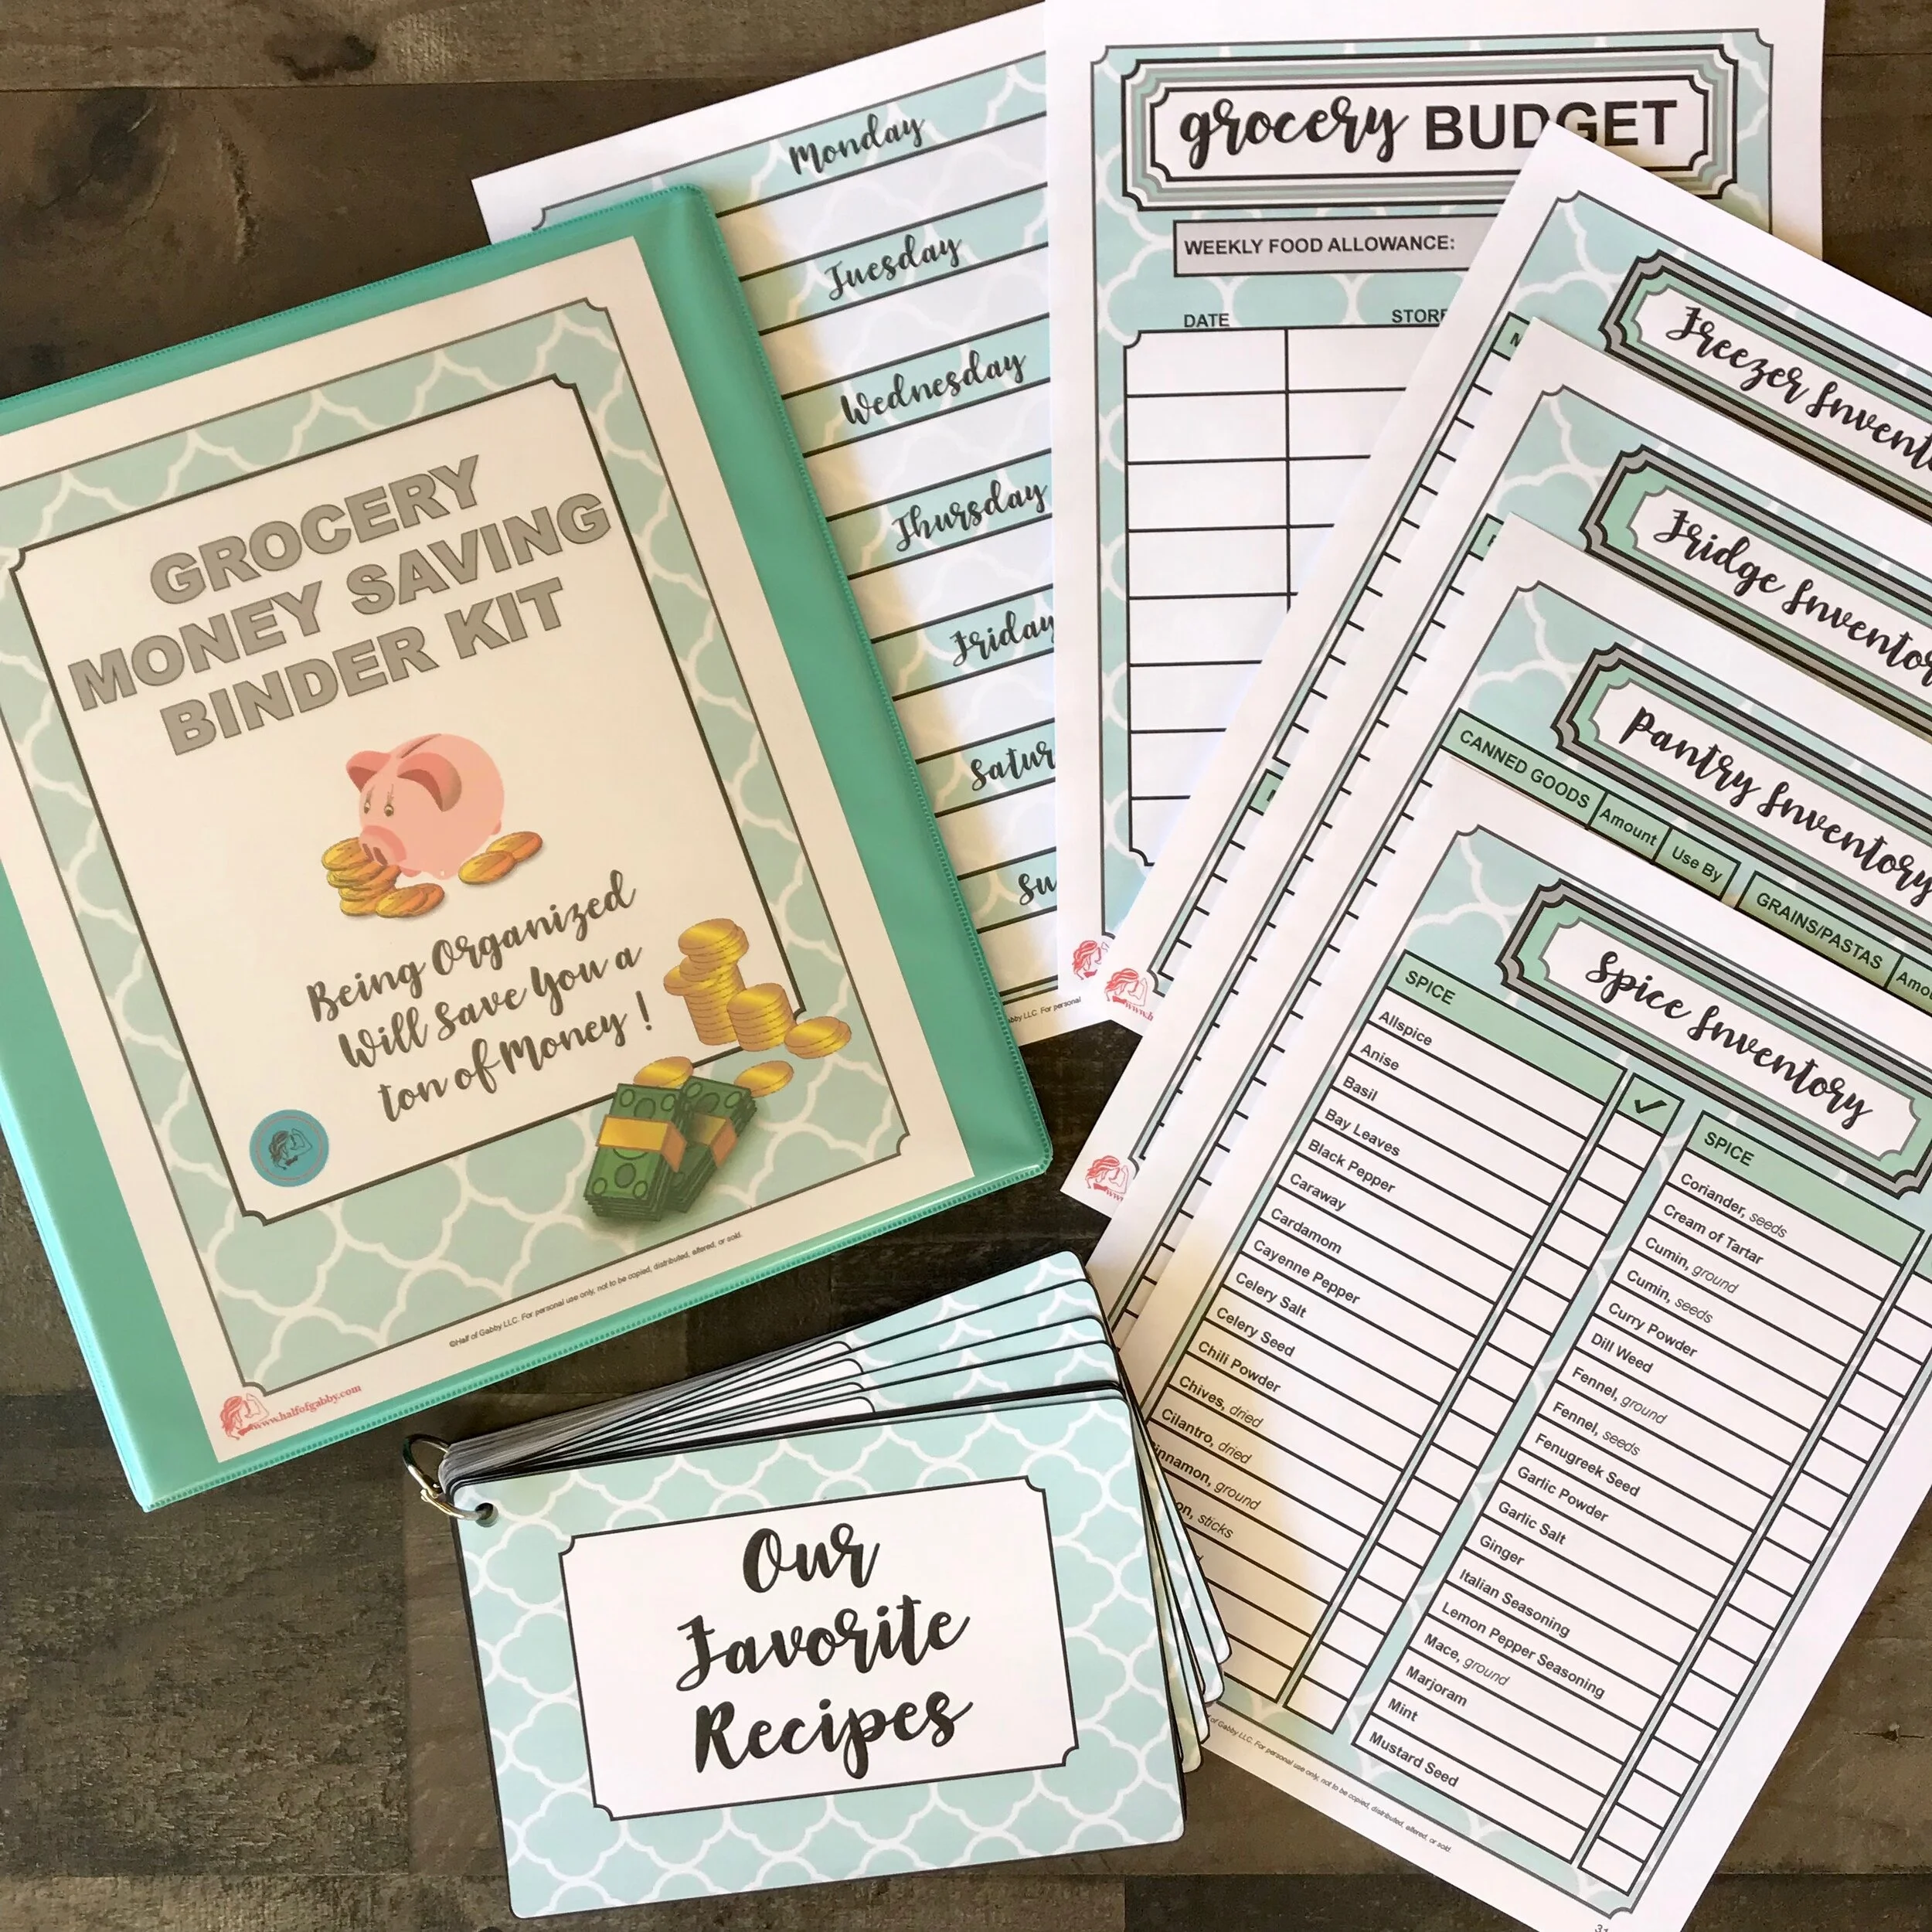
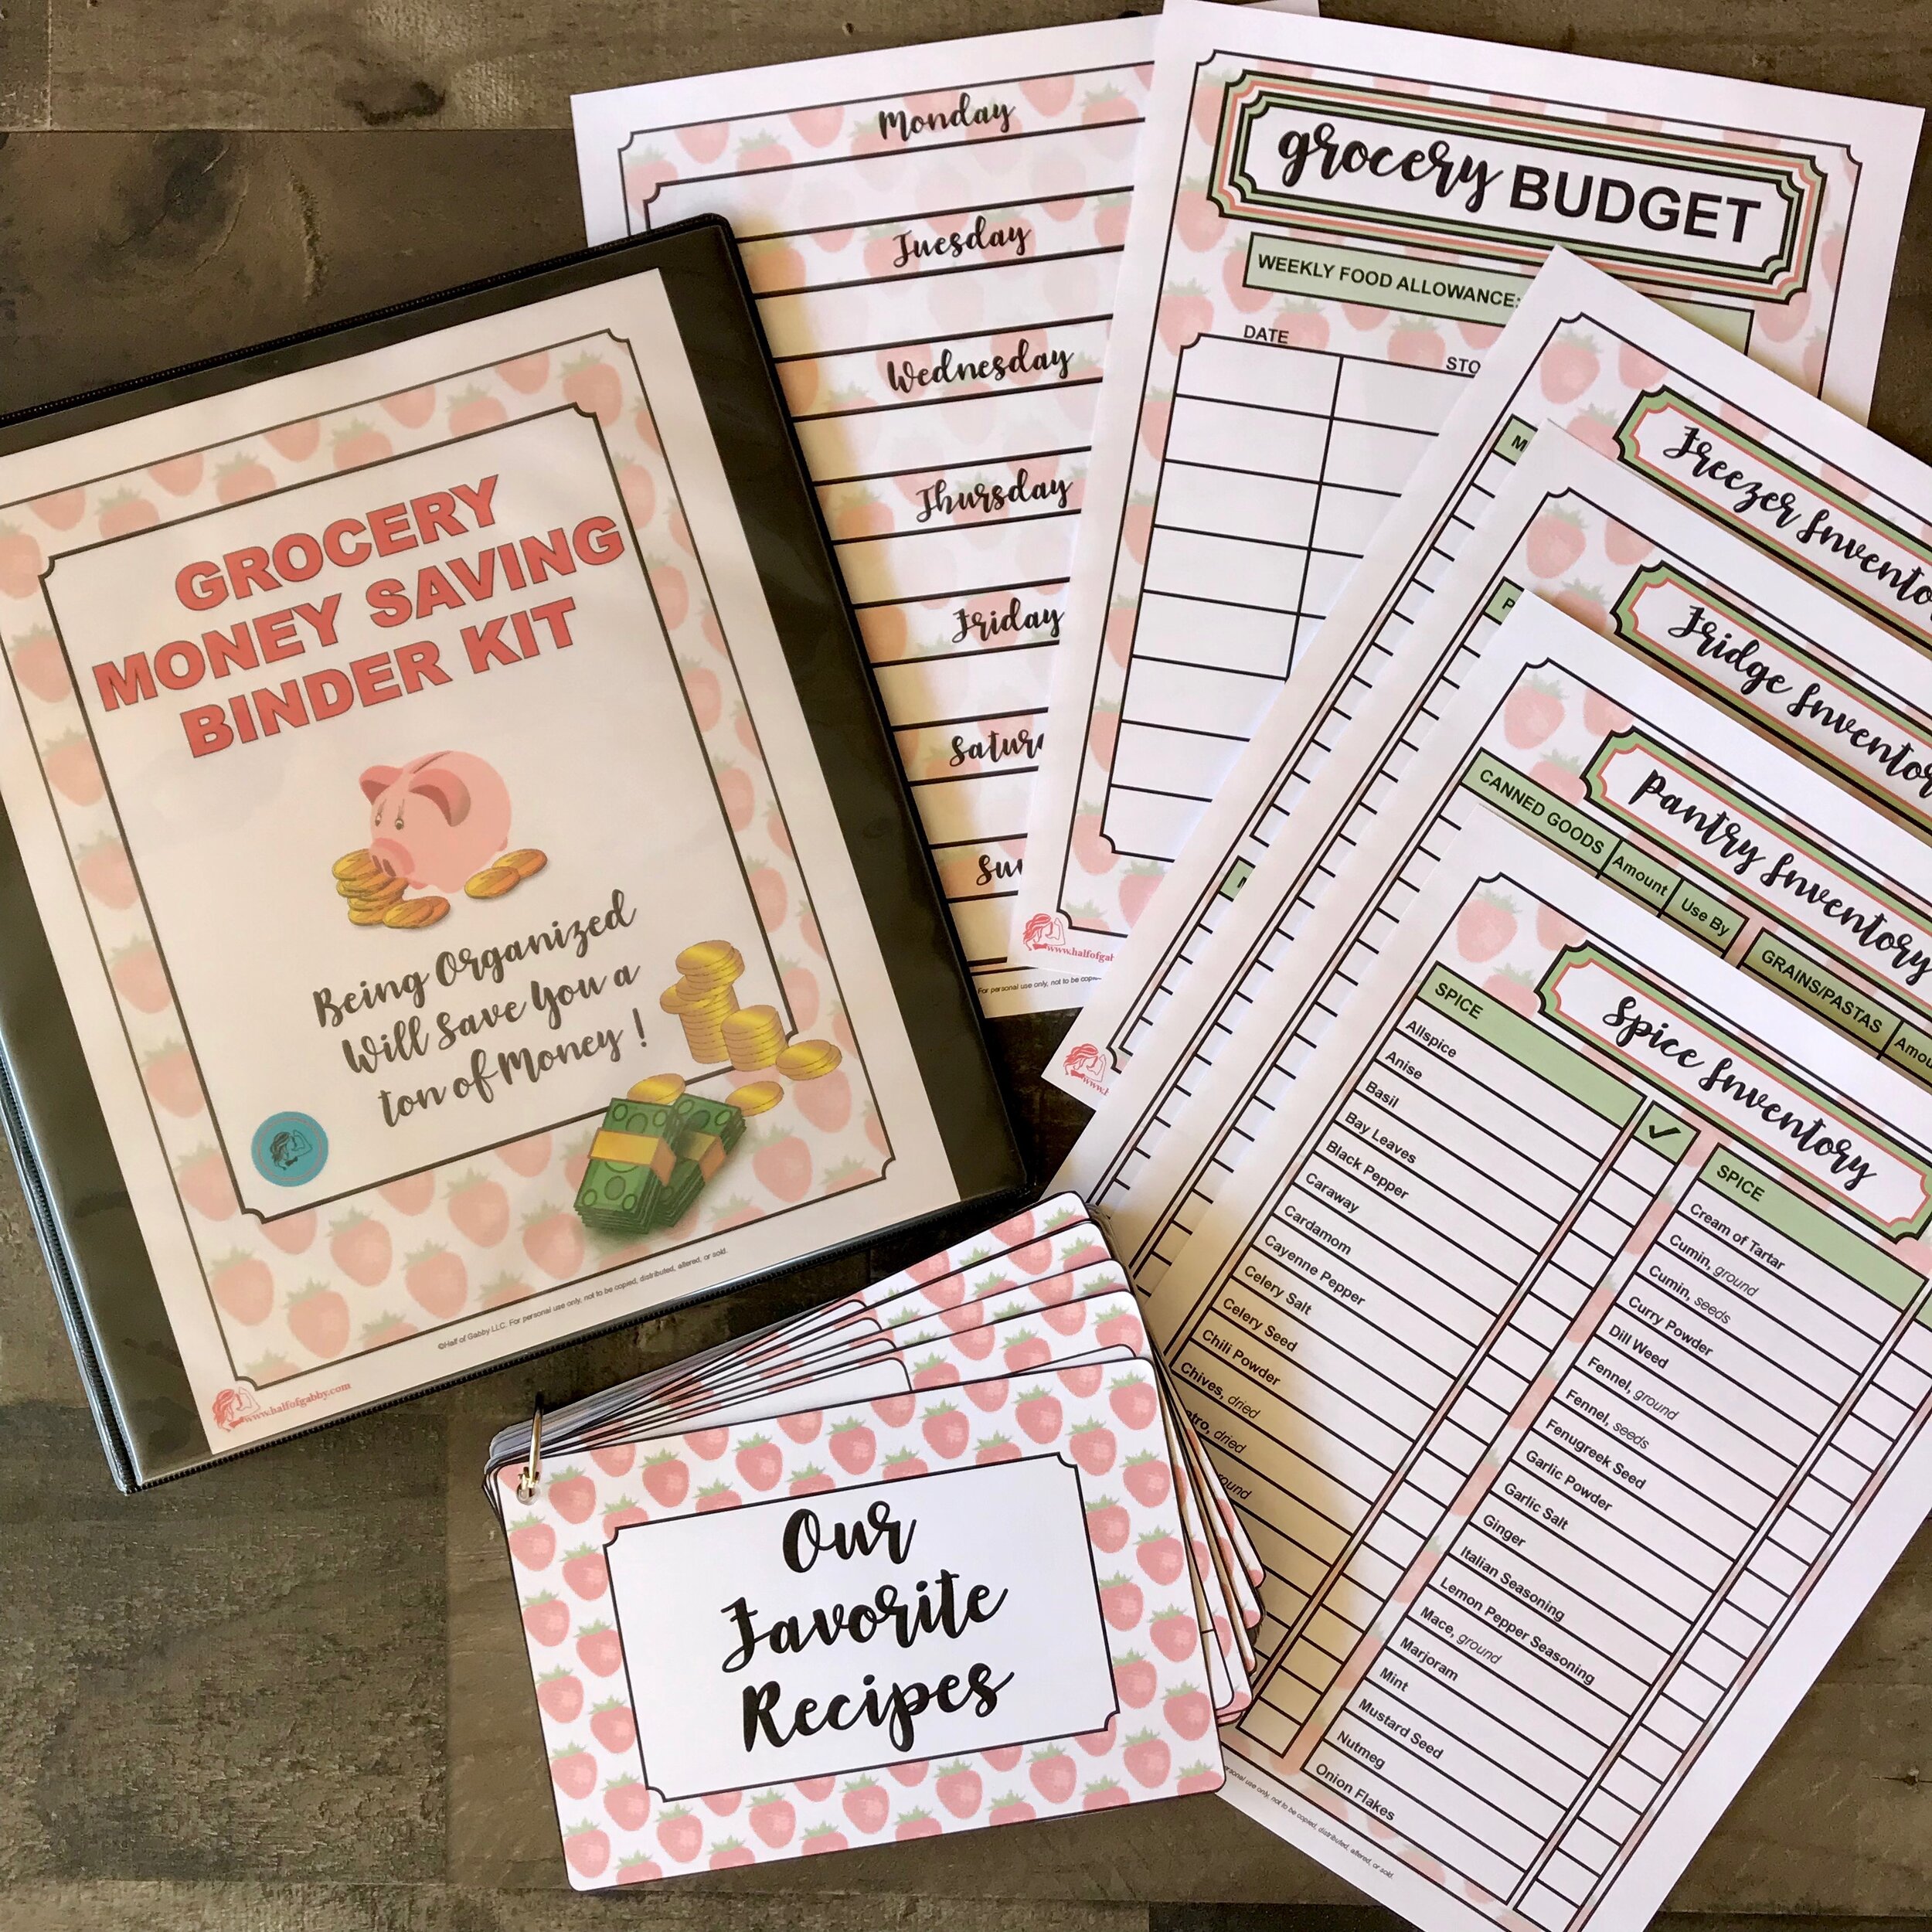
Trying To Save Money?
Check out my 39-page Grocery Money Saving Binder Kit! IT COMES IN 7 DESIGNS!
~
NUTRITIONAL INFORMATION: Based on 6 Servings.
*The nutritional info will vary depending on which molds you use; however, the information provided here is based on a batch that yields 24 gummies using my square mold.
*NOTE: If not using recommended Grass Fed Gelatin and using store-bought packets instead, protein count will be significantly less.
STEVIA GUMMIES: Serving size, 4 Gummies
76 Calories
0 Fat
12g Carbohydrates
12g Protein
4g Sugar
2g Fiber
HONEY GUMMIES: Serving size, 4 Gummies
120 Calories
0 Fat
20g Carbohydrates
12g Protein
16g Sugar
2g Fiber
Gelatin Resource Links:
*The information on this site is not intended or implied to be a substitute for professional medical advice, diagnosis or treatment. All content in this article is for general information purposes only. I am not a doctor, nor am I a dietitian. Talk to your physician before making any changes in your diet or exercise regimen. The information found in this article is from various sources which include, but are not limited to, the sites listed above. I encourage you to do your own research and talk with your physician before making any changes in diet or exercise. What has worked for me may not work for you. This information in this article or on this website should never replace or serve as medical advice.
NEVER DISREGARD PROFESSIONAL MEDICAL ADVICE OR DELAY SEEKING MEDICAL TREATMENT BECAUSE OF SOMETHING YOU HAVE READ ON OR HAVE ACCESSED THROUGH THIS WEB SITE.
*Affiliate Disclaimer: As an Amazon Associate, I earn from qualifying purchases. The Federal Trade Commission (FTC) requires all affiliates to put a disclaimer on their website/blog. I will be providing links just as I've always done but now will receive a very small commission, at no cost to you, if you purchase an item through the affiliate link that I provide. An affiliate link is simply a link that brings you to a place where you can buy that product. I will not earn a commission by you simply clicking on the link, you must actually purchase the item(s) within 24 hours of putting it in your Amazon cart. Prices are exactly the same for you if you purchase through an affiliate link on Half of Gabby. You will NOT pay more by clicking through the link. My promise to you is that I will never recommend a product that I don’t fully 100% believe in and/or use myself and recommend to close friends and family.


