
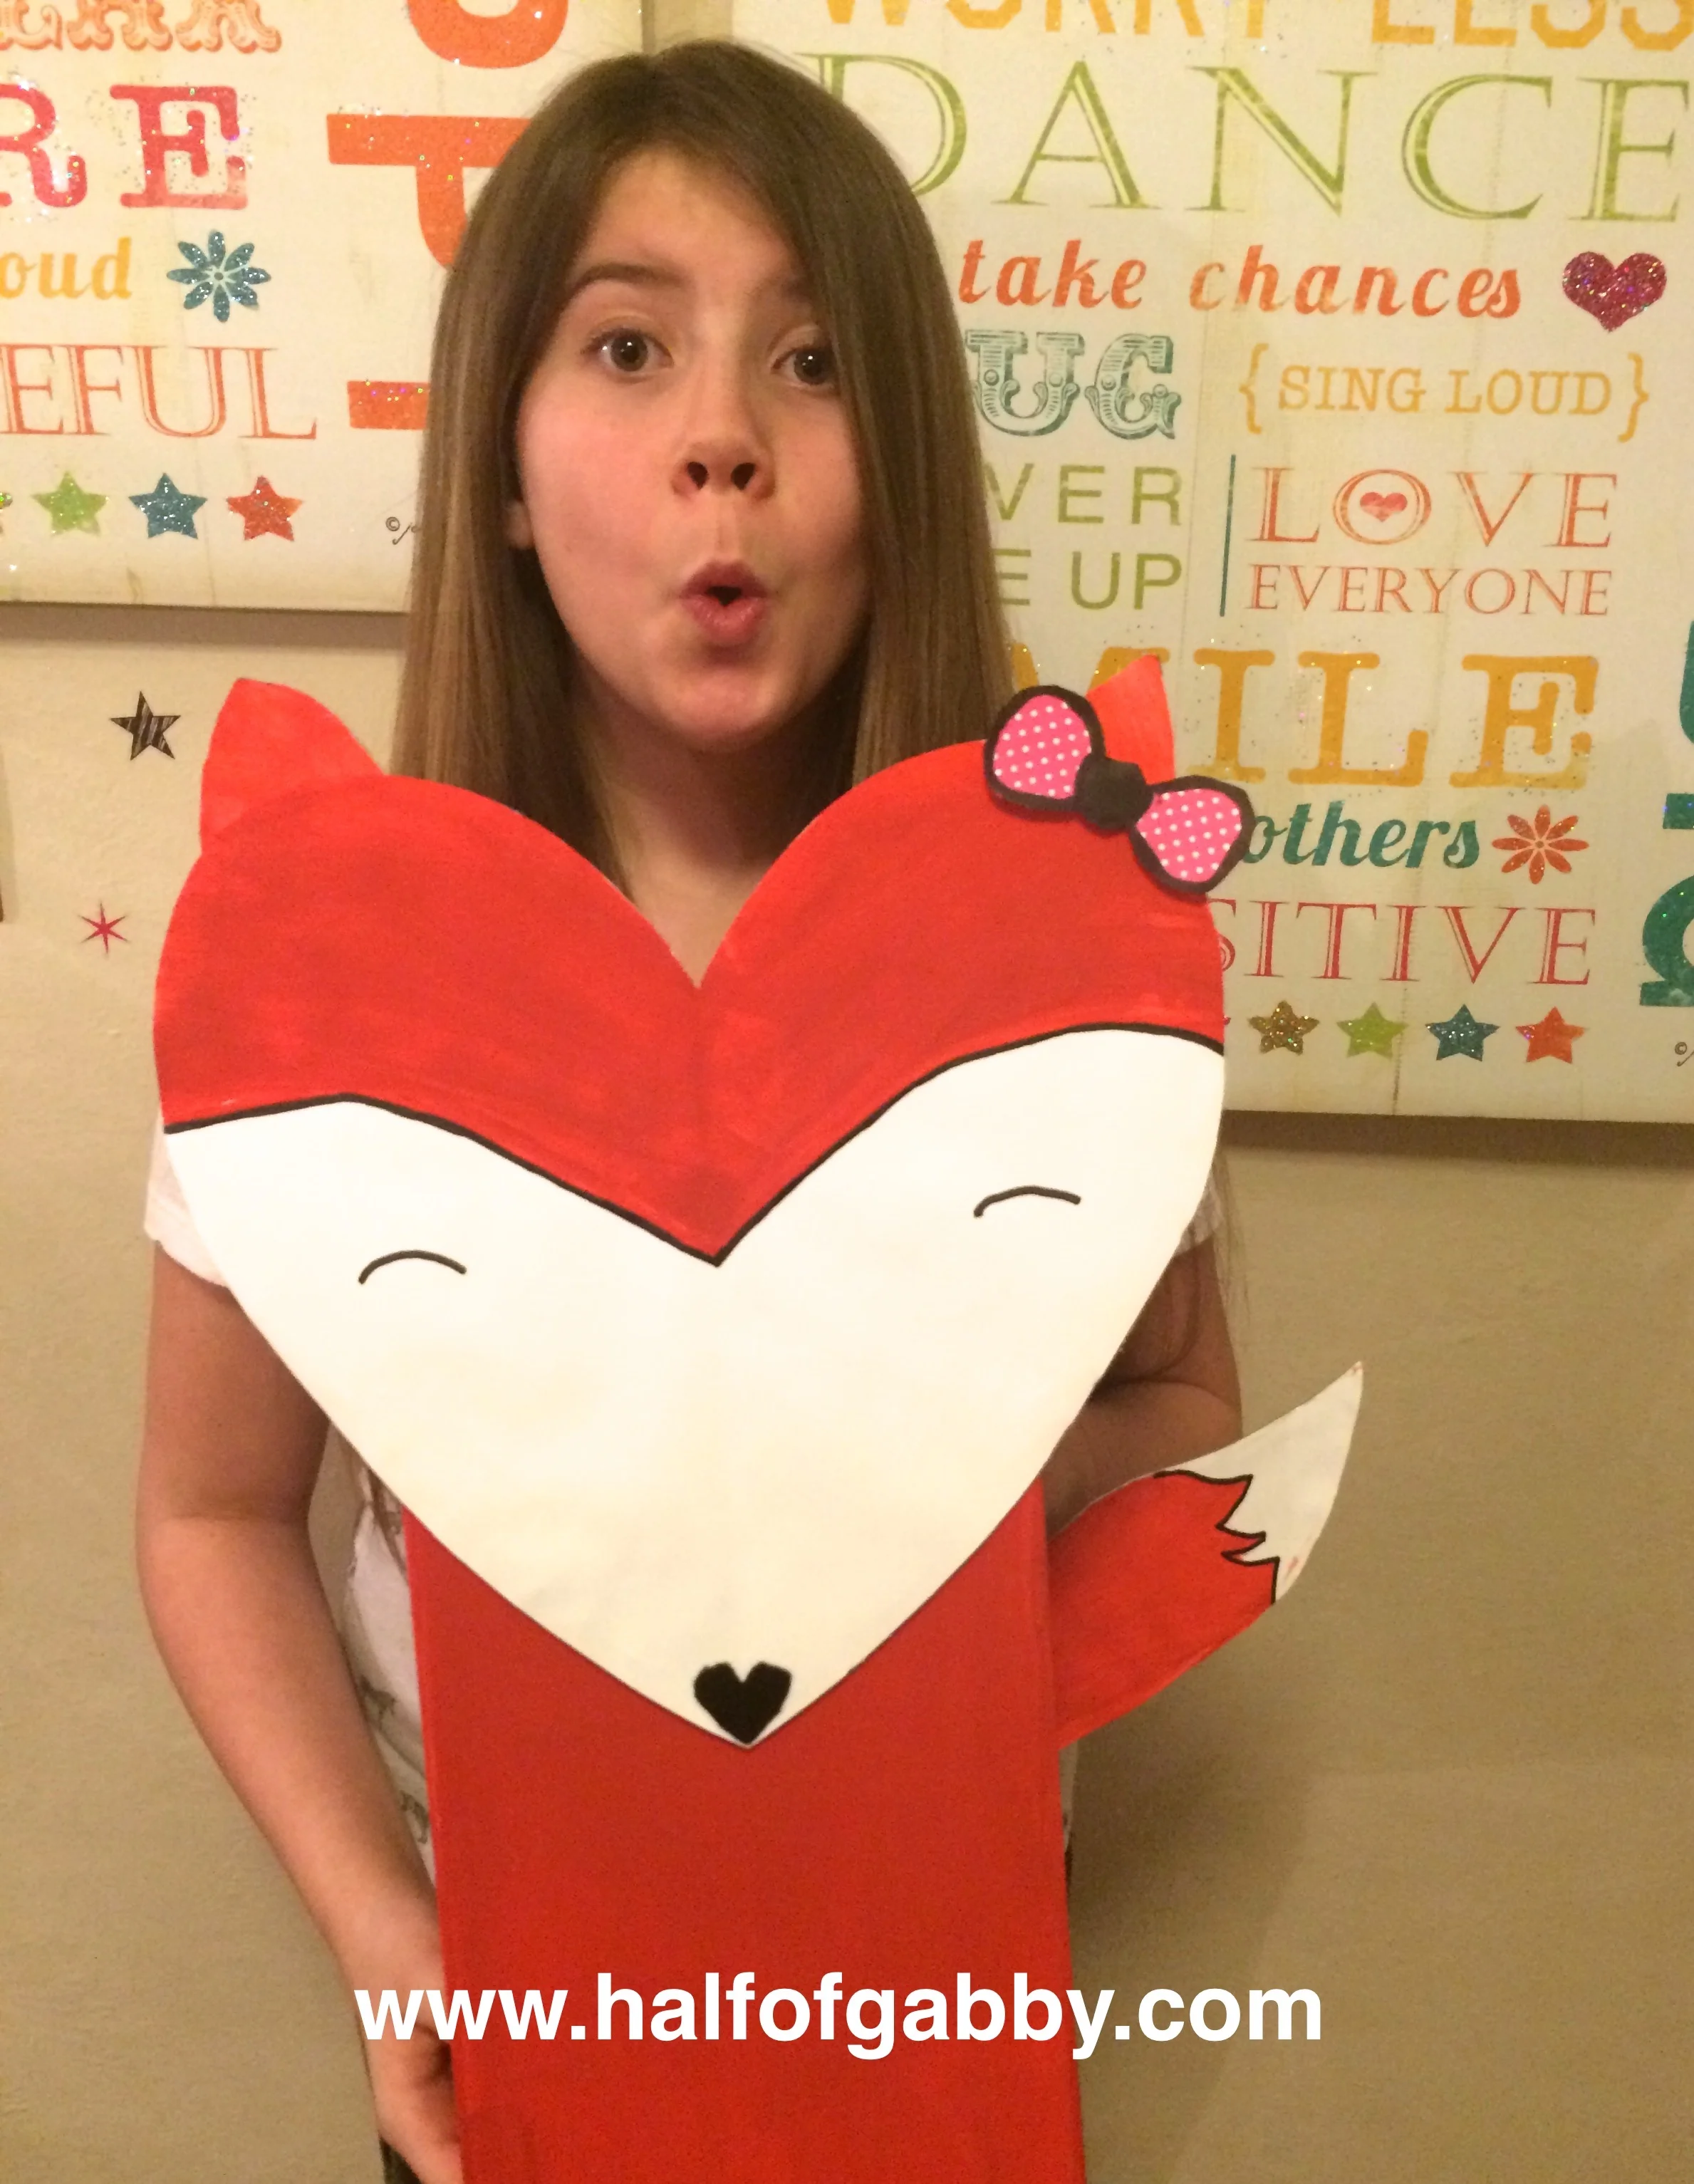
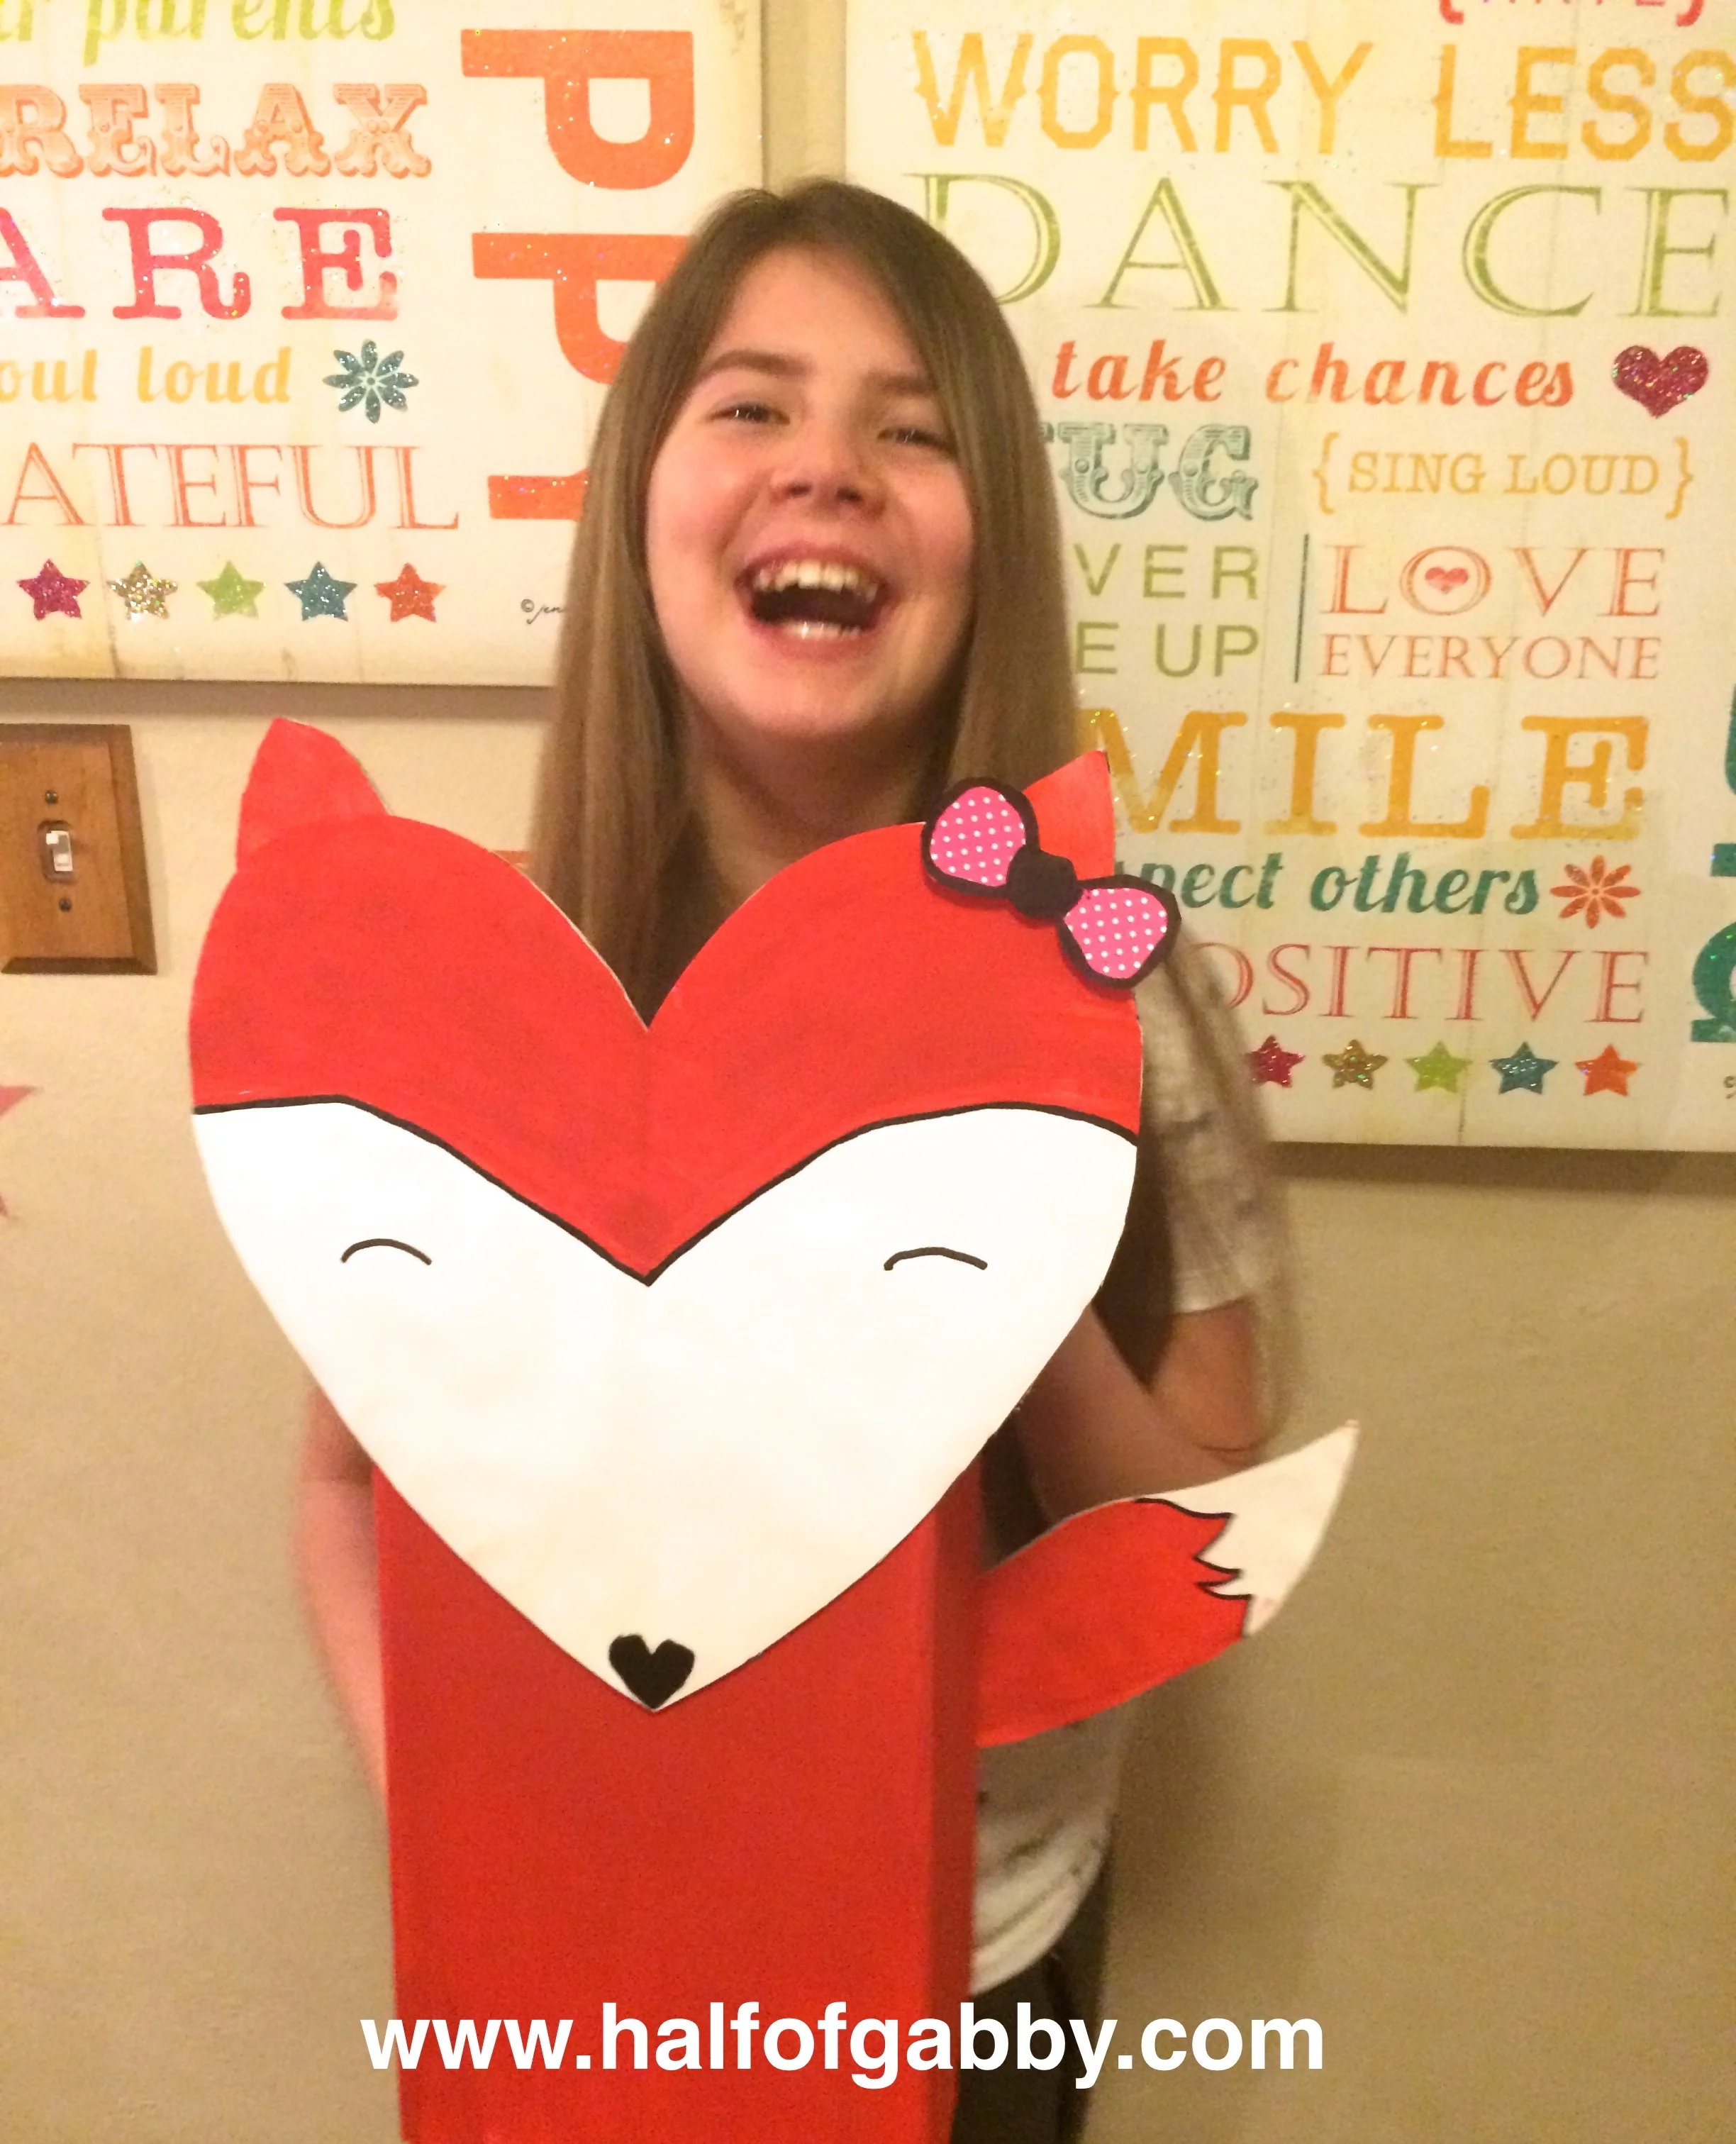
VALENTINE'S FOX BOX: Pictorial Included!

This is such an adorable and simple Valentine's box!
Every year for Valentine's Day, my girls and I have so much fun making their Valentine boxes for school.
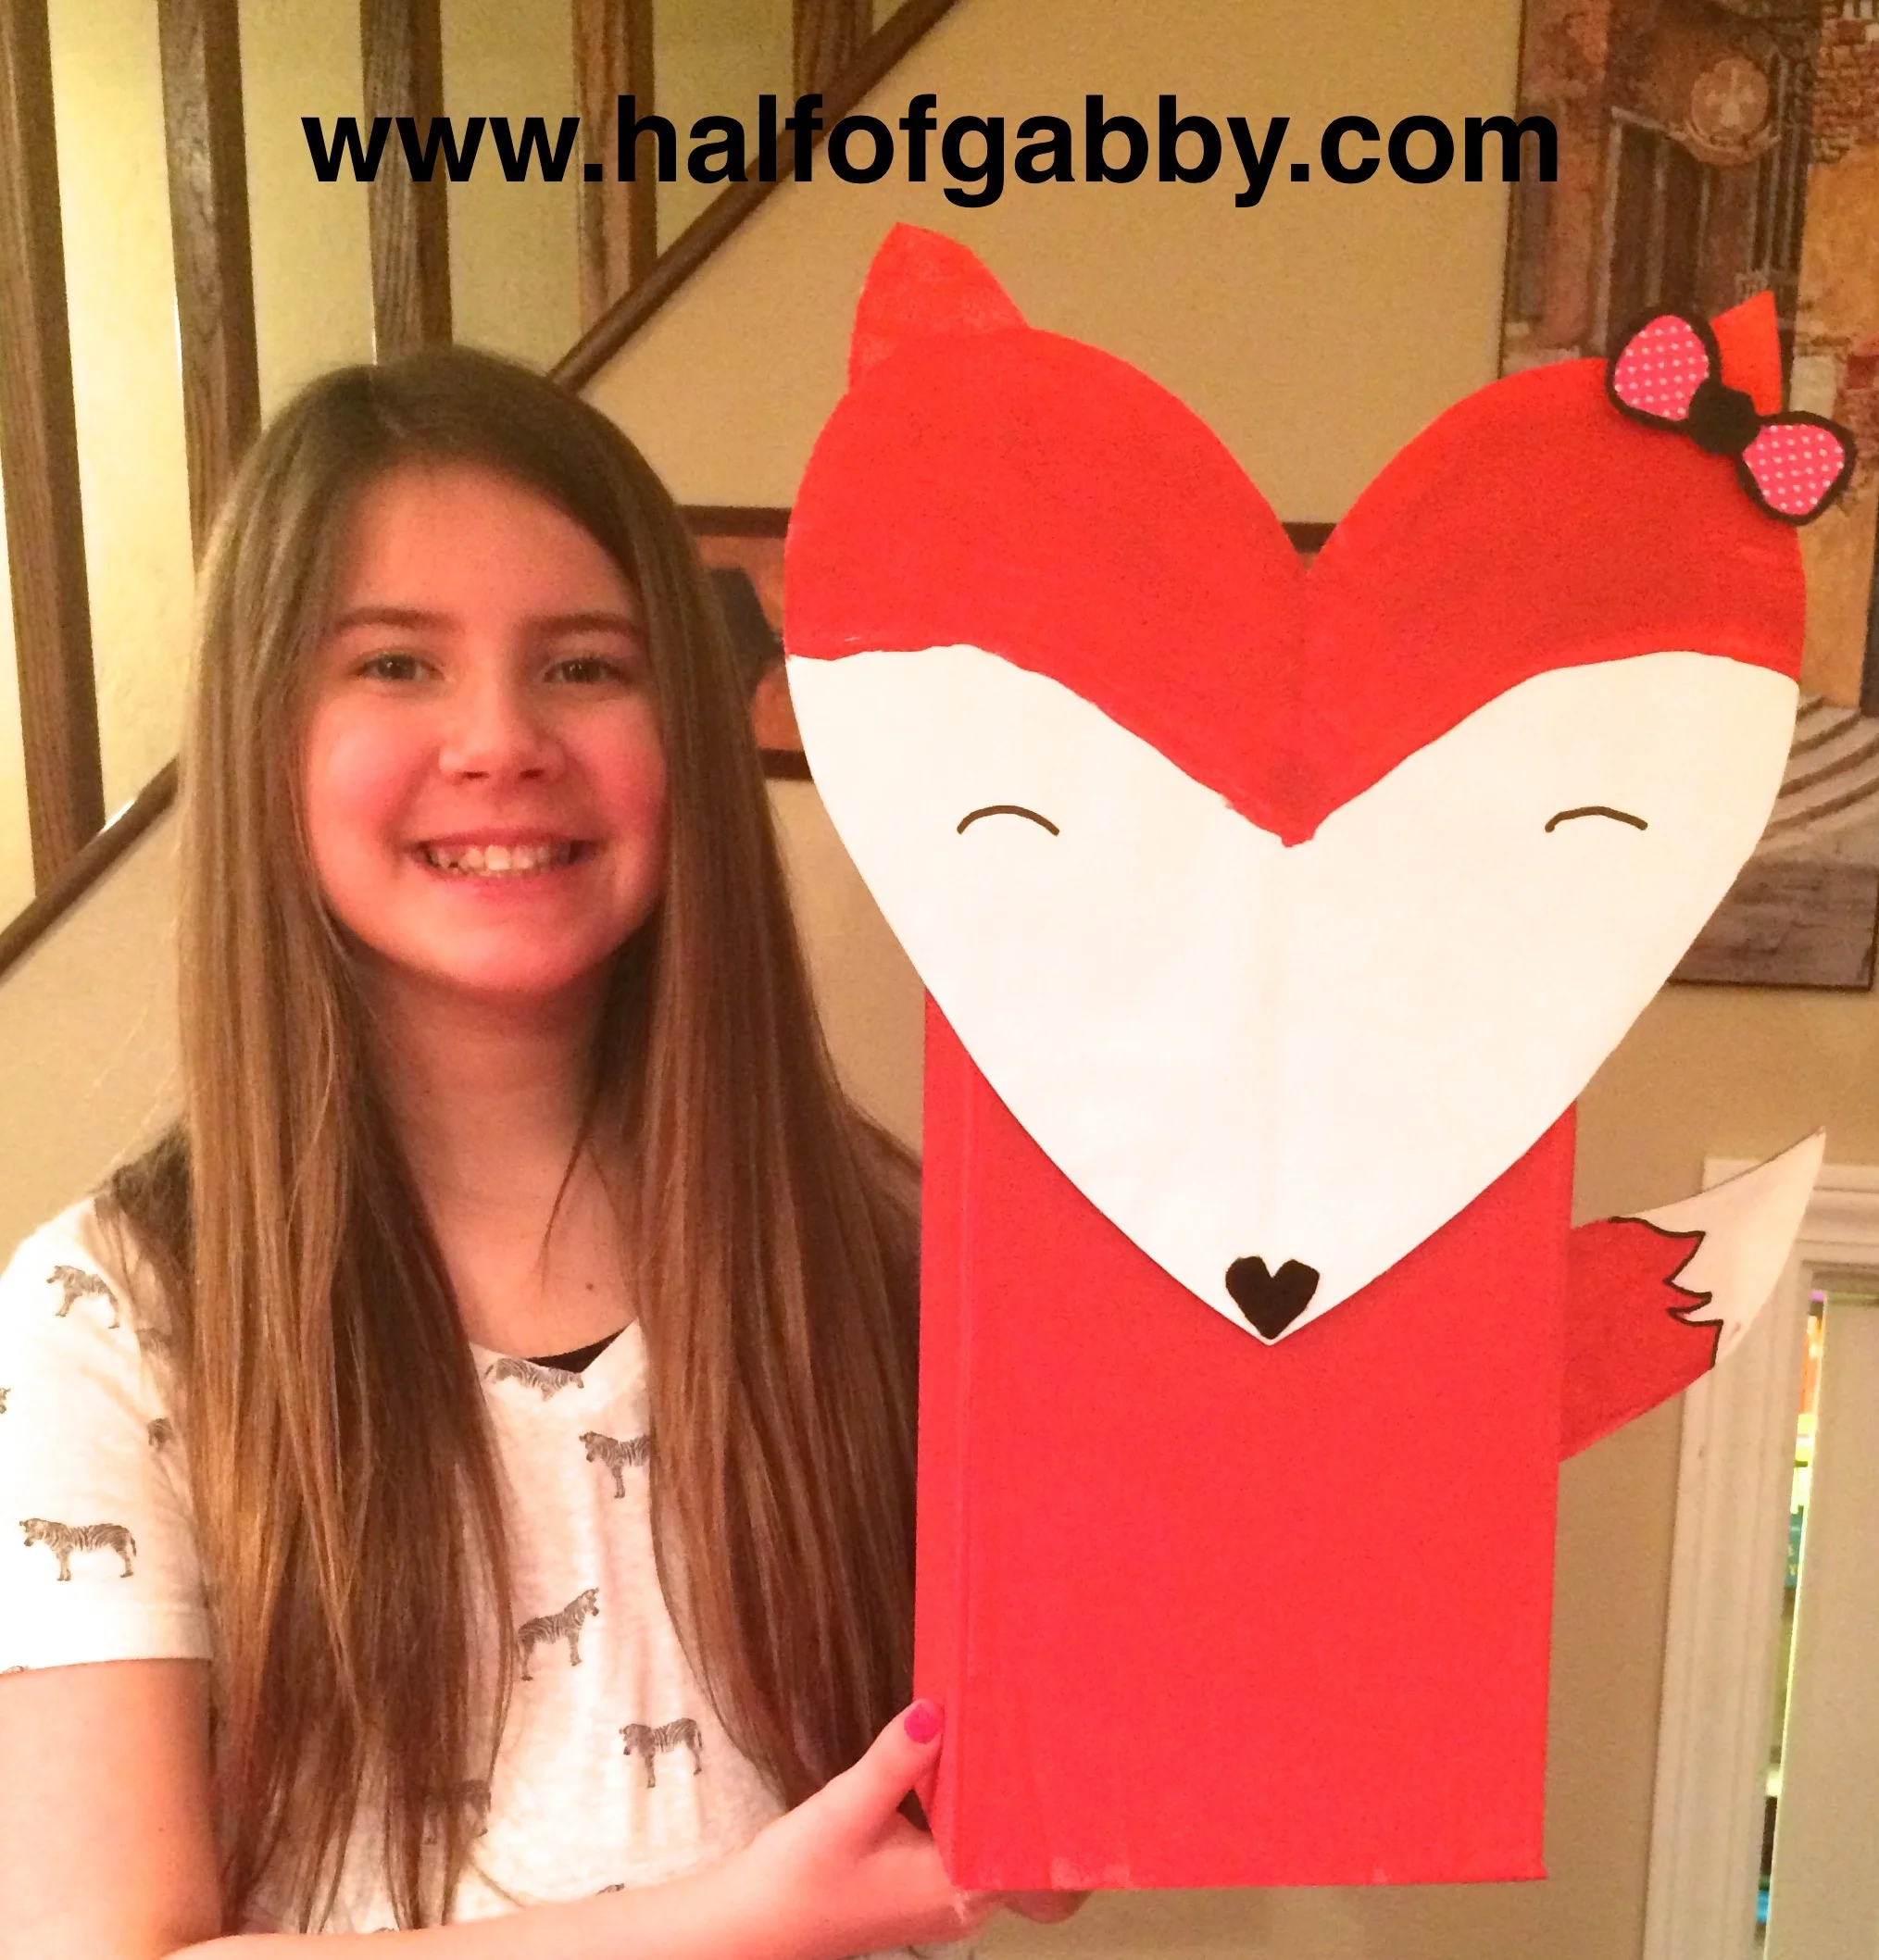
It usually takes a while for them to decide on which one they want to make. Not this year, no siree! This year, they both made decisions in nanoseconds. I was shocked. Gianna, my 10 year old, picked a fox box!
When Gia saw a picture of a fox Valentine box, she was instantly excited and immediately wanted to get started. We came across the picture at www.littlebitsandgiggles.com but unfortunately there wasn't any instructions. But no worries, we figured it out on our own. It was super simple!
In fact, Gia completed the box entirely on her own! I am so proud of her!
She did not want any help at all. She wanted to be able to say that she made it all by herself. And now she can!
However, I must add that I did not allow her to use the razor knife for two very tiny steps so her daddy did those for her :)
Would you like to make your very own Fox Box too? Here's how!
{This article contains affiliate links. See bottom of page for details.}
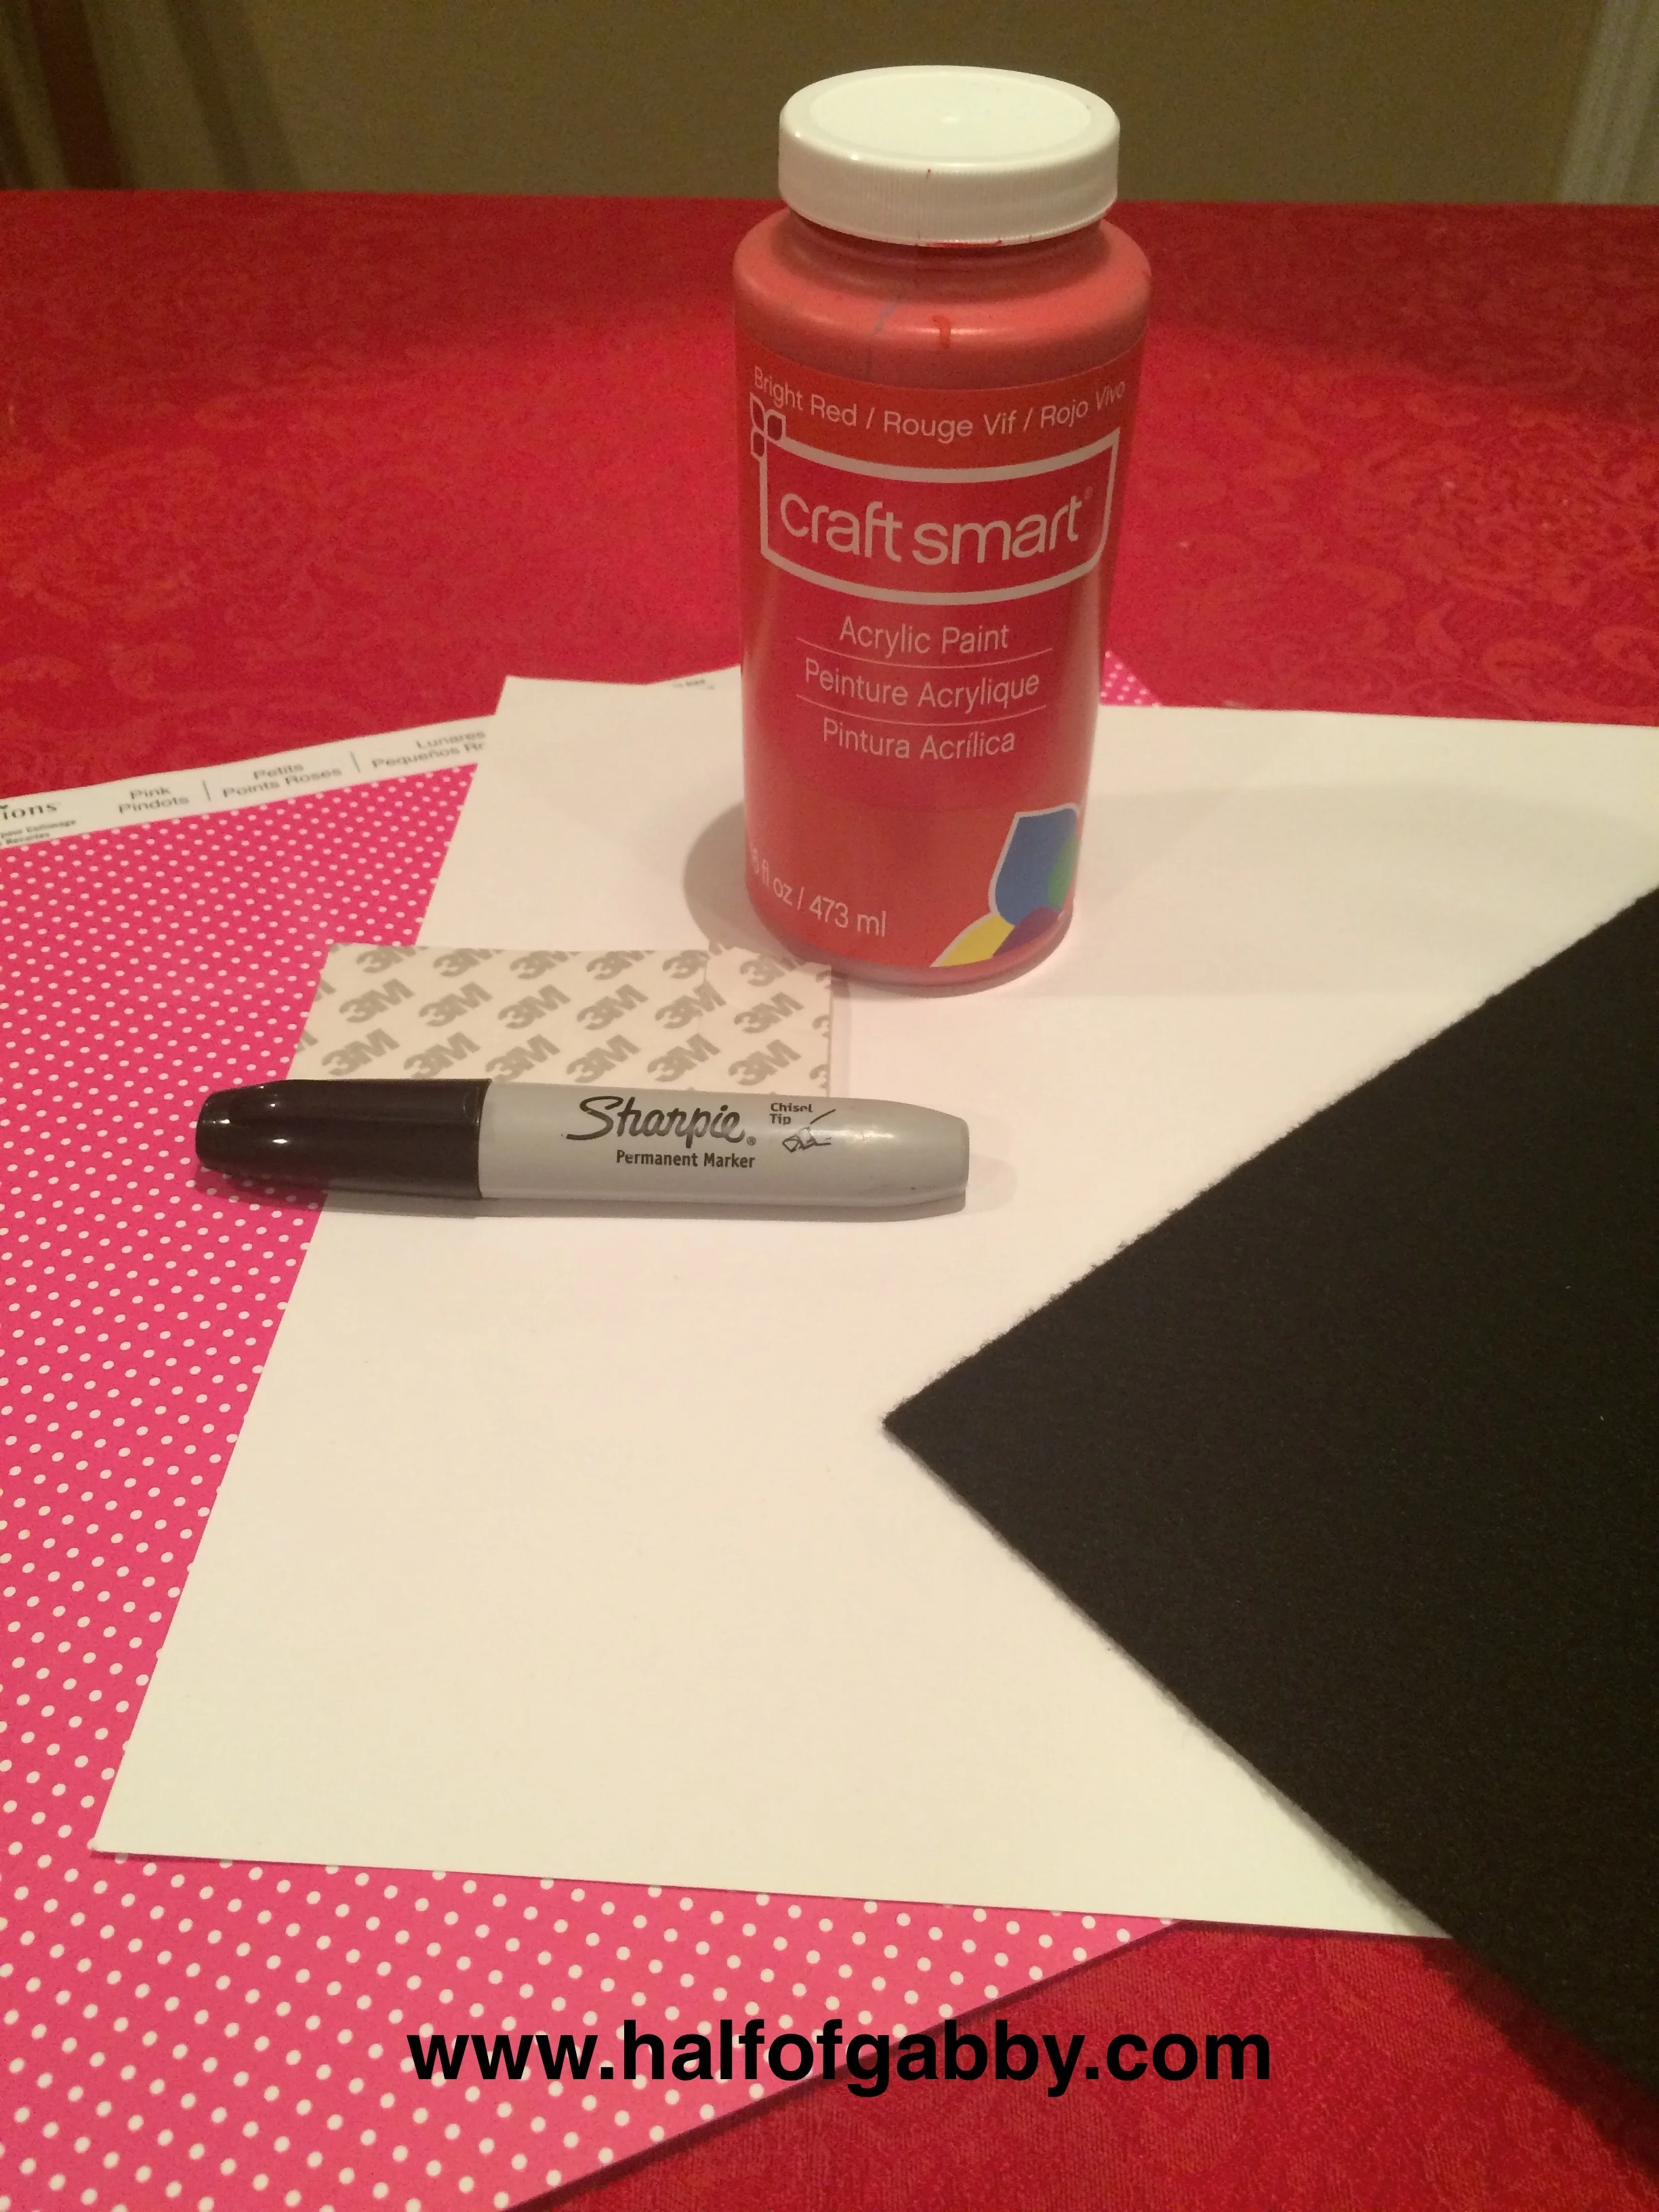
WHATCHU NEED:
Rectangular box (ours was 7.5" x 5" x 14")
Glue Gun (or strong glue)
Red Acrylic Paint (or any color)
Paint Brush
Cardboard
2 Sheets of White Card Stock 12" x 12" (for face and tail)
Decorative Paper, any size (for bow)
Black Felt or Black Paper (for nose)
Double-Sided Foam Craft Tape (optional)
WHATCHU DO:
1. Put box together and tape shut.
We used a rectangular mailing box that had openings on the far ends. This was nice because the taped sides were hidden from sight when the box was finished.
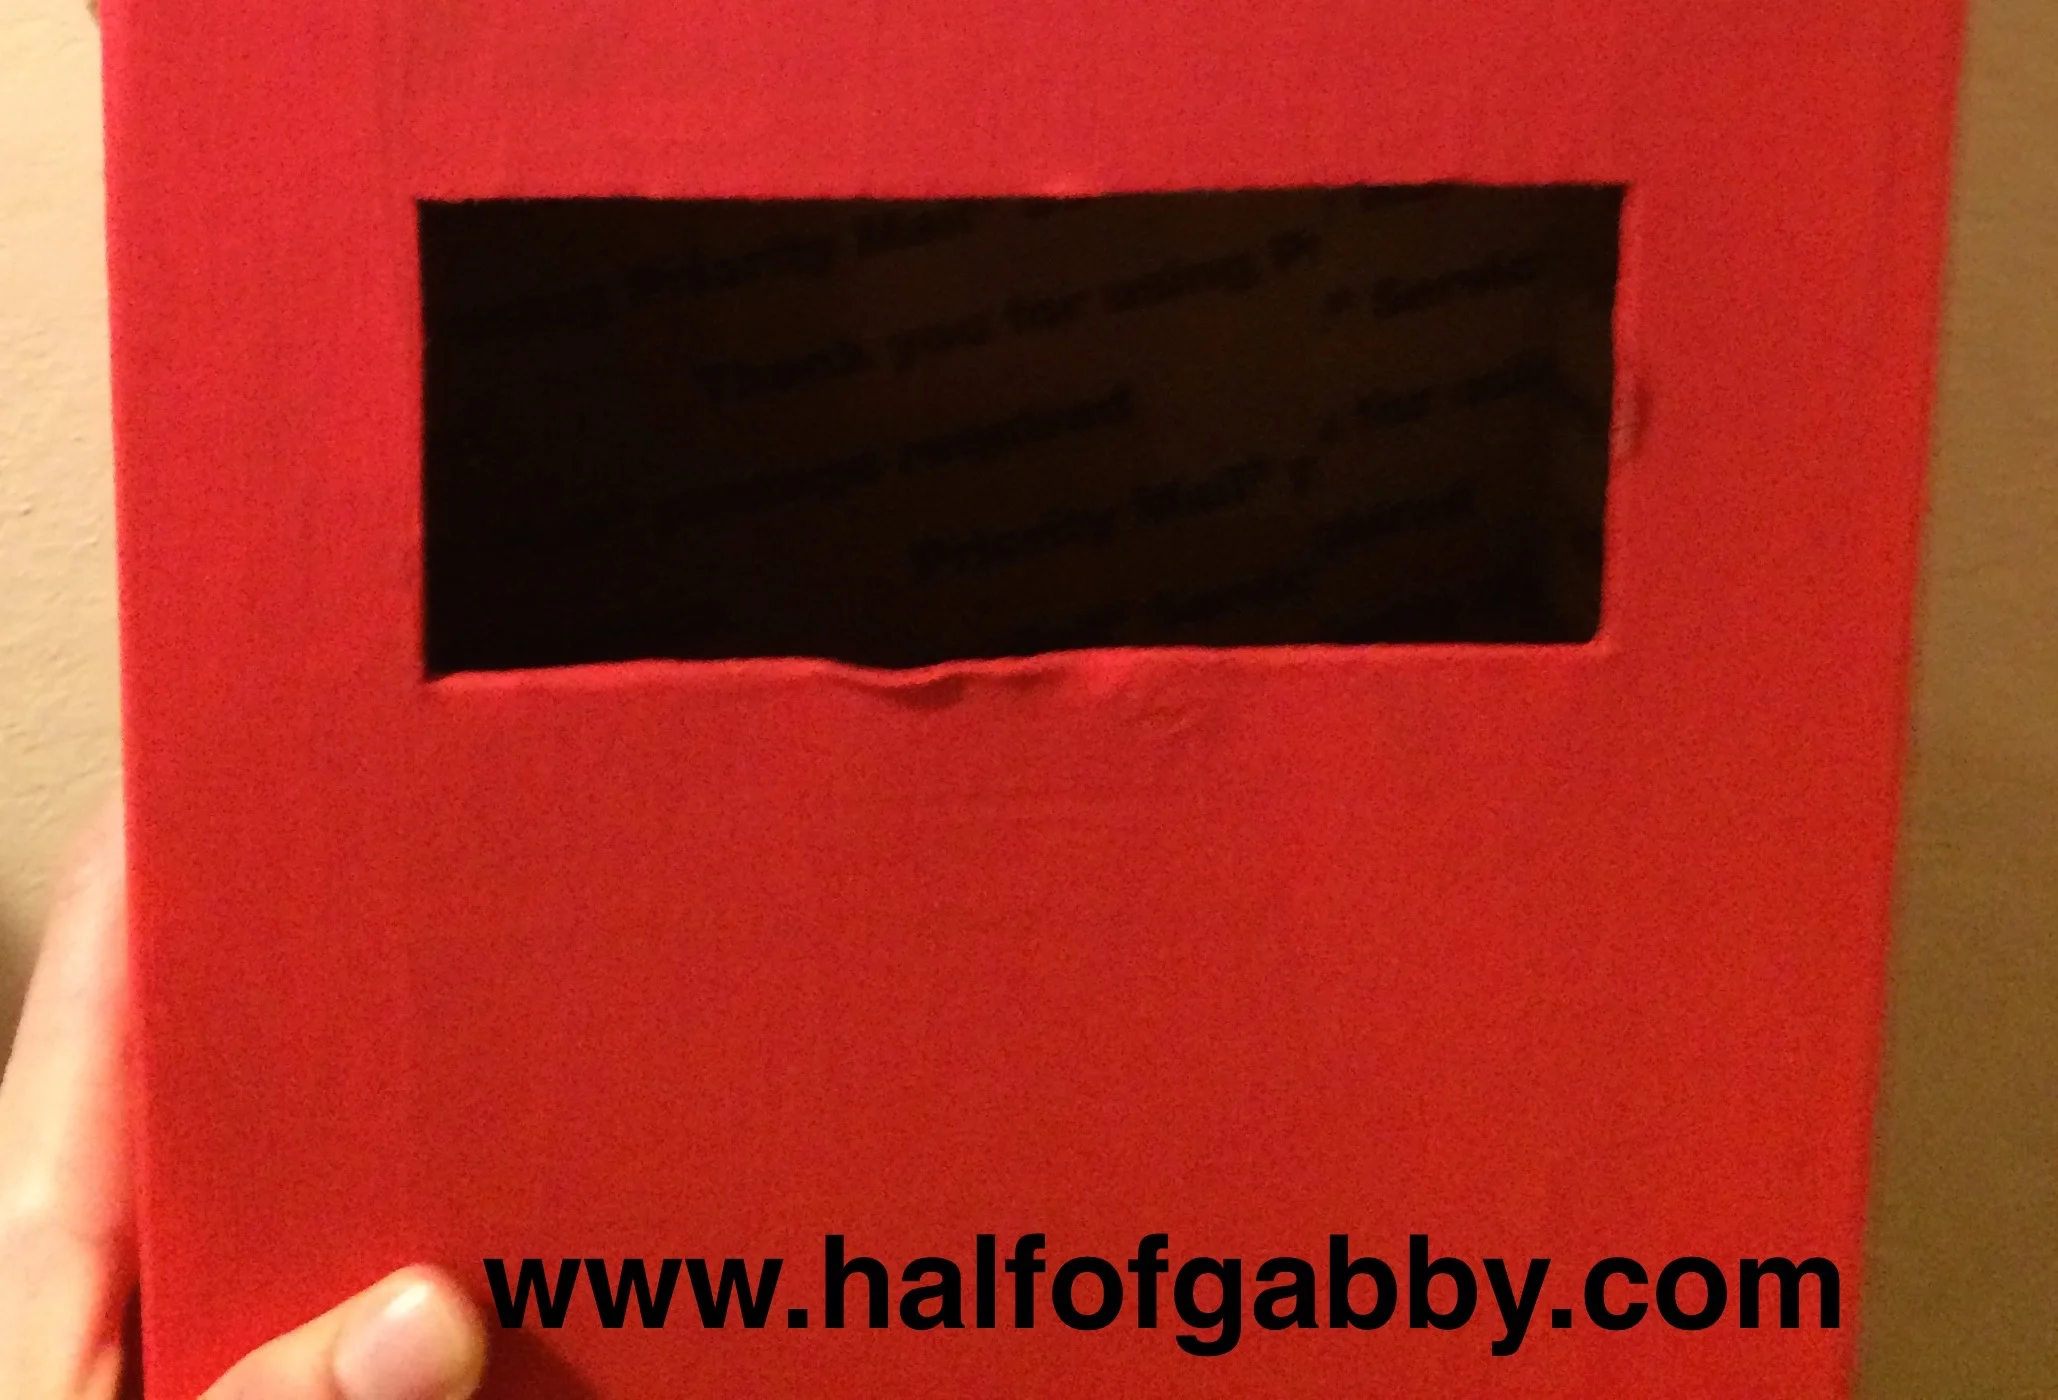
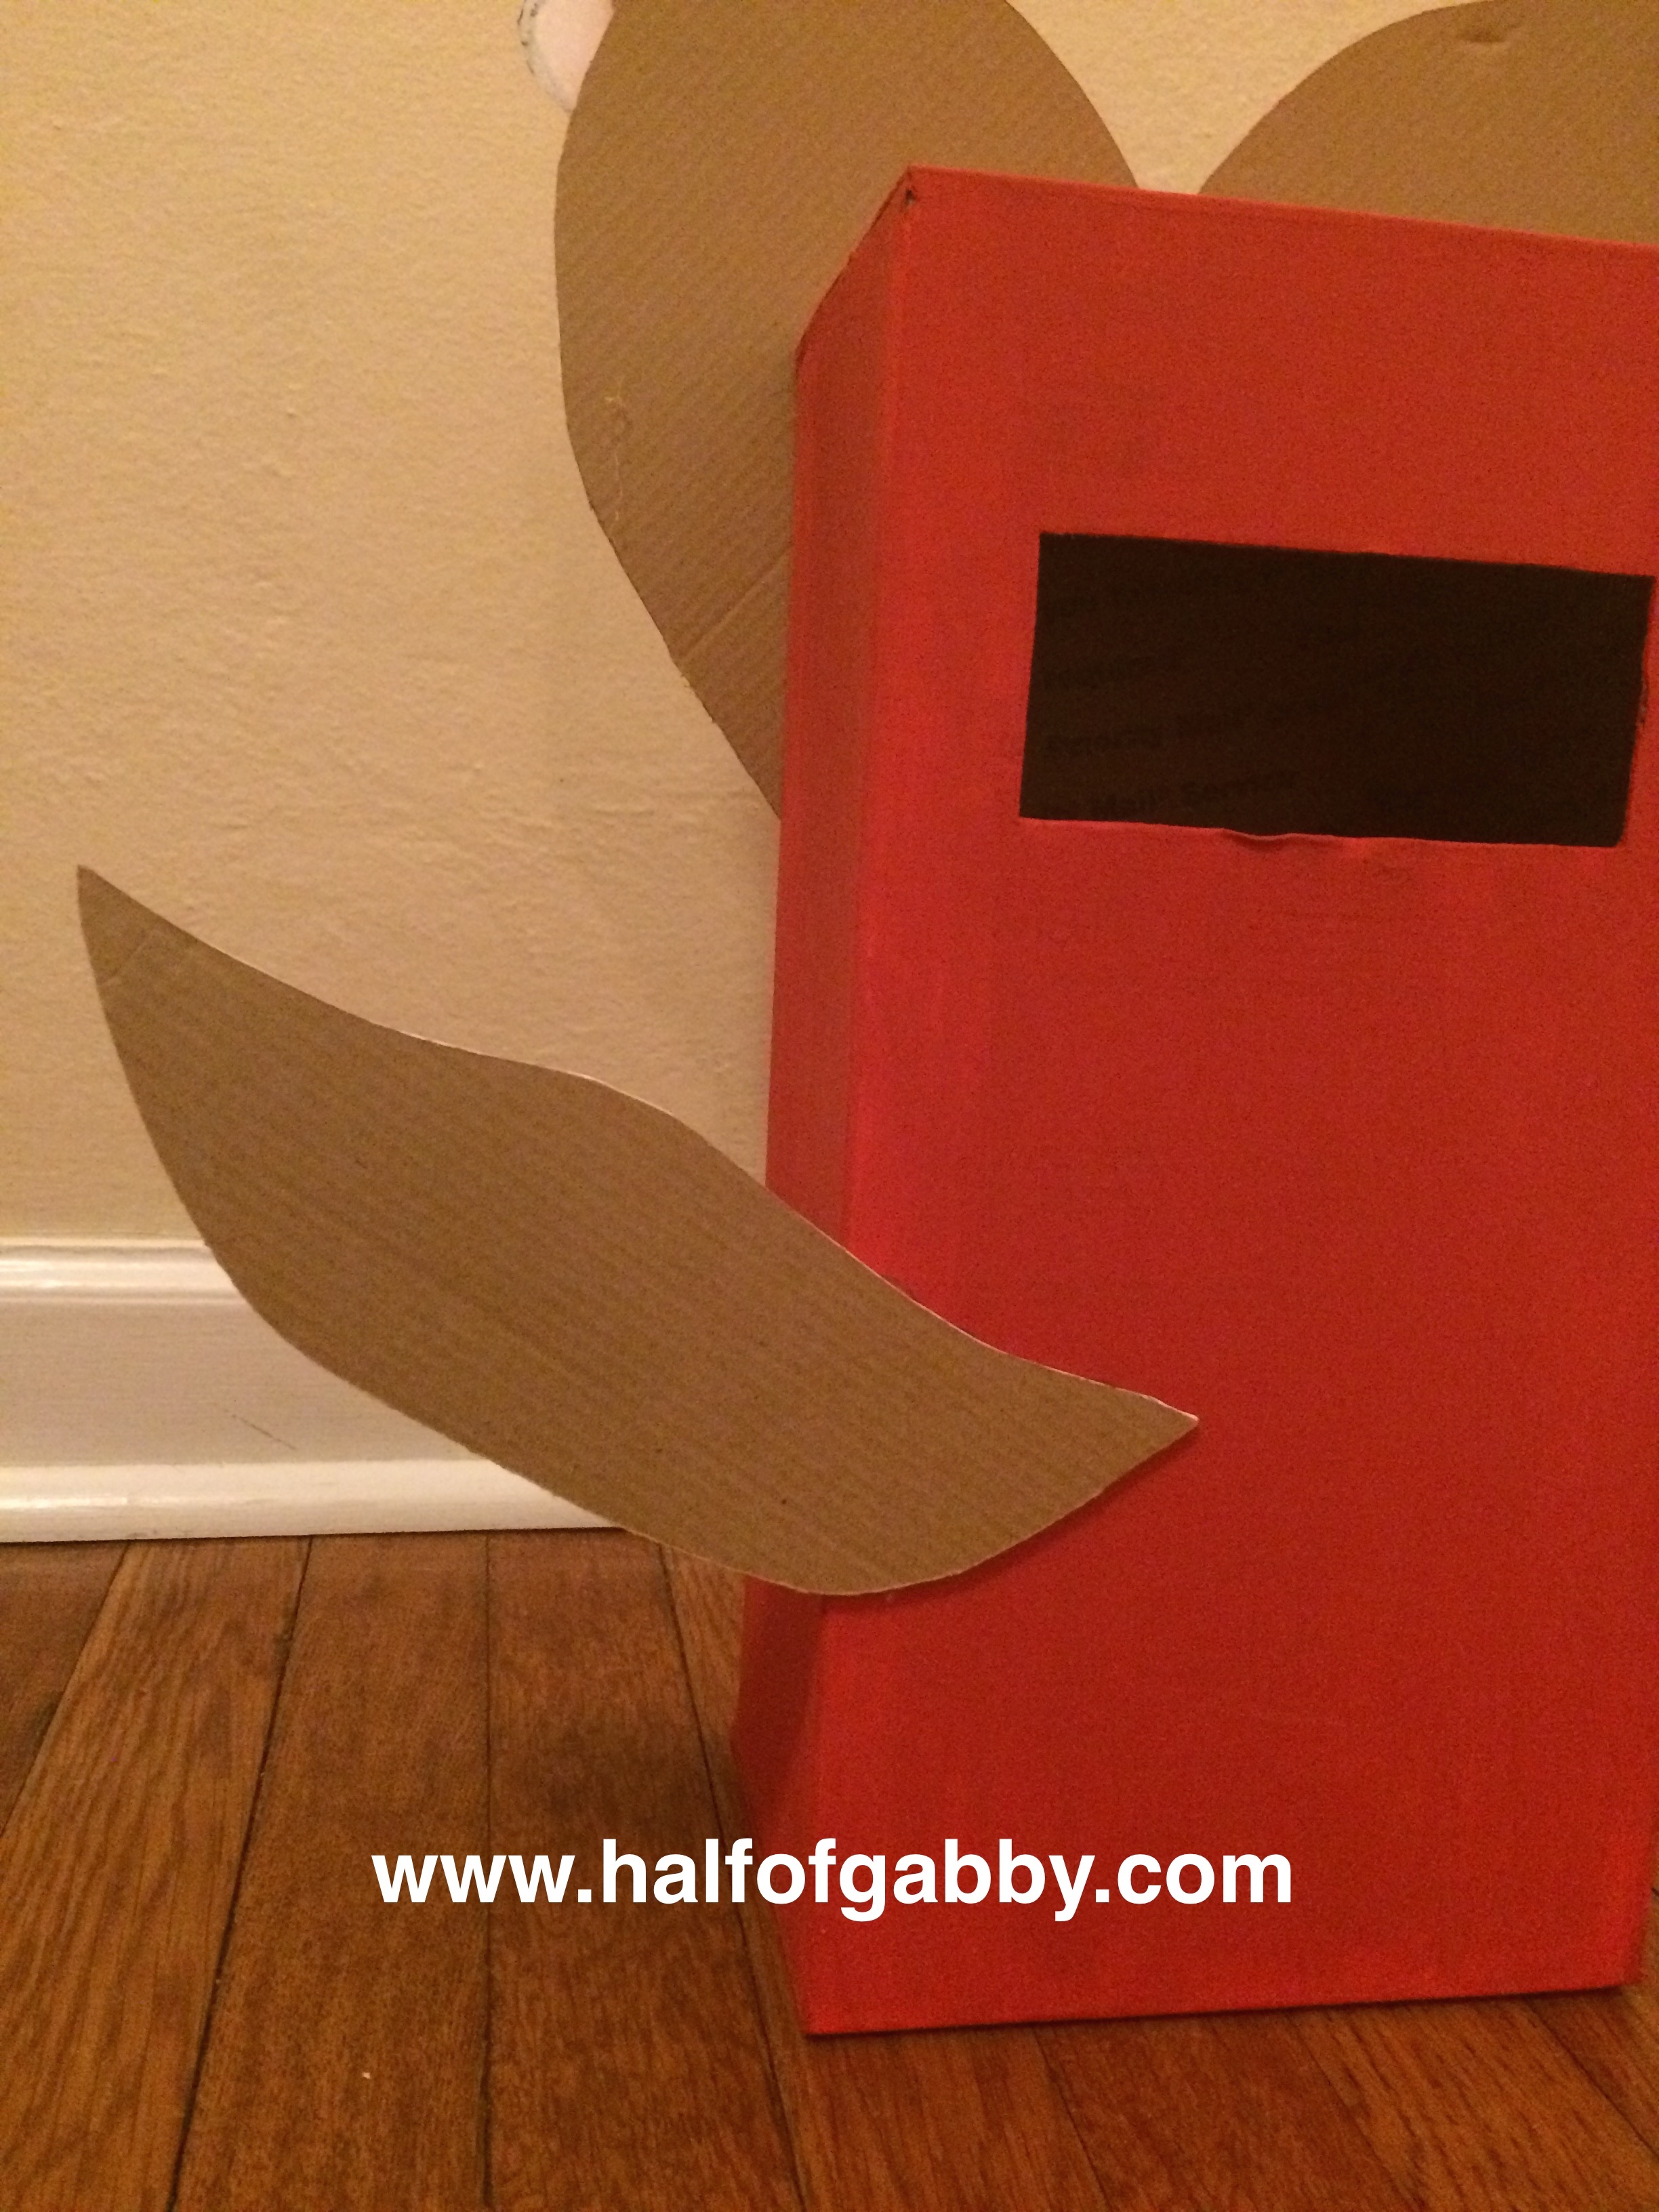
2. Cut a Valentine mail slot with the razor knife.
Adults only!
*You will cut the mail slot BEFORE you paint the box.
I just simply forgot to take a picture before it was painted. Actually it really wasn't that I forgot, it was because Gia was chomping at the bit to get started and before I could blink an eye, she was already painting!
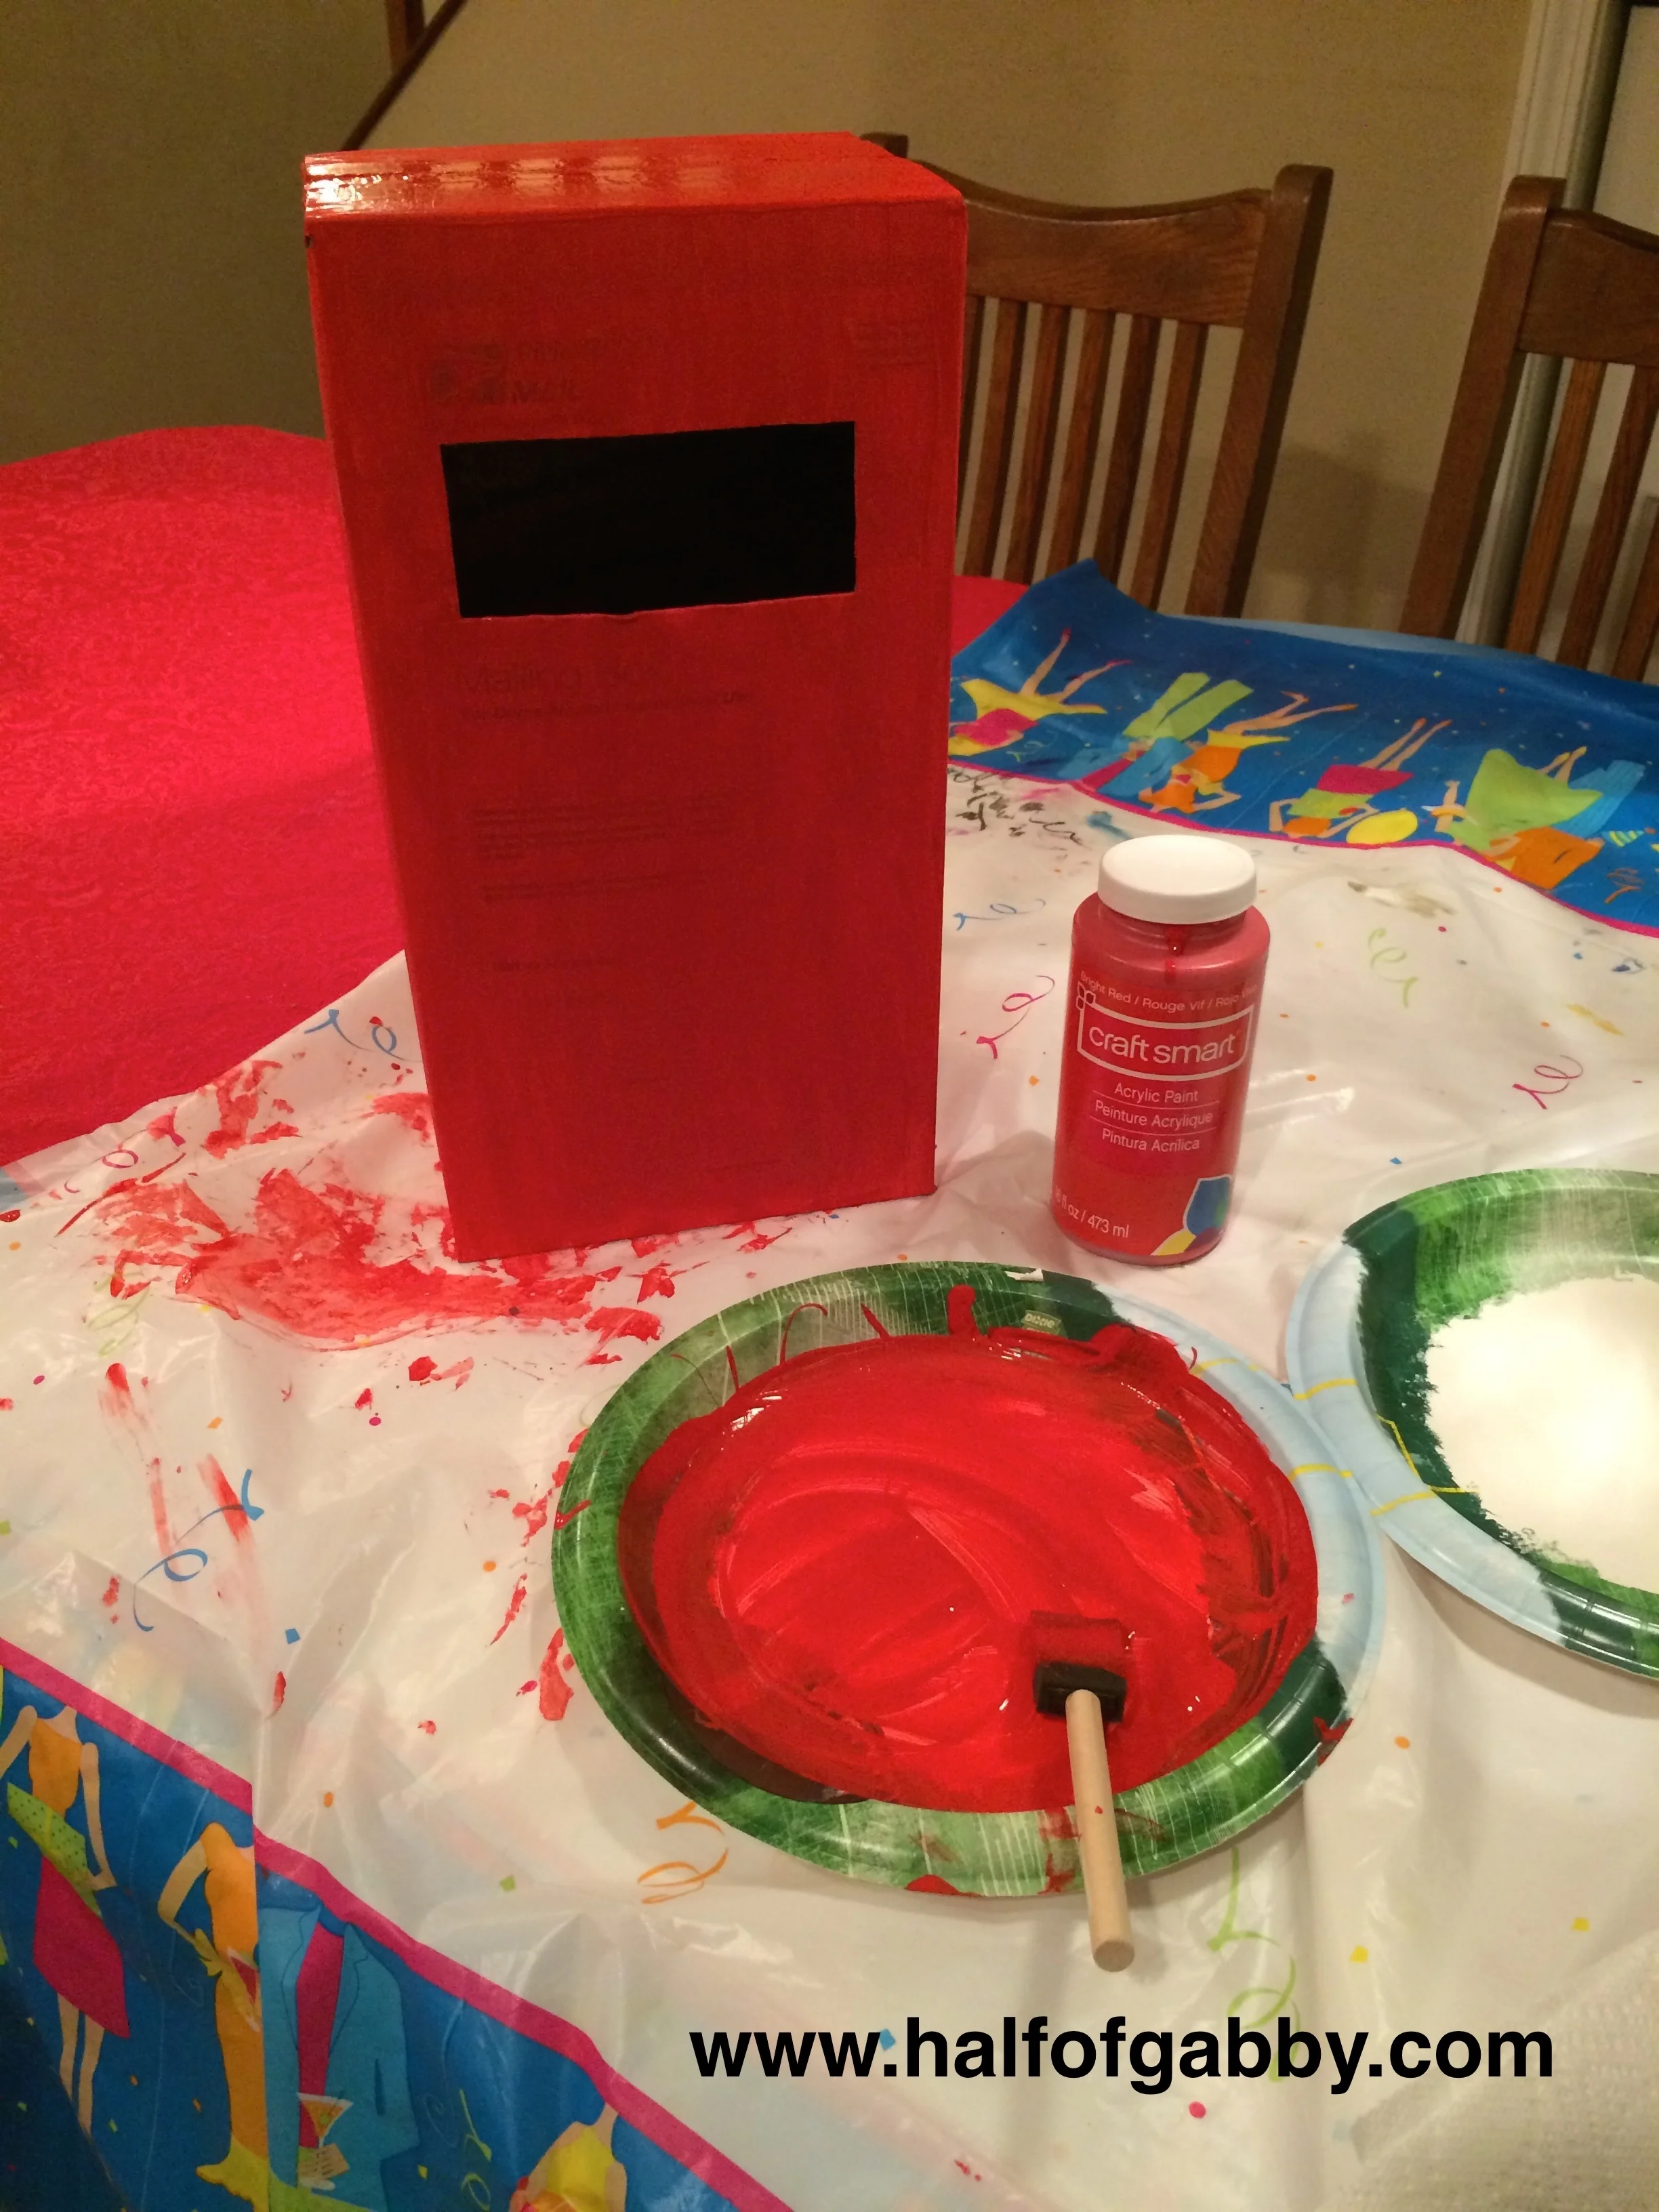
3. Paint your box!
Here's Gia getting right to business!
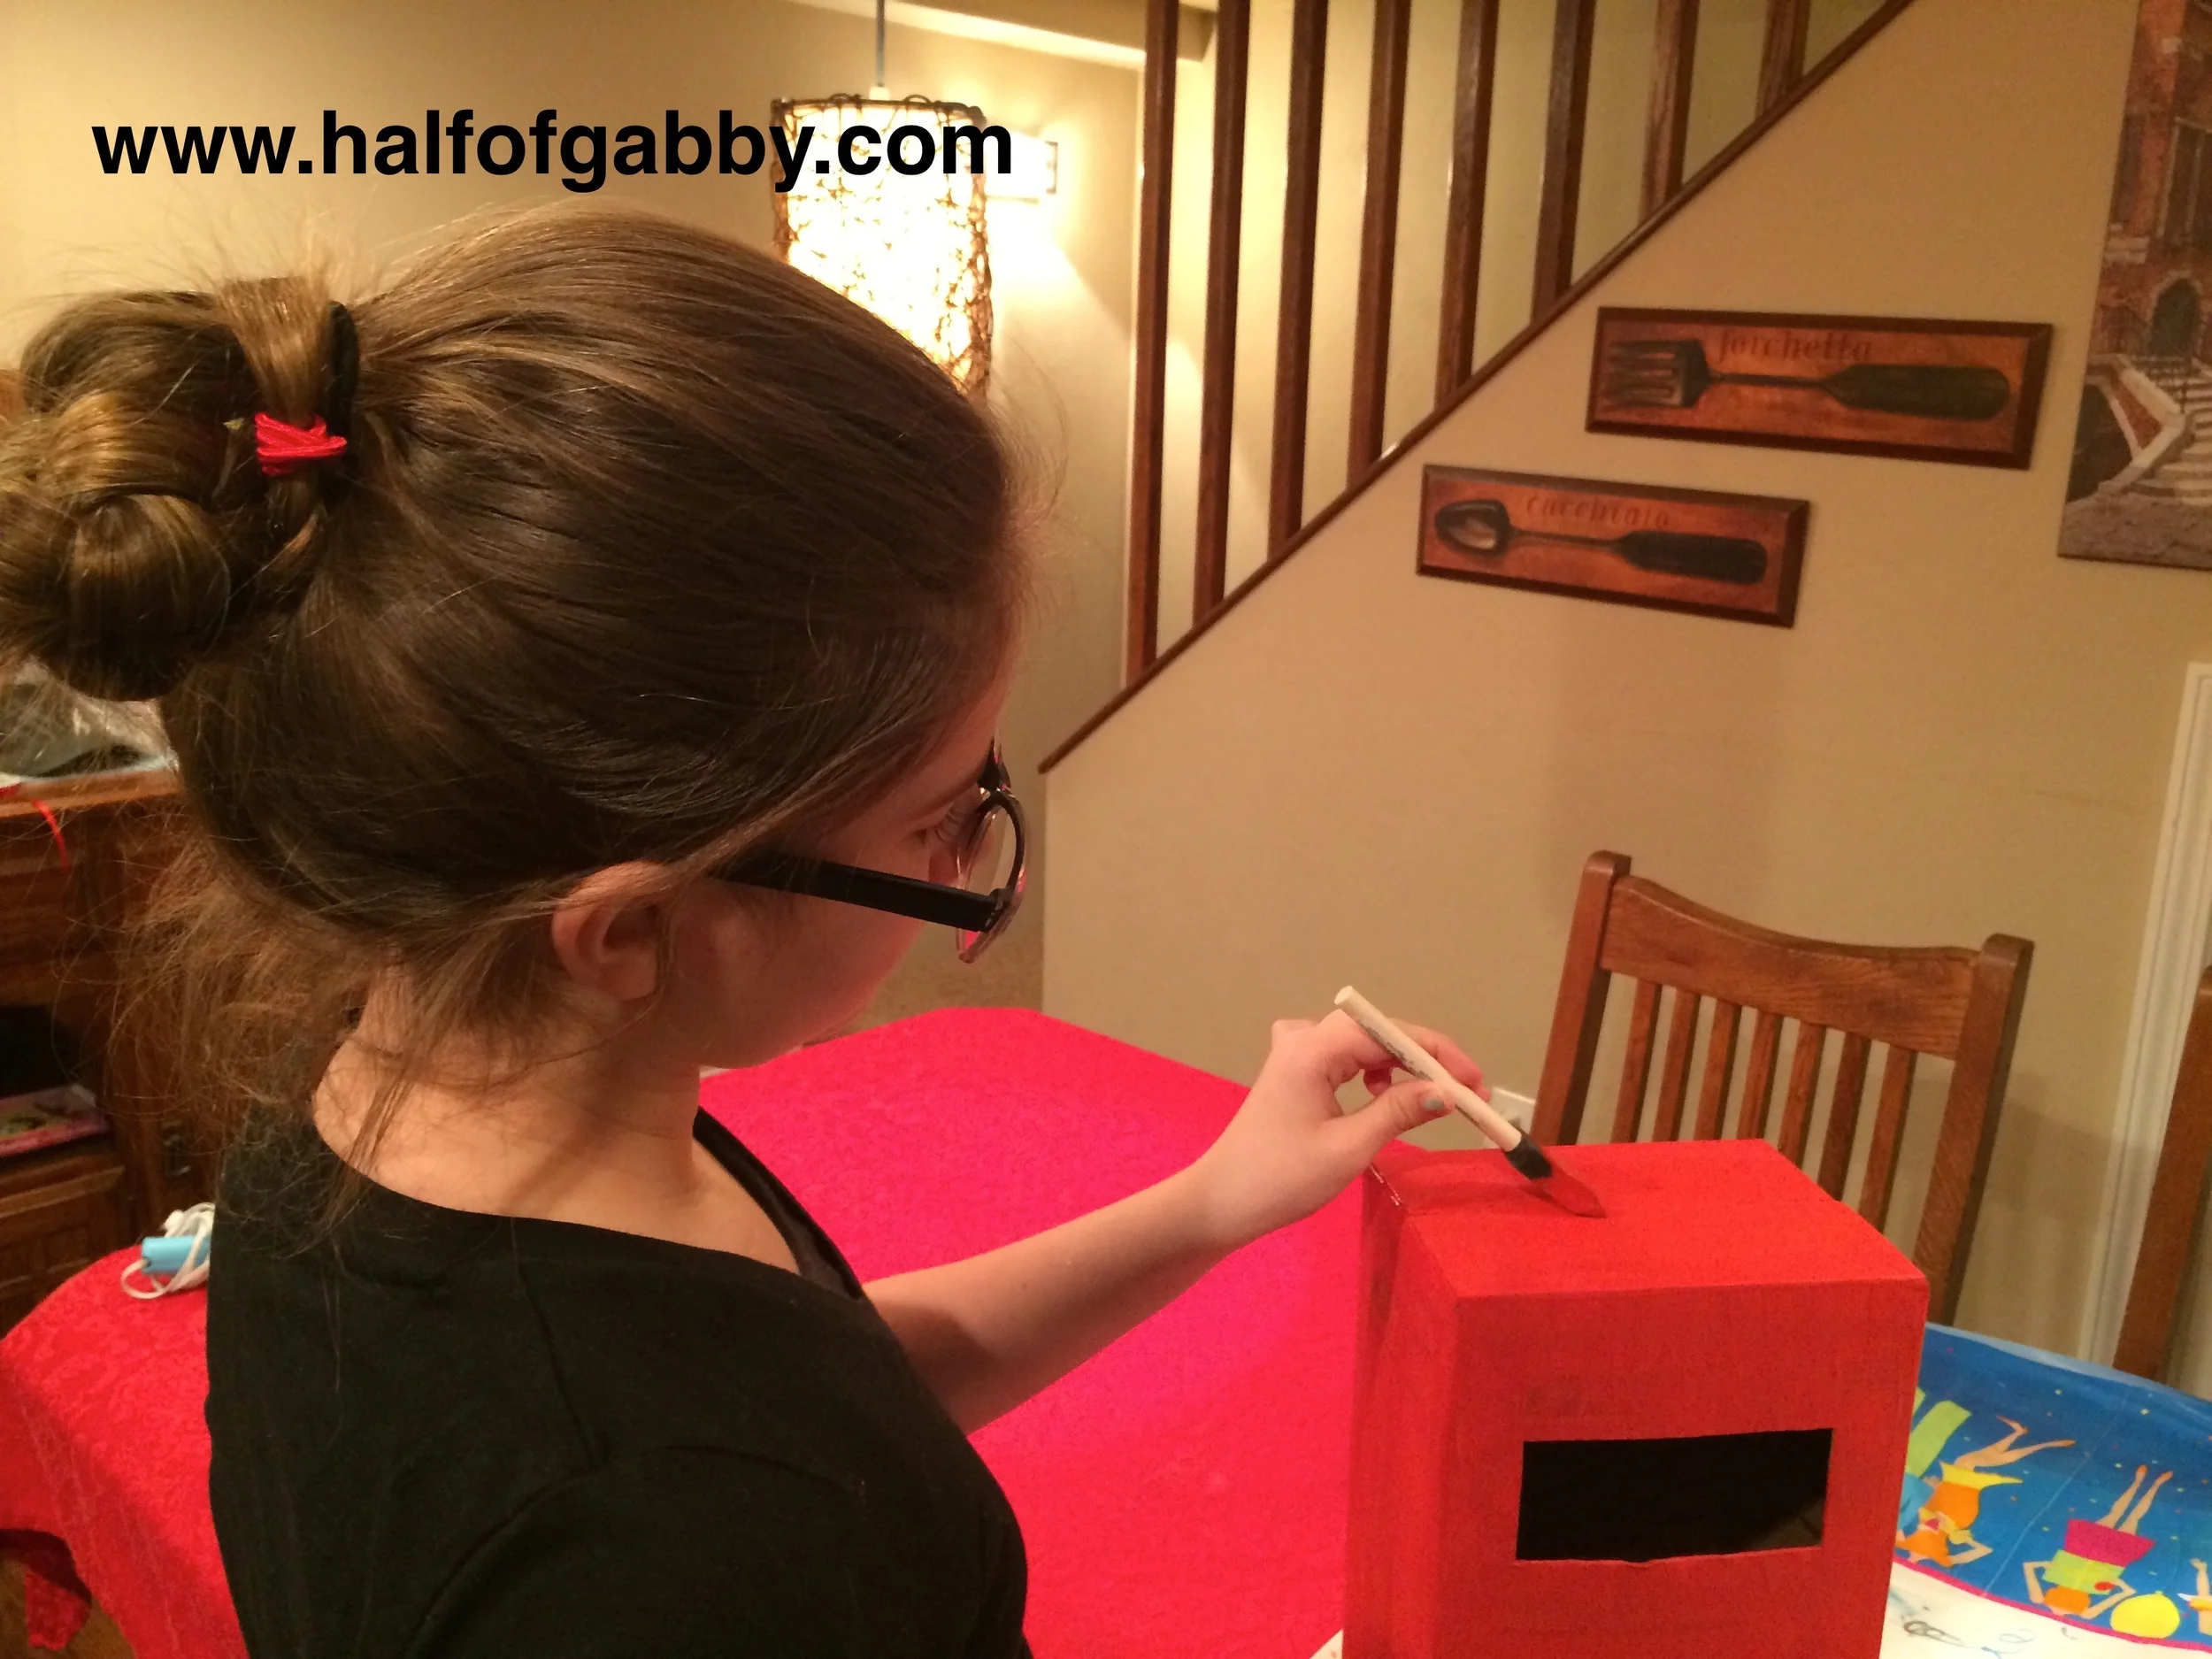
The box will need a couple coats, especially if it has writing on it like Gia's did.
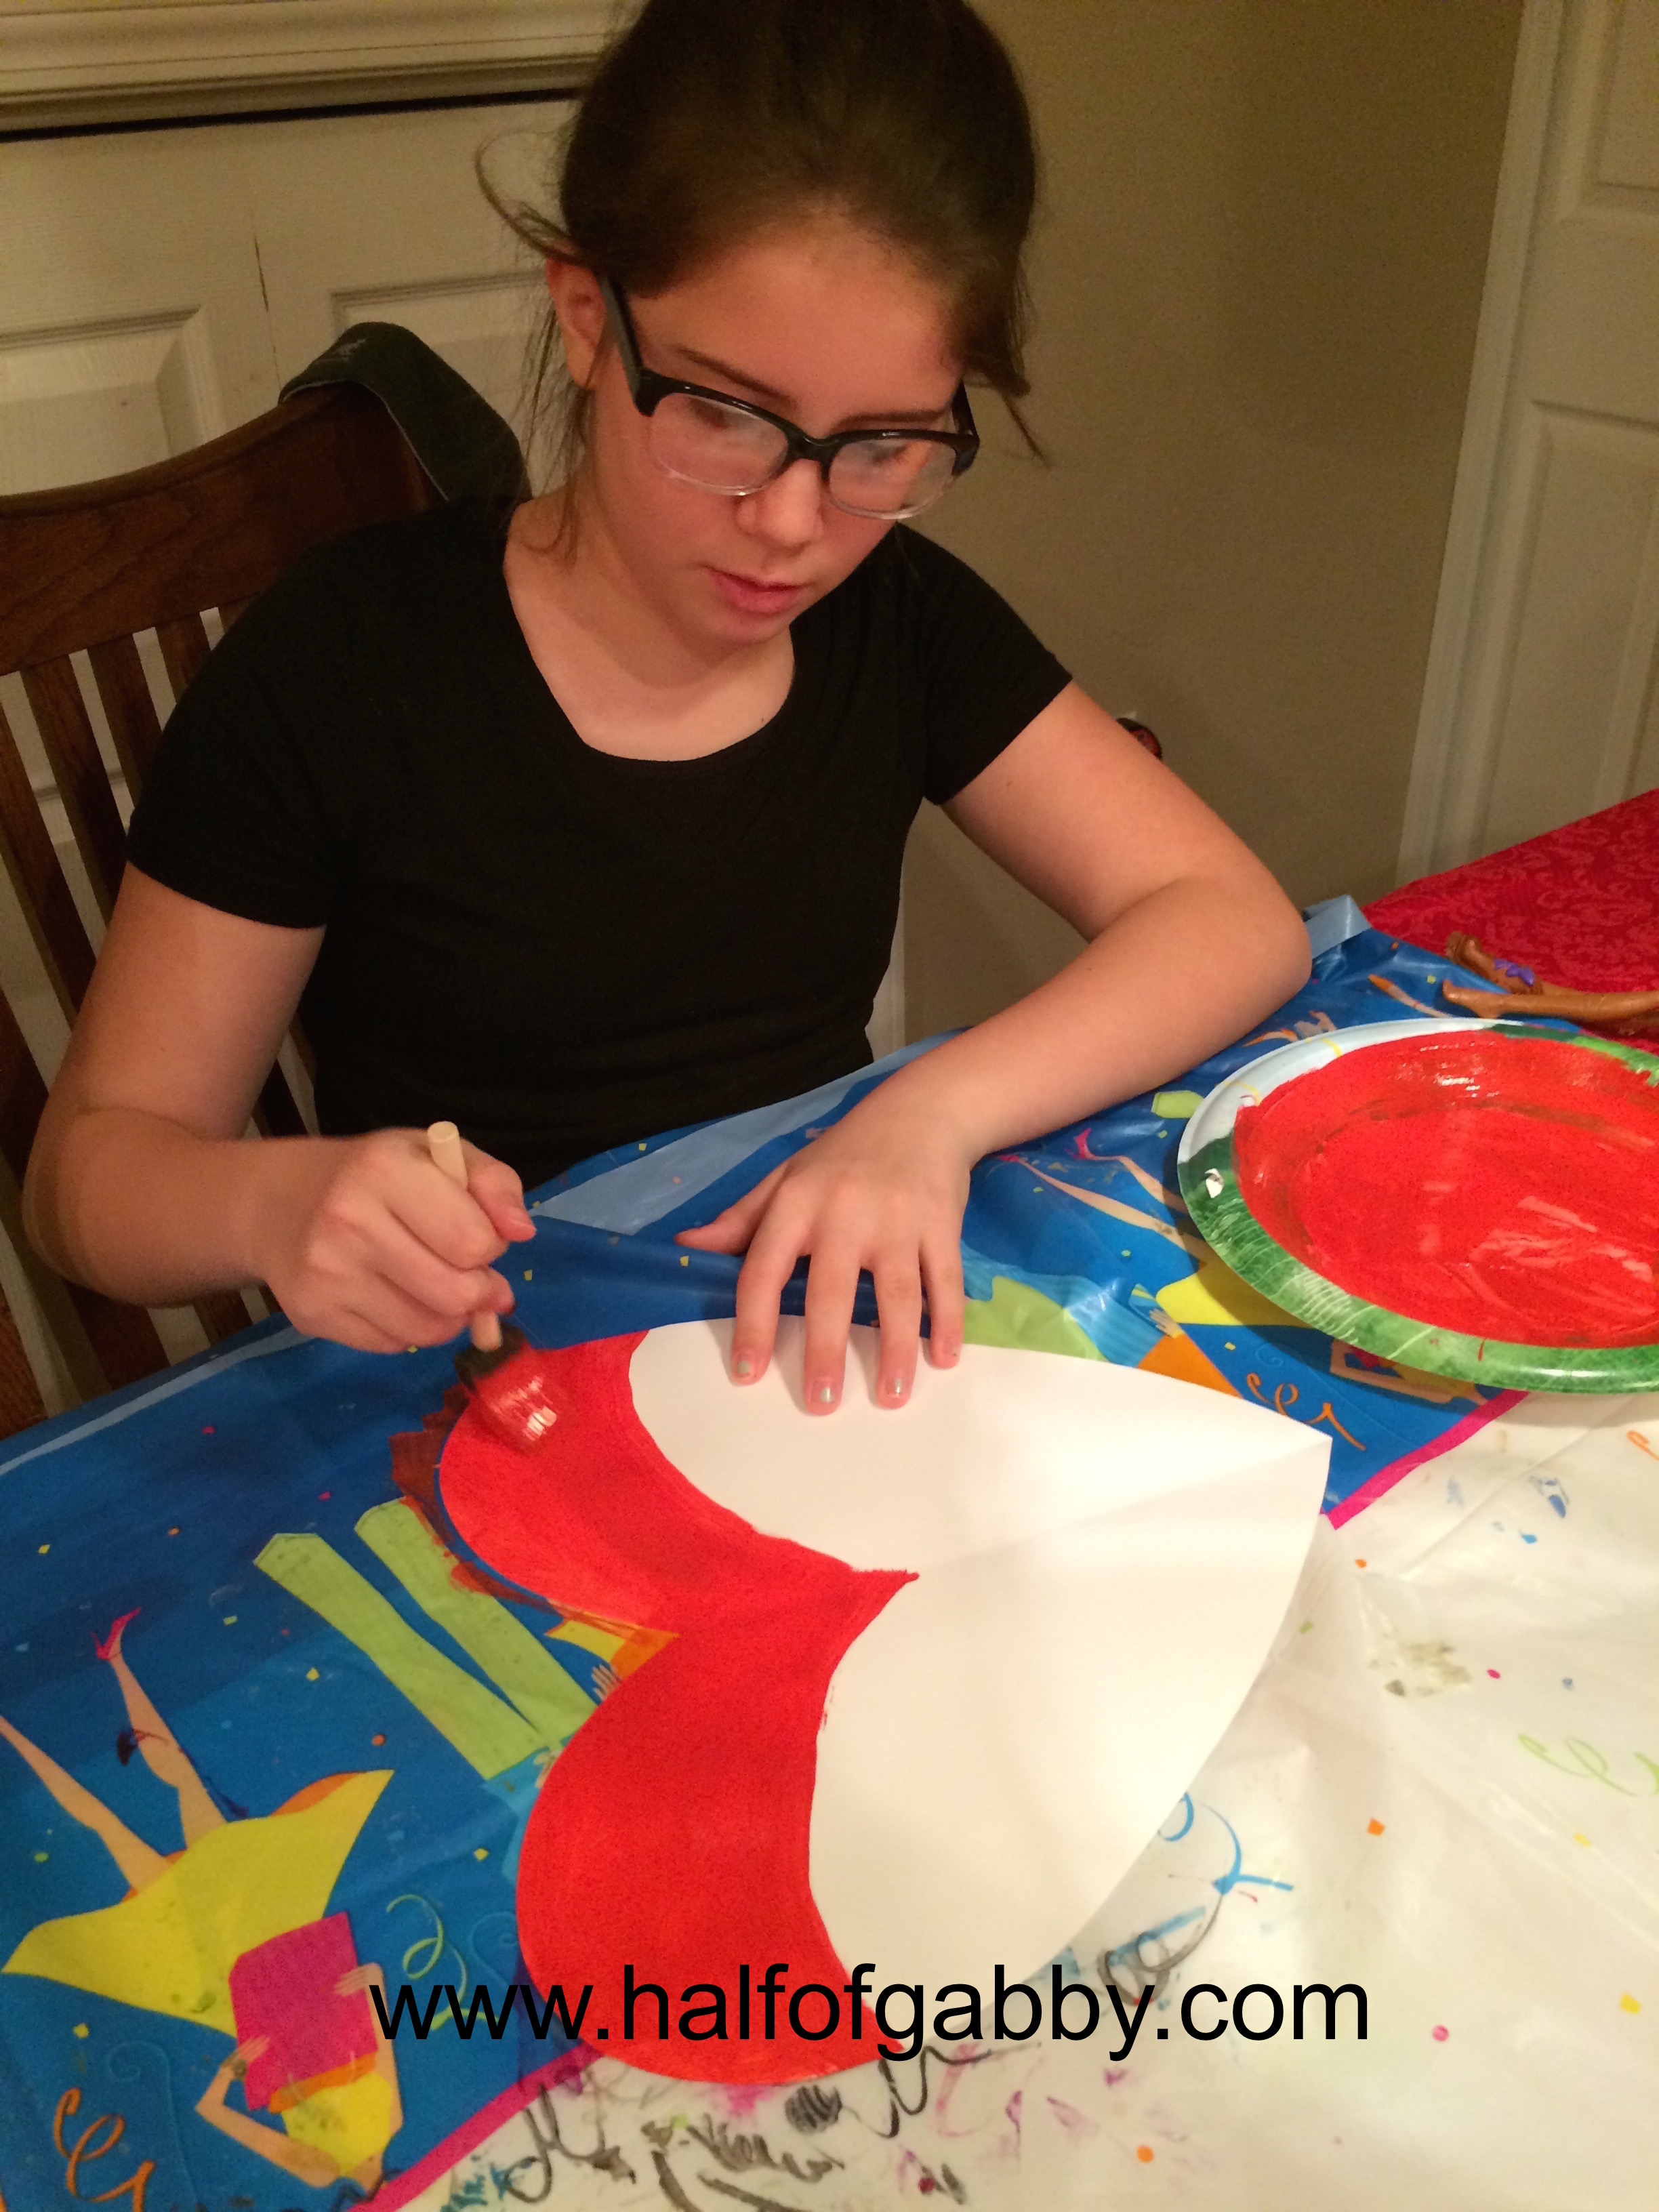
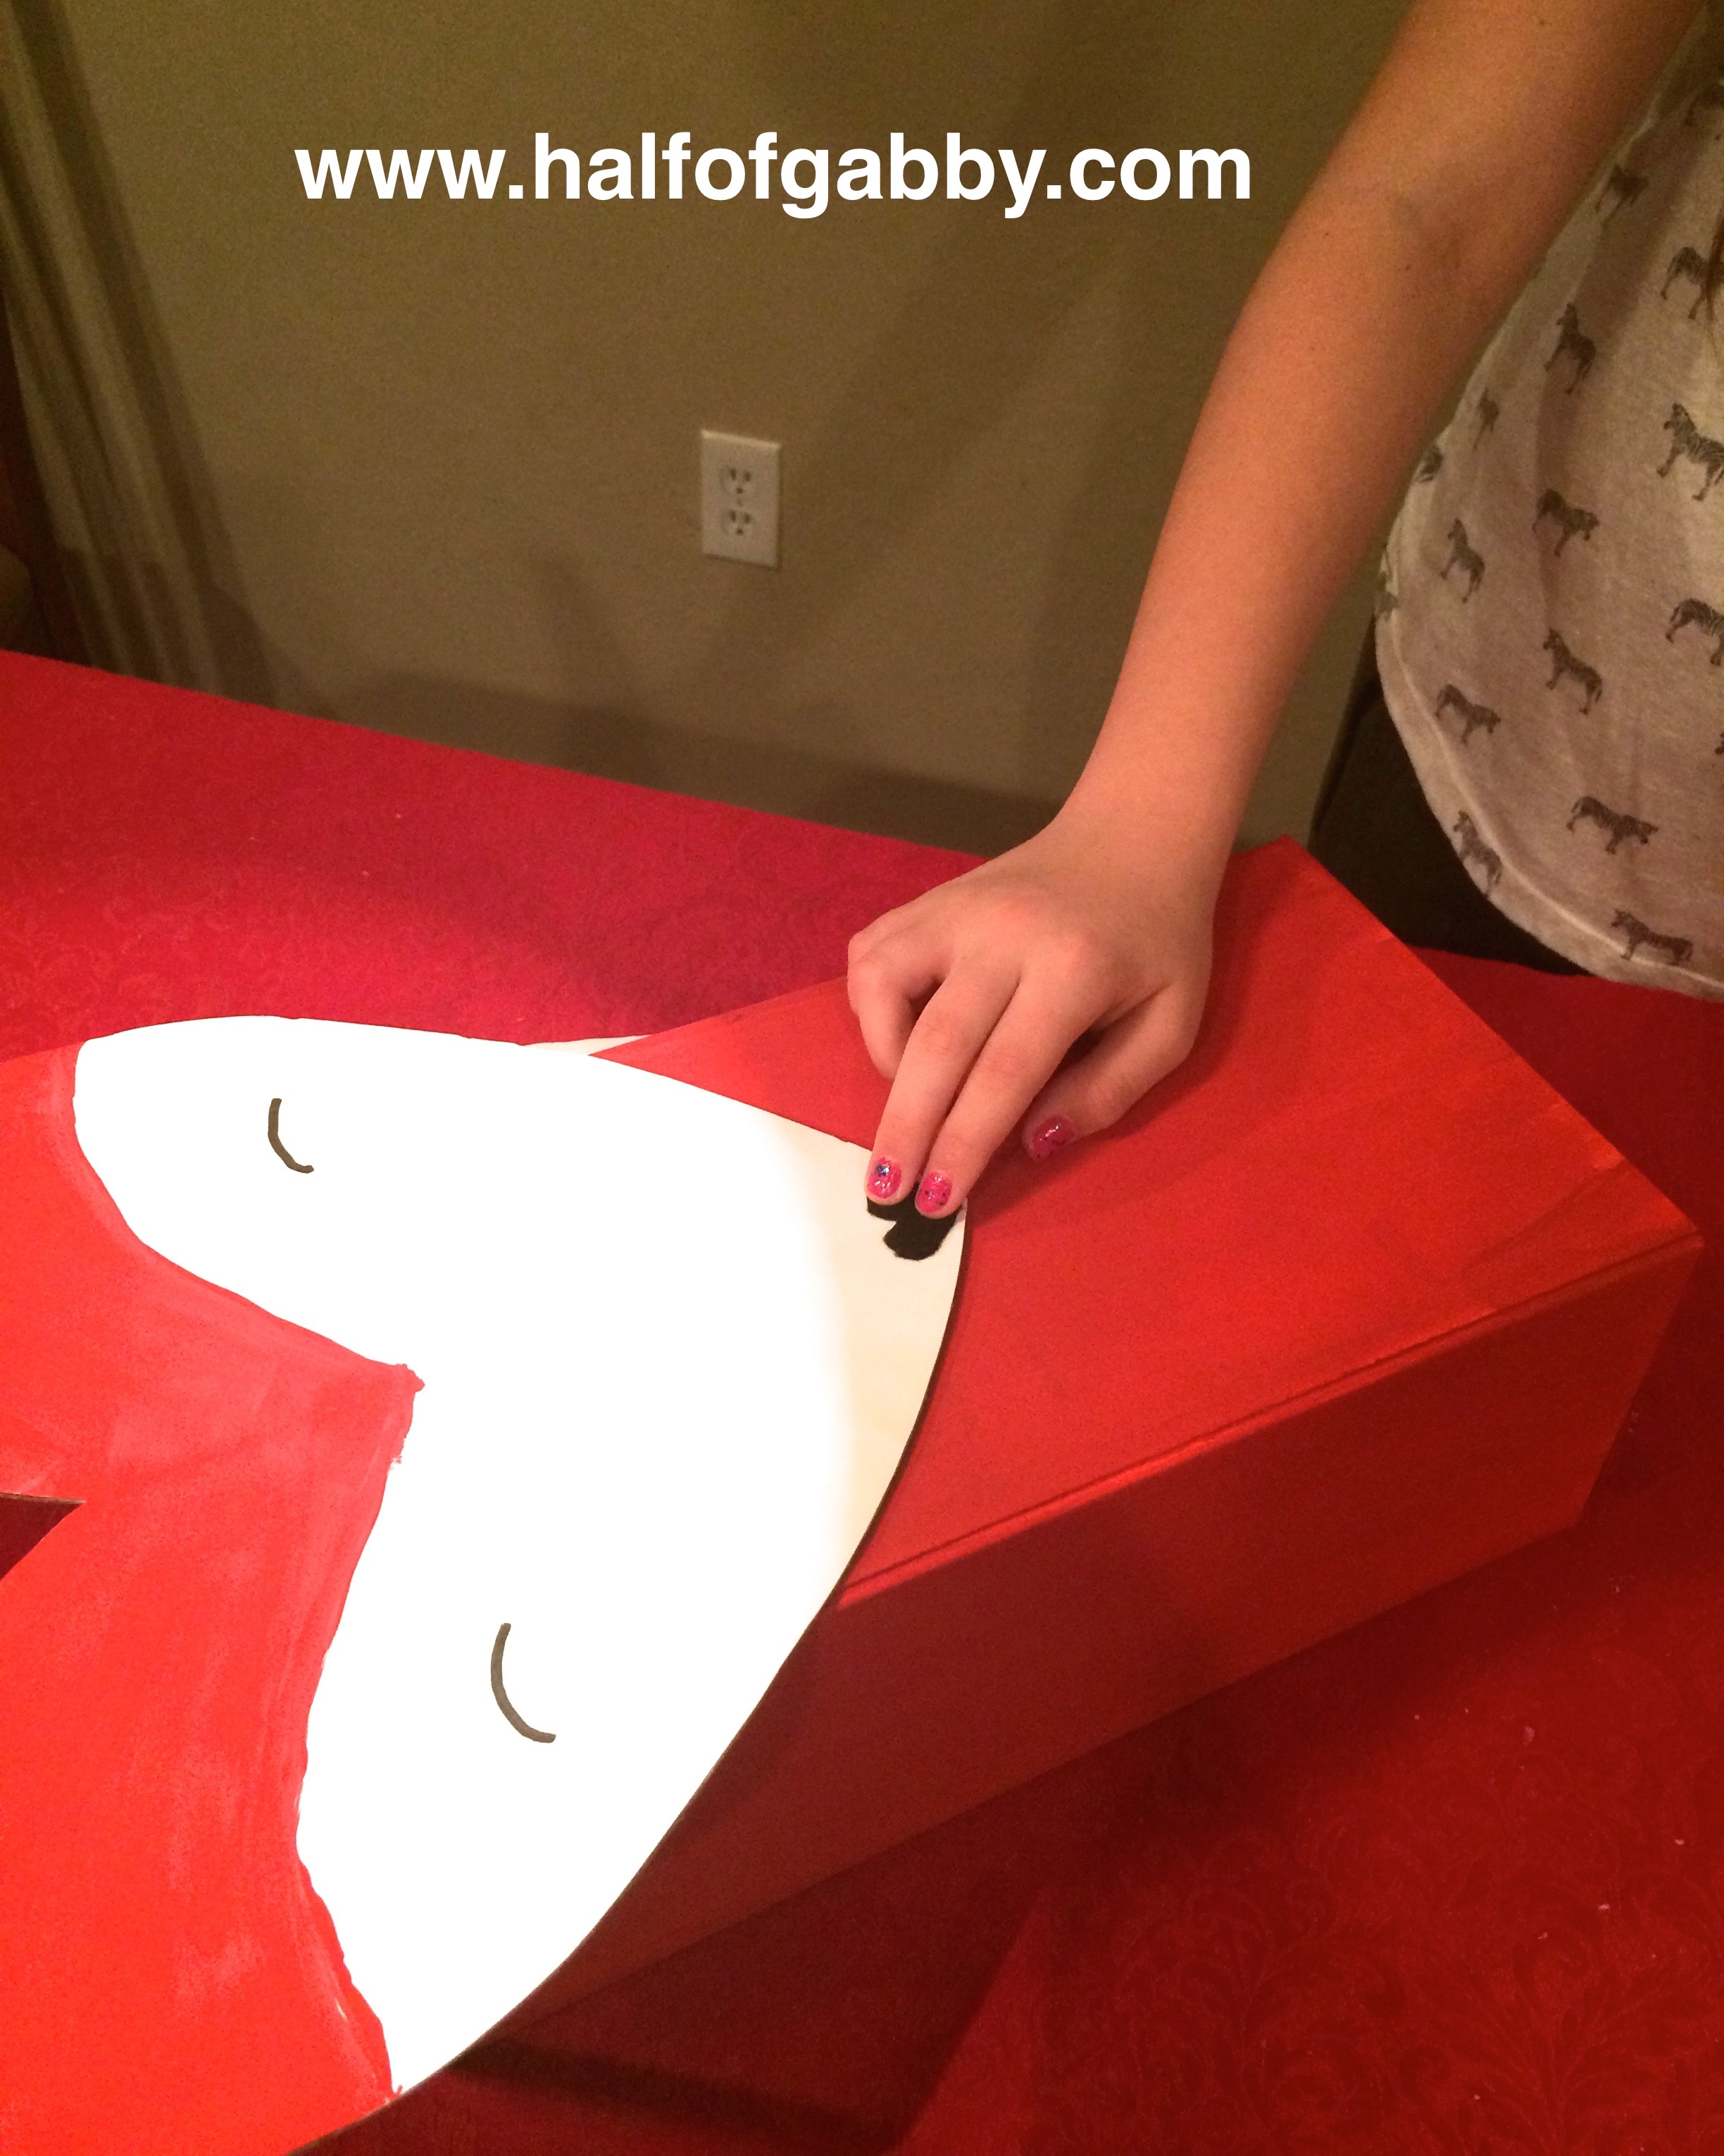
4. Make the fox's face.
While you're waiting for your box to dry, you can get started on your fox's heart face. Loosely fold one of your sheets of white card stock in half, draw half of a heart on it, and then cut it out.
Folding the paper loosely ensures that you won't have a permanent crease down the middle of the fox's face and drawing half of a heart while the paper is folded ensures the heart will be perfectly symmetrical. Gia used almost the whole piece of paper. Her heart face was 12" wide and about 11" tall.
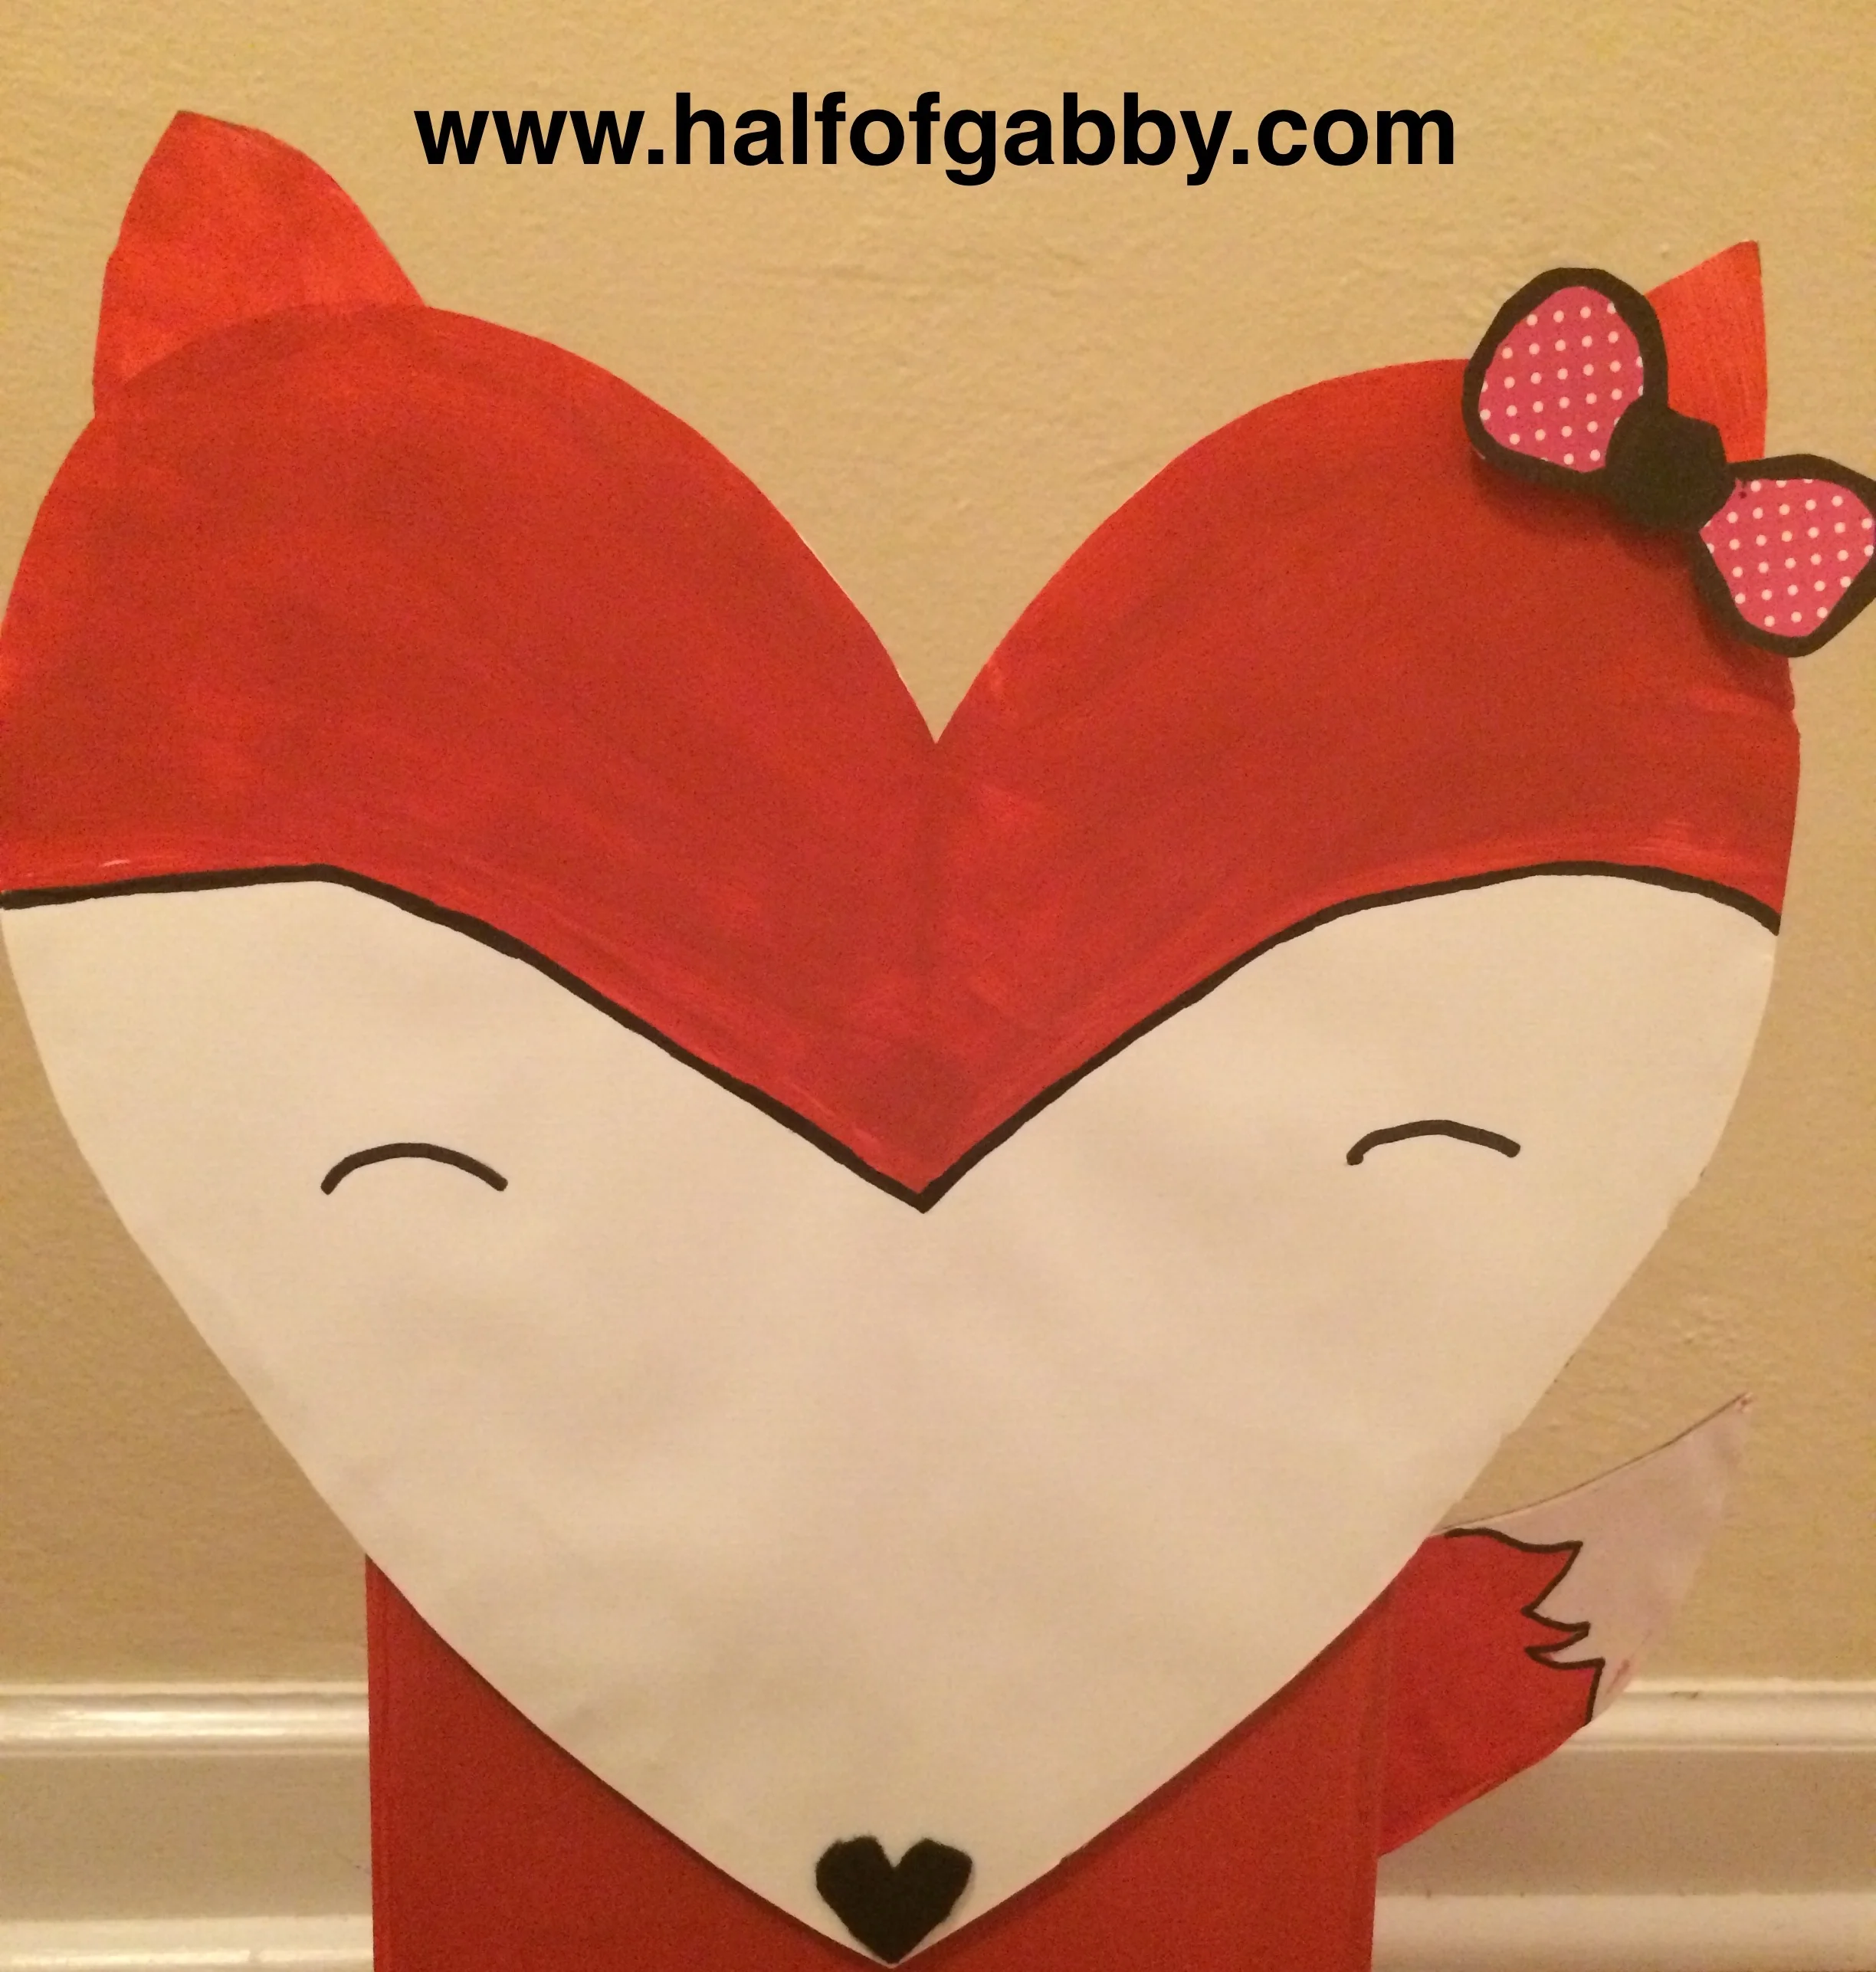
After you cut out your heart face, paint a curved section on the top of the heart.
This will still leave a smaller white heart as the 'face' but create 'hair/fur' on the top of the head. You can paint it any color you'd like but Gia chose to use the same red that she used to paint the box (the fox's body).
THE EARS:
While you have the paint out, work on the ears next! To make the ears, simply cut out two triangles to whatever size you would like your ears to be and then paint them. Once they're dry, glue them to the back of the heart face.
*An adult should do the hot gluing depending on the age of the child. But close supervision regardless of age.
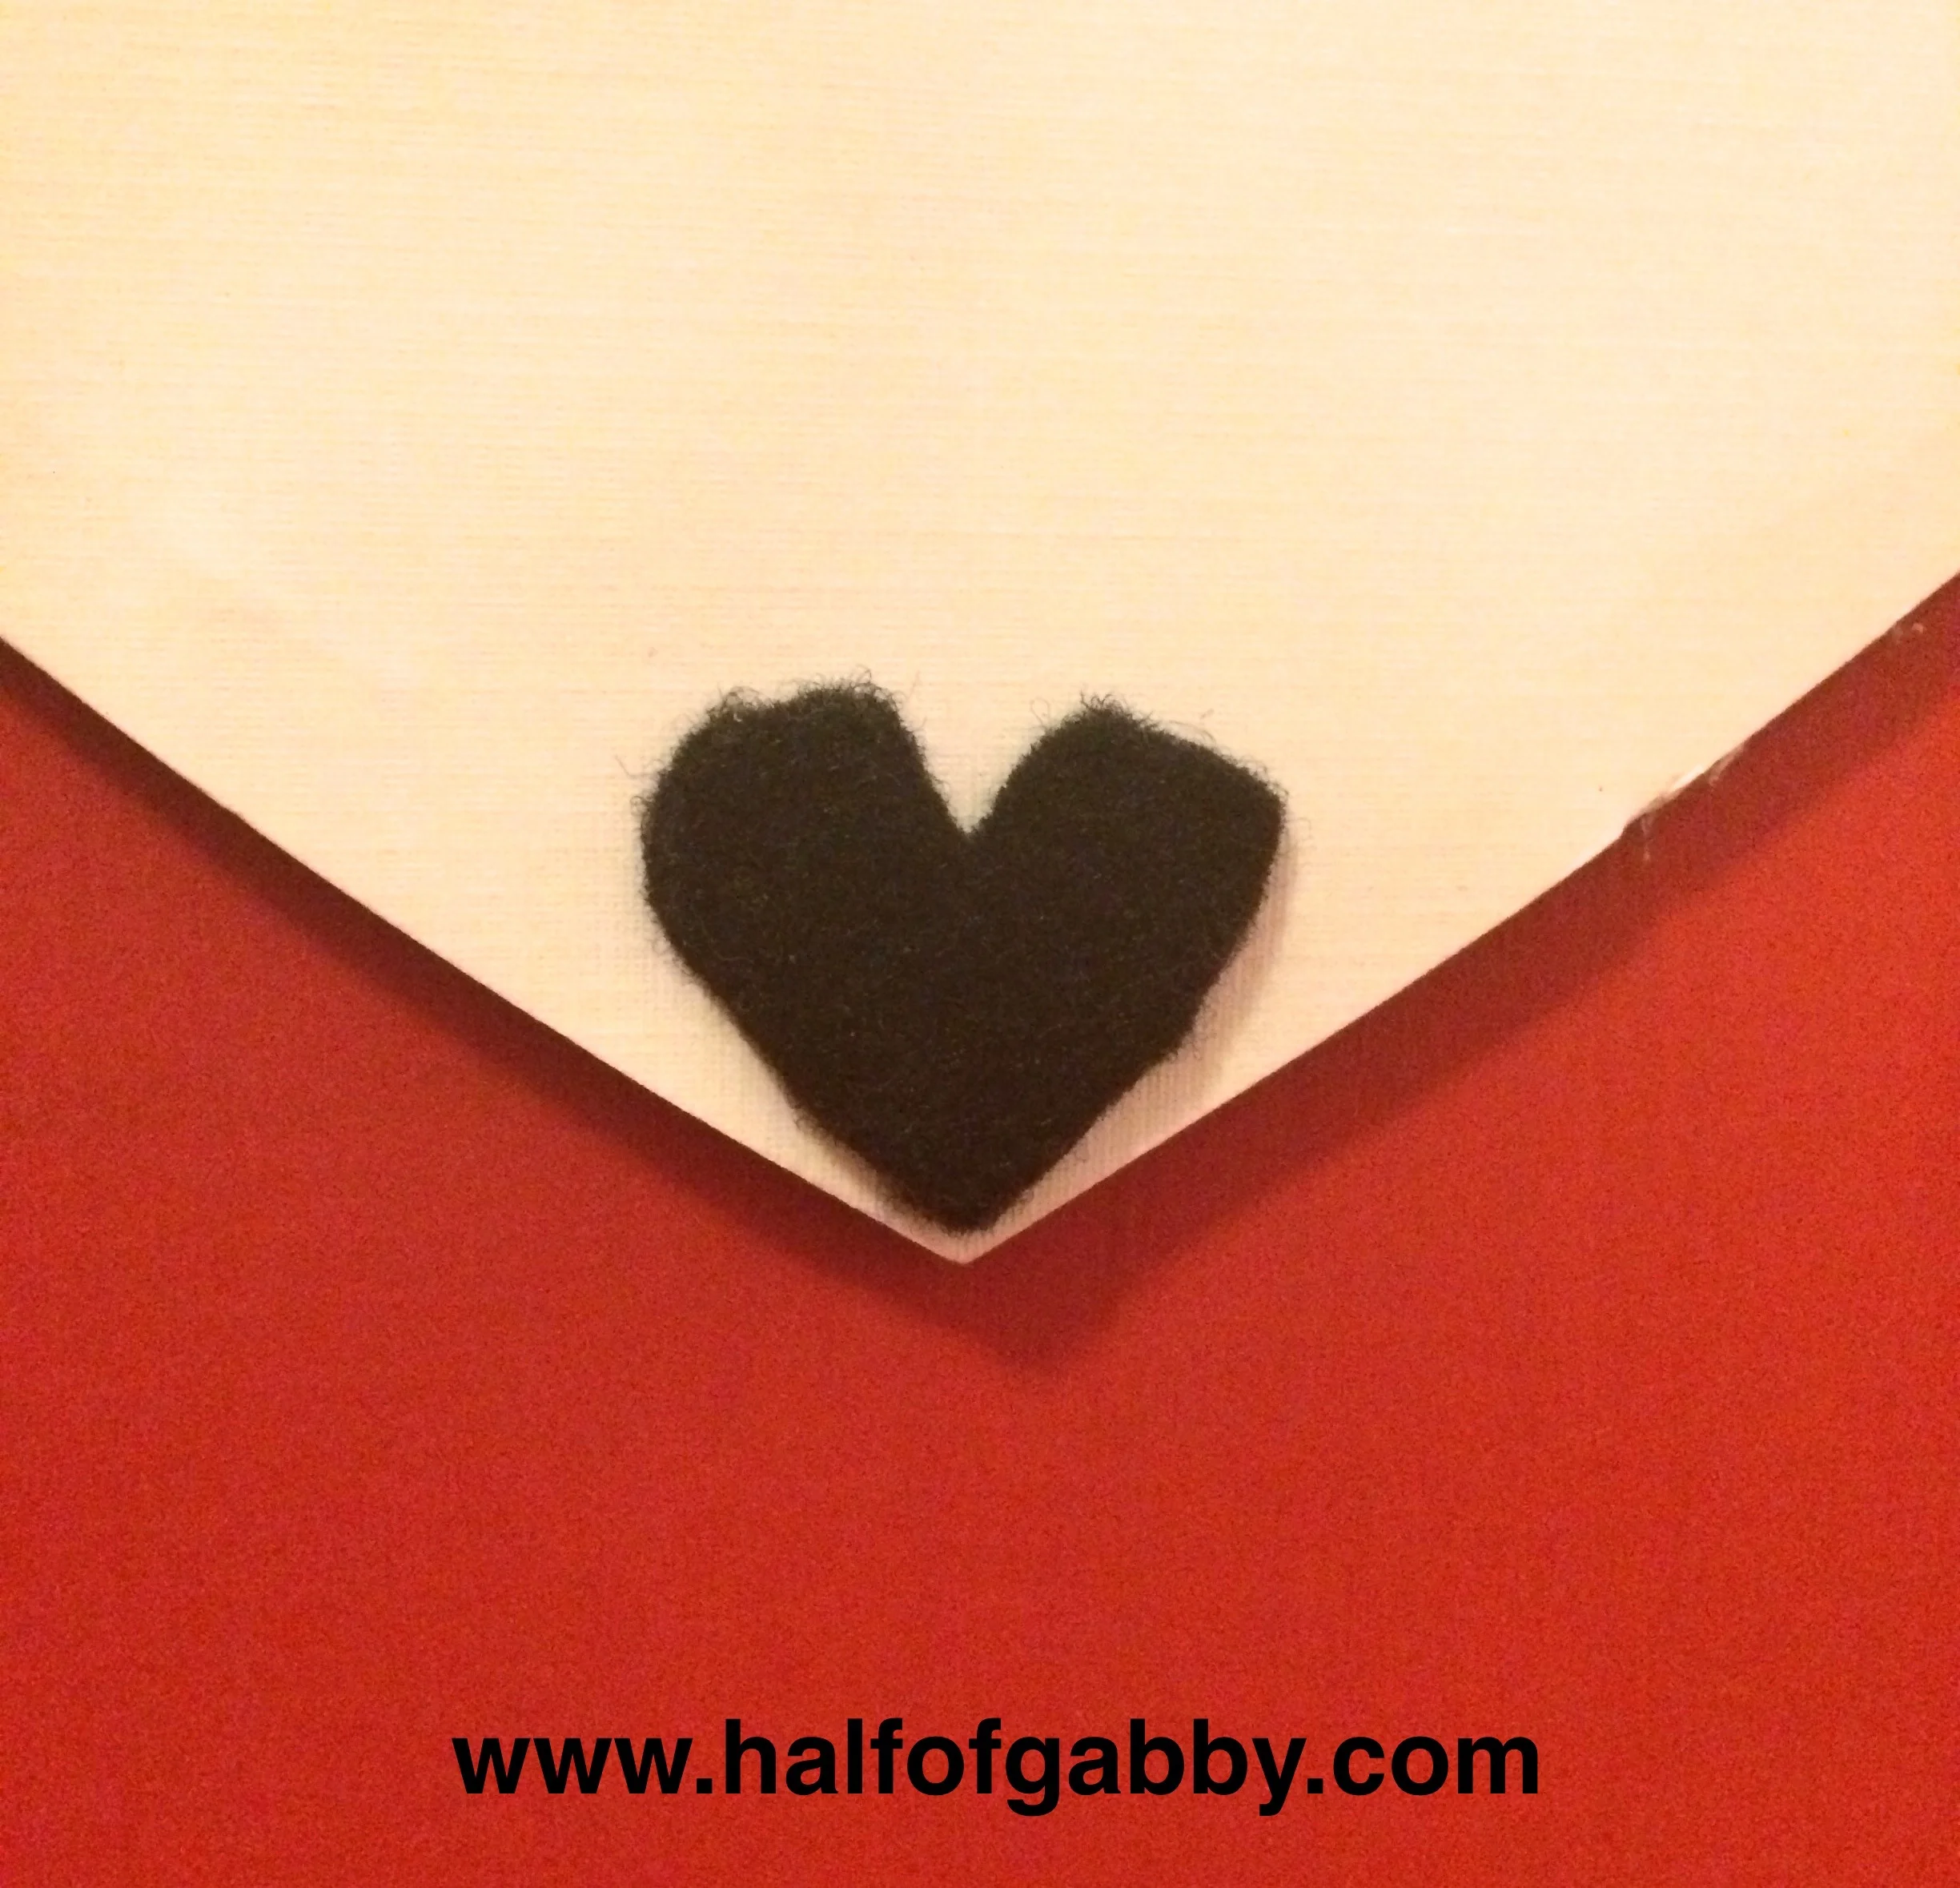
THE NOSE:
To create the nose, simply cut a small heart out of the black felt and glue to the very bottom of the face where the heart comes to a point. If you don't have felt, you can use black paper or even just draw a heart with a black marker right on the face.
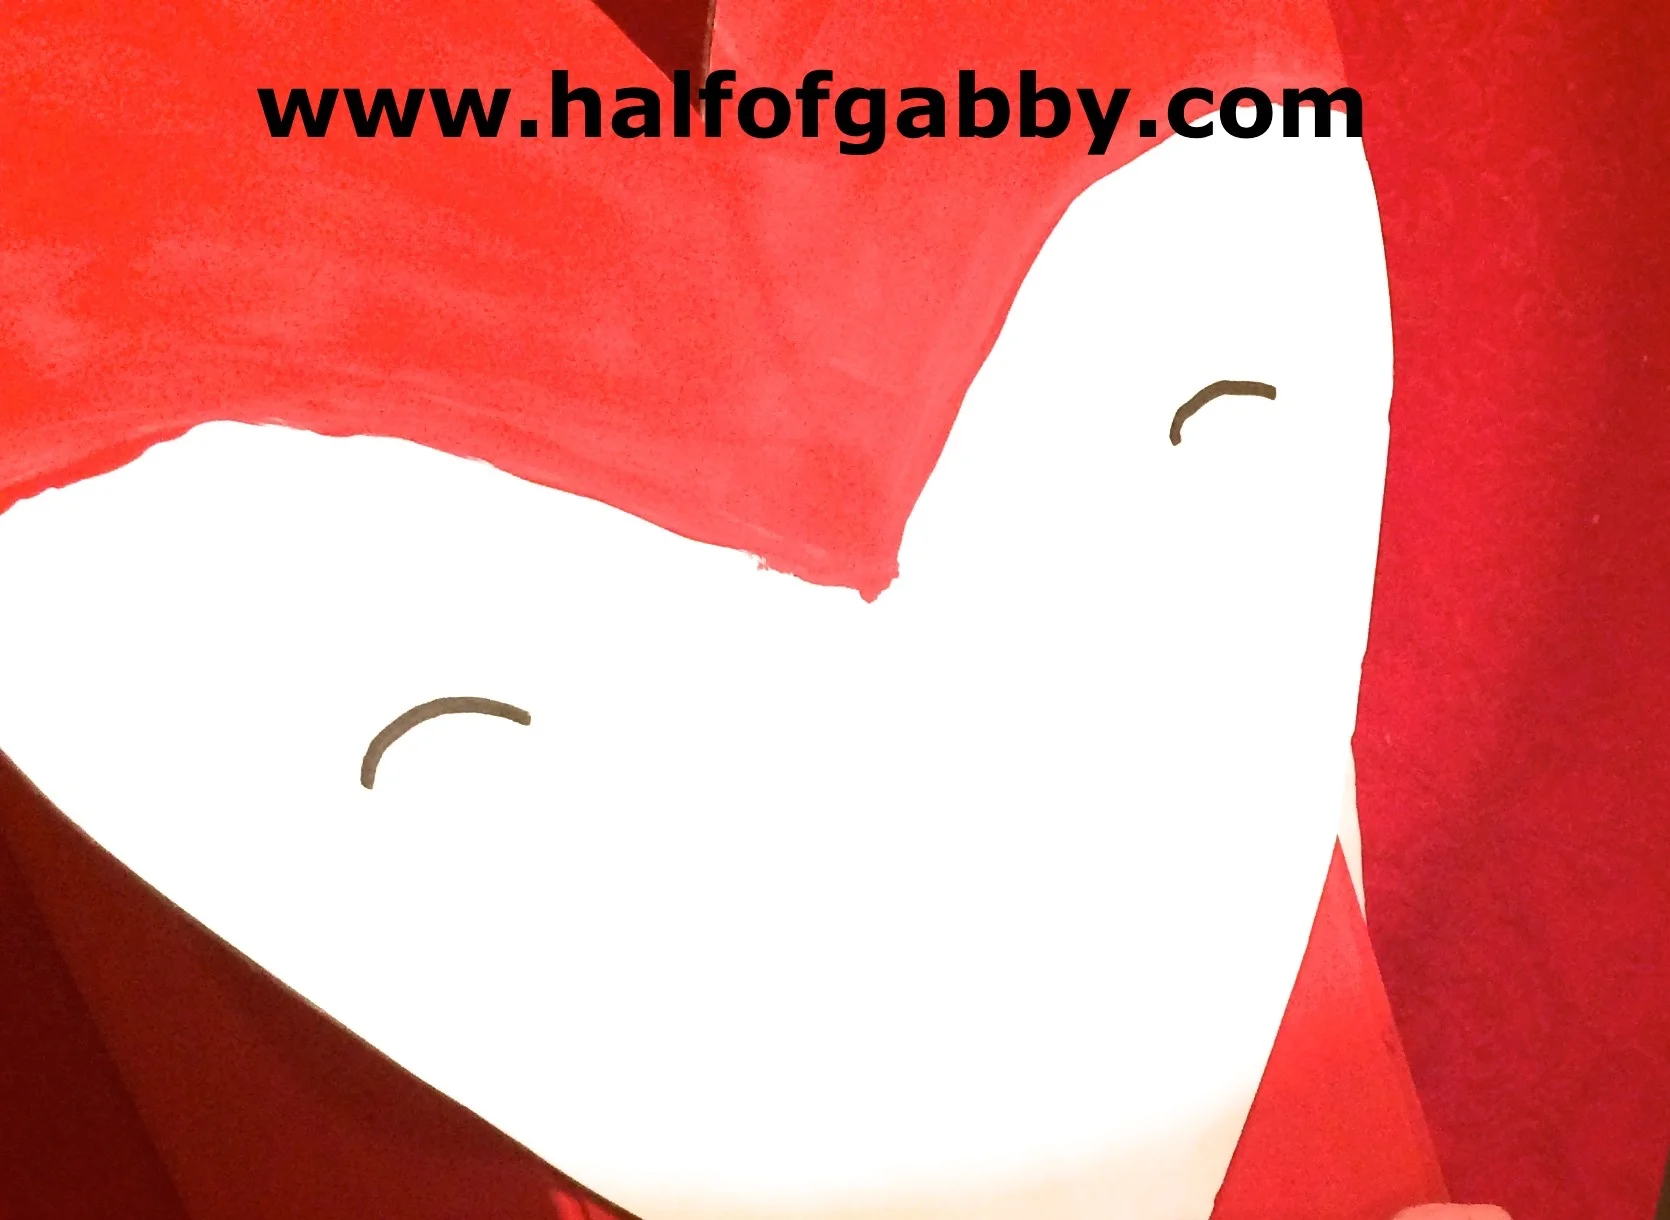
THE EYES:
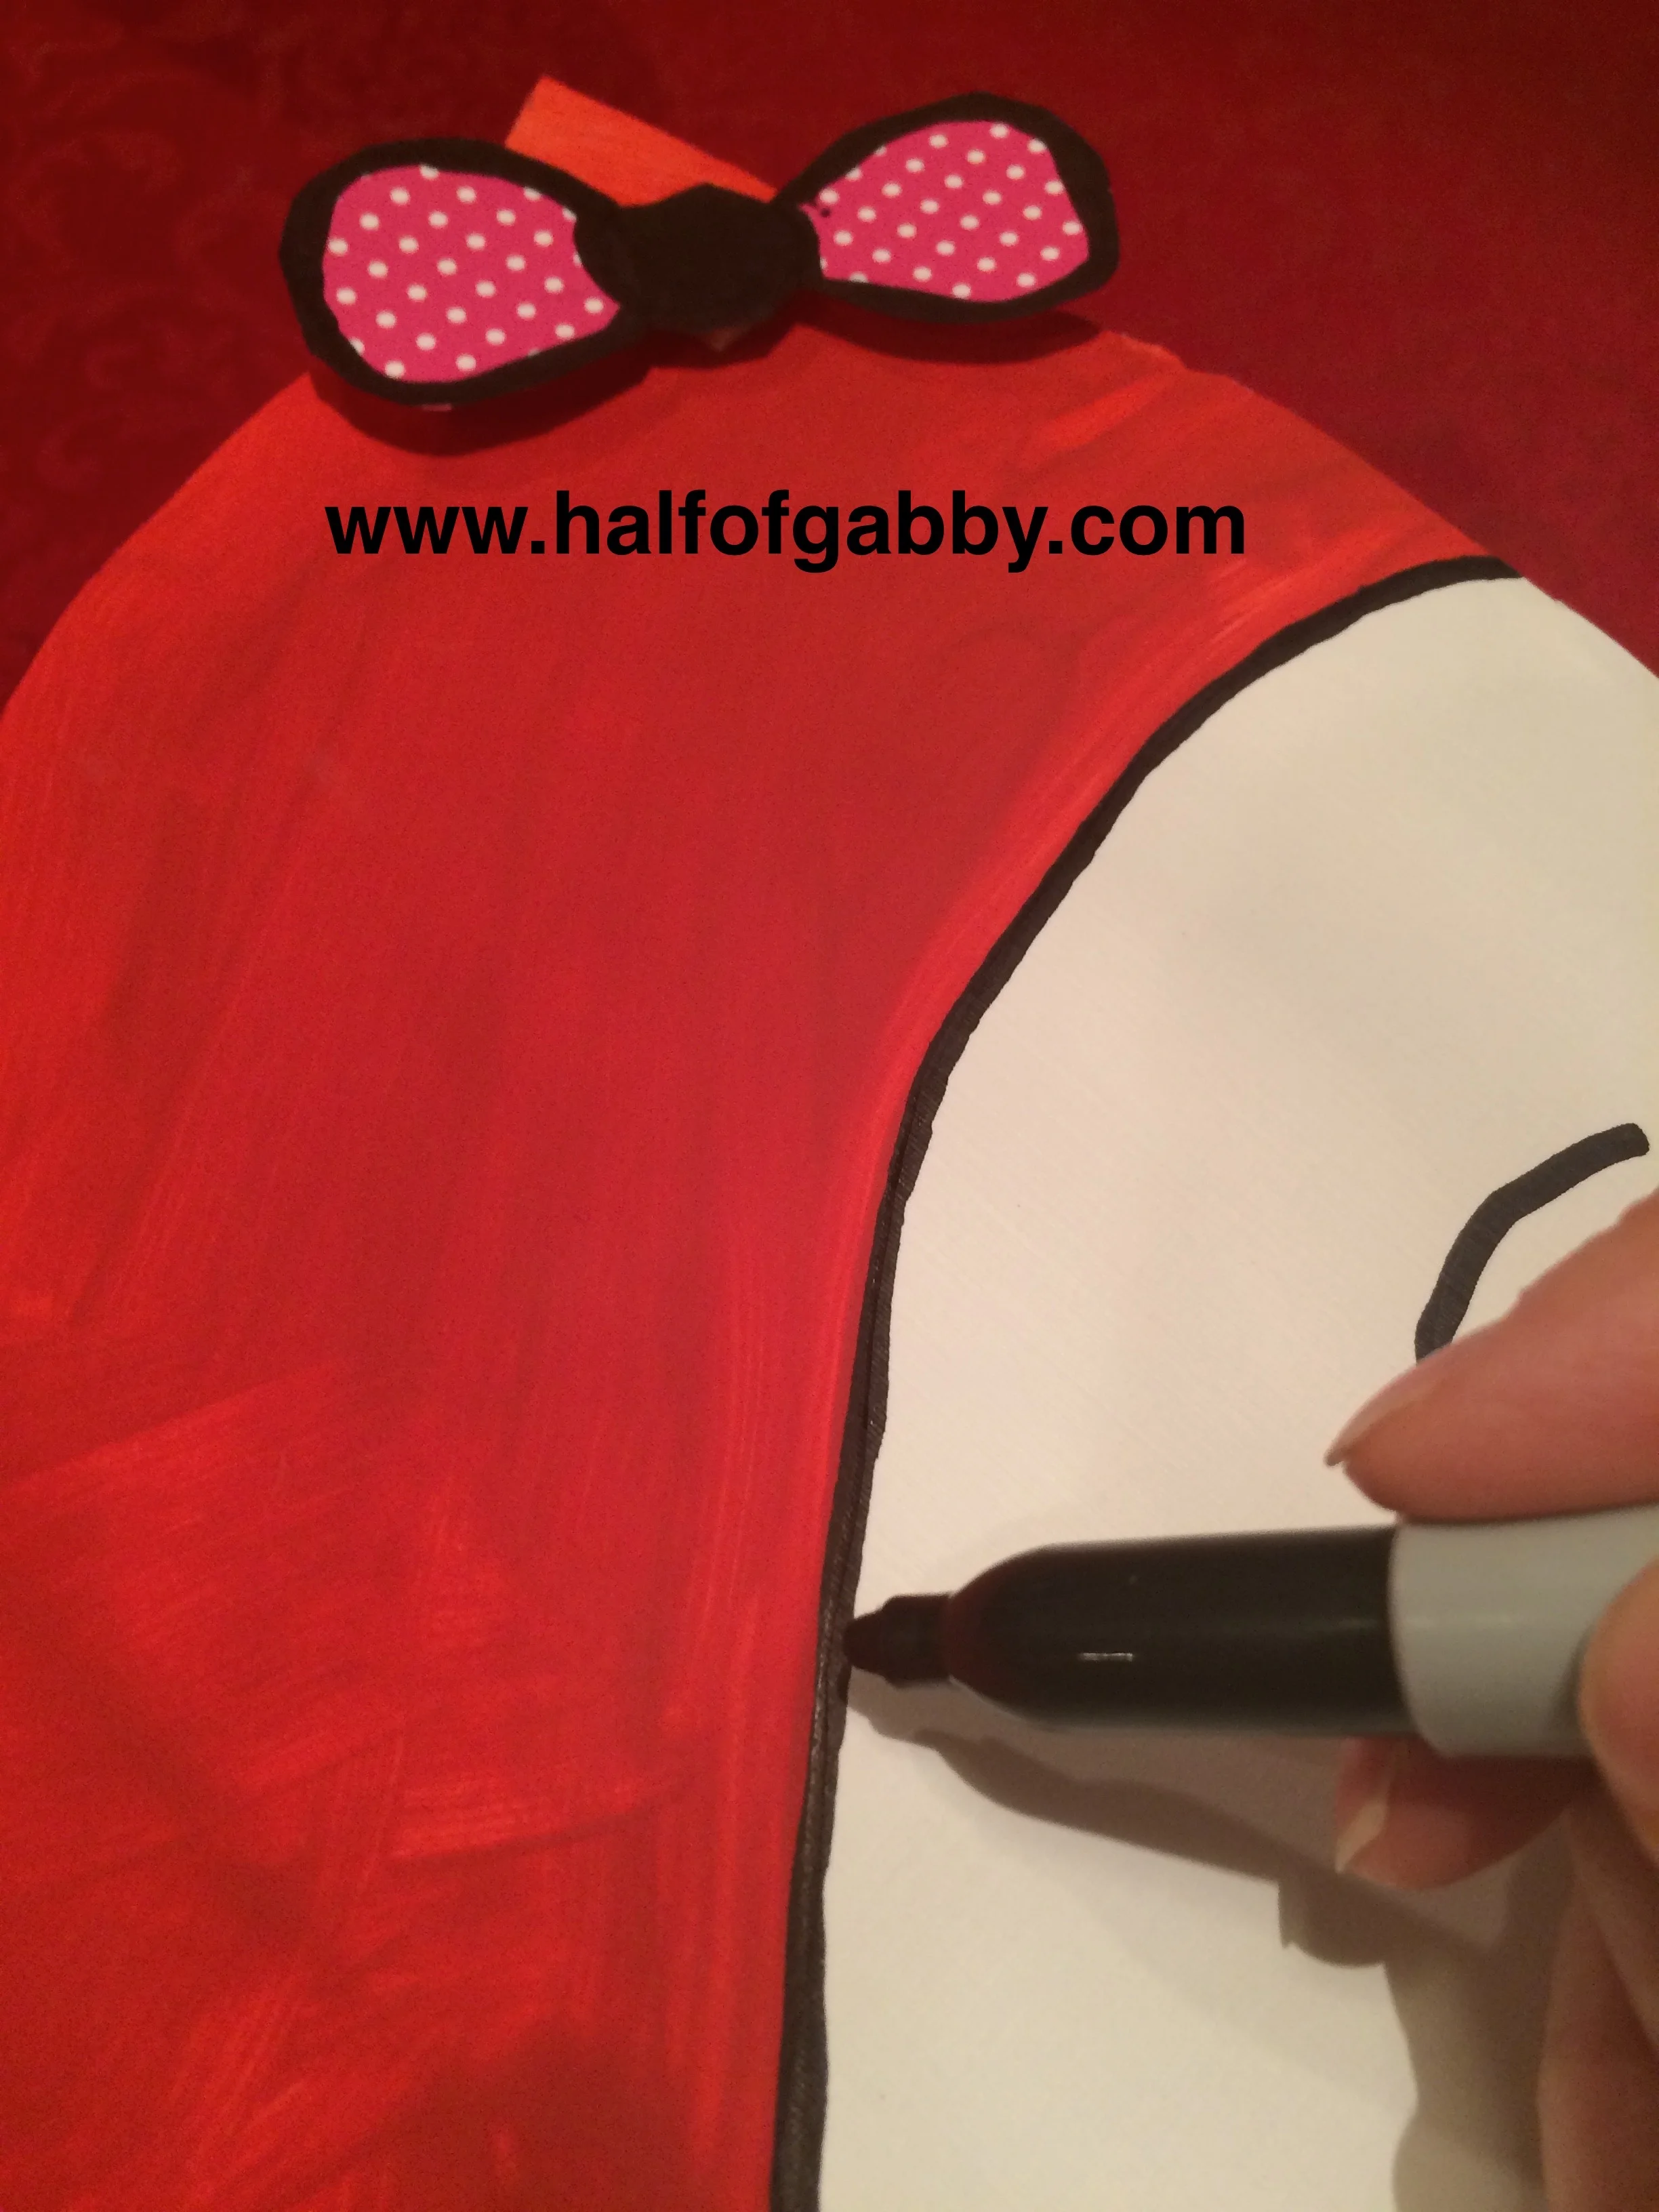
For the eyes, simply take a black marker and draw them on.
5. Hot glue the face to a piece of cardboard.
This will ensure that your fox's face will be sturdy and hold up during traveling back and forth to school.
Note:
BEFORE you hot glue the face onto the cardboard, make sure you already hot glued the ears on!
After the hot glue dries, take a razor knife and cut around the heart face.
An adult should do this step!
NOW YOU HAVE A FACE! YAY!
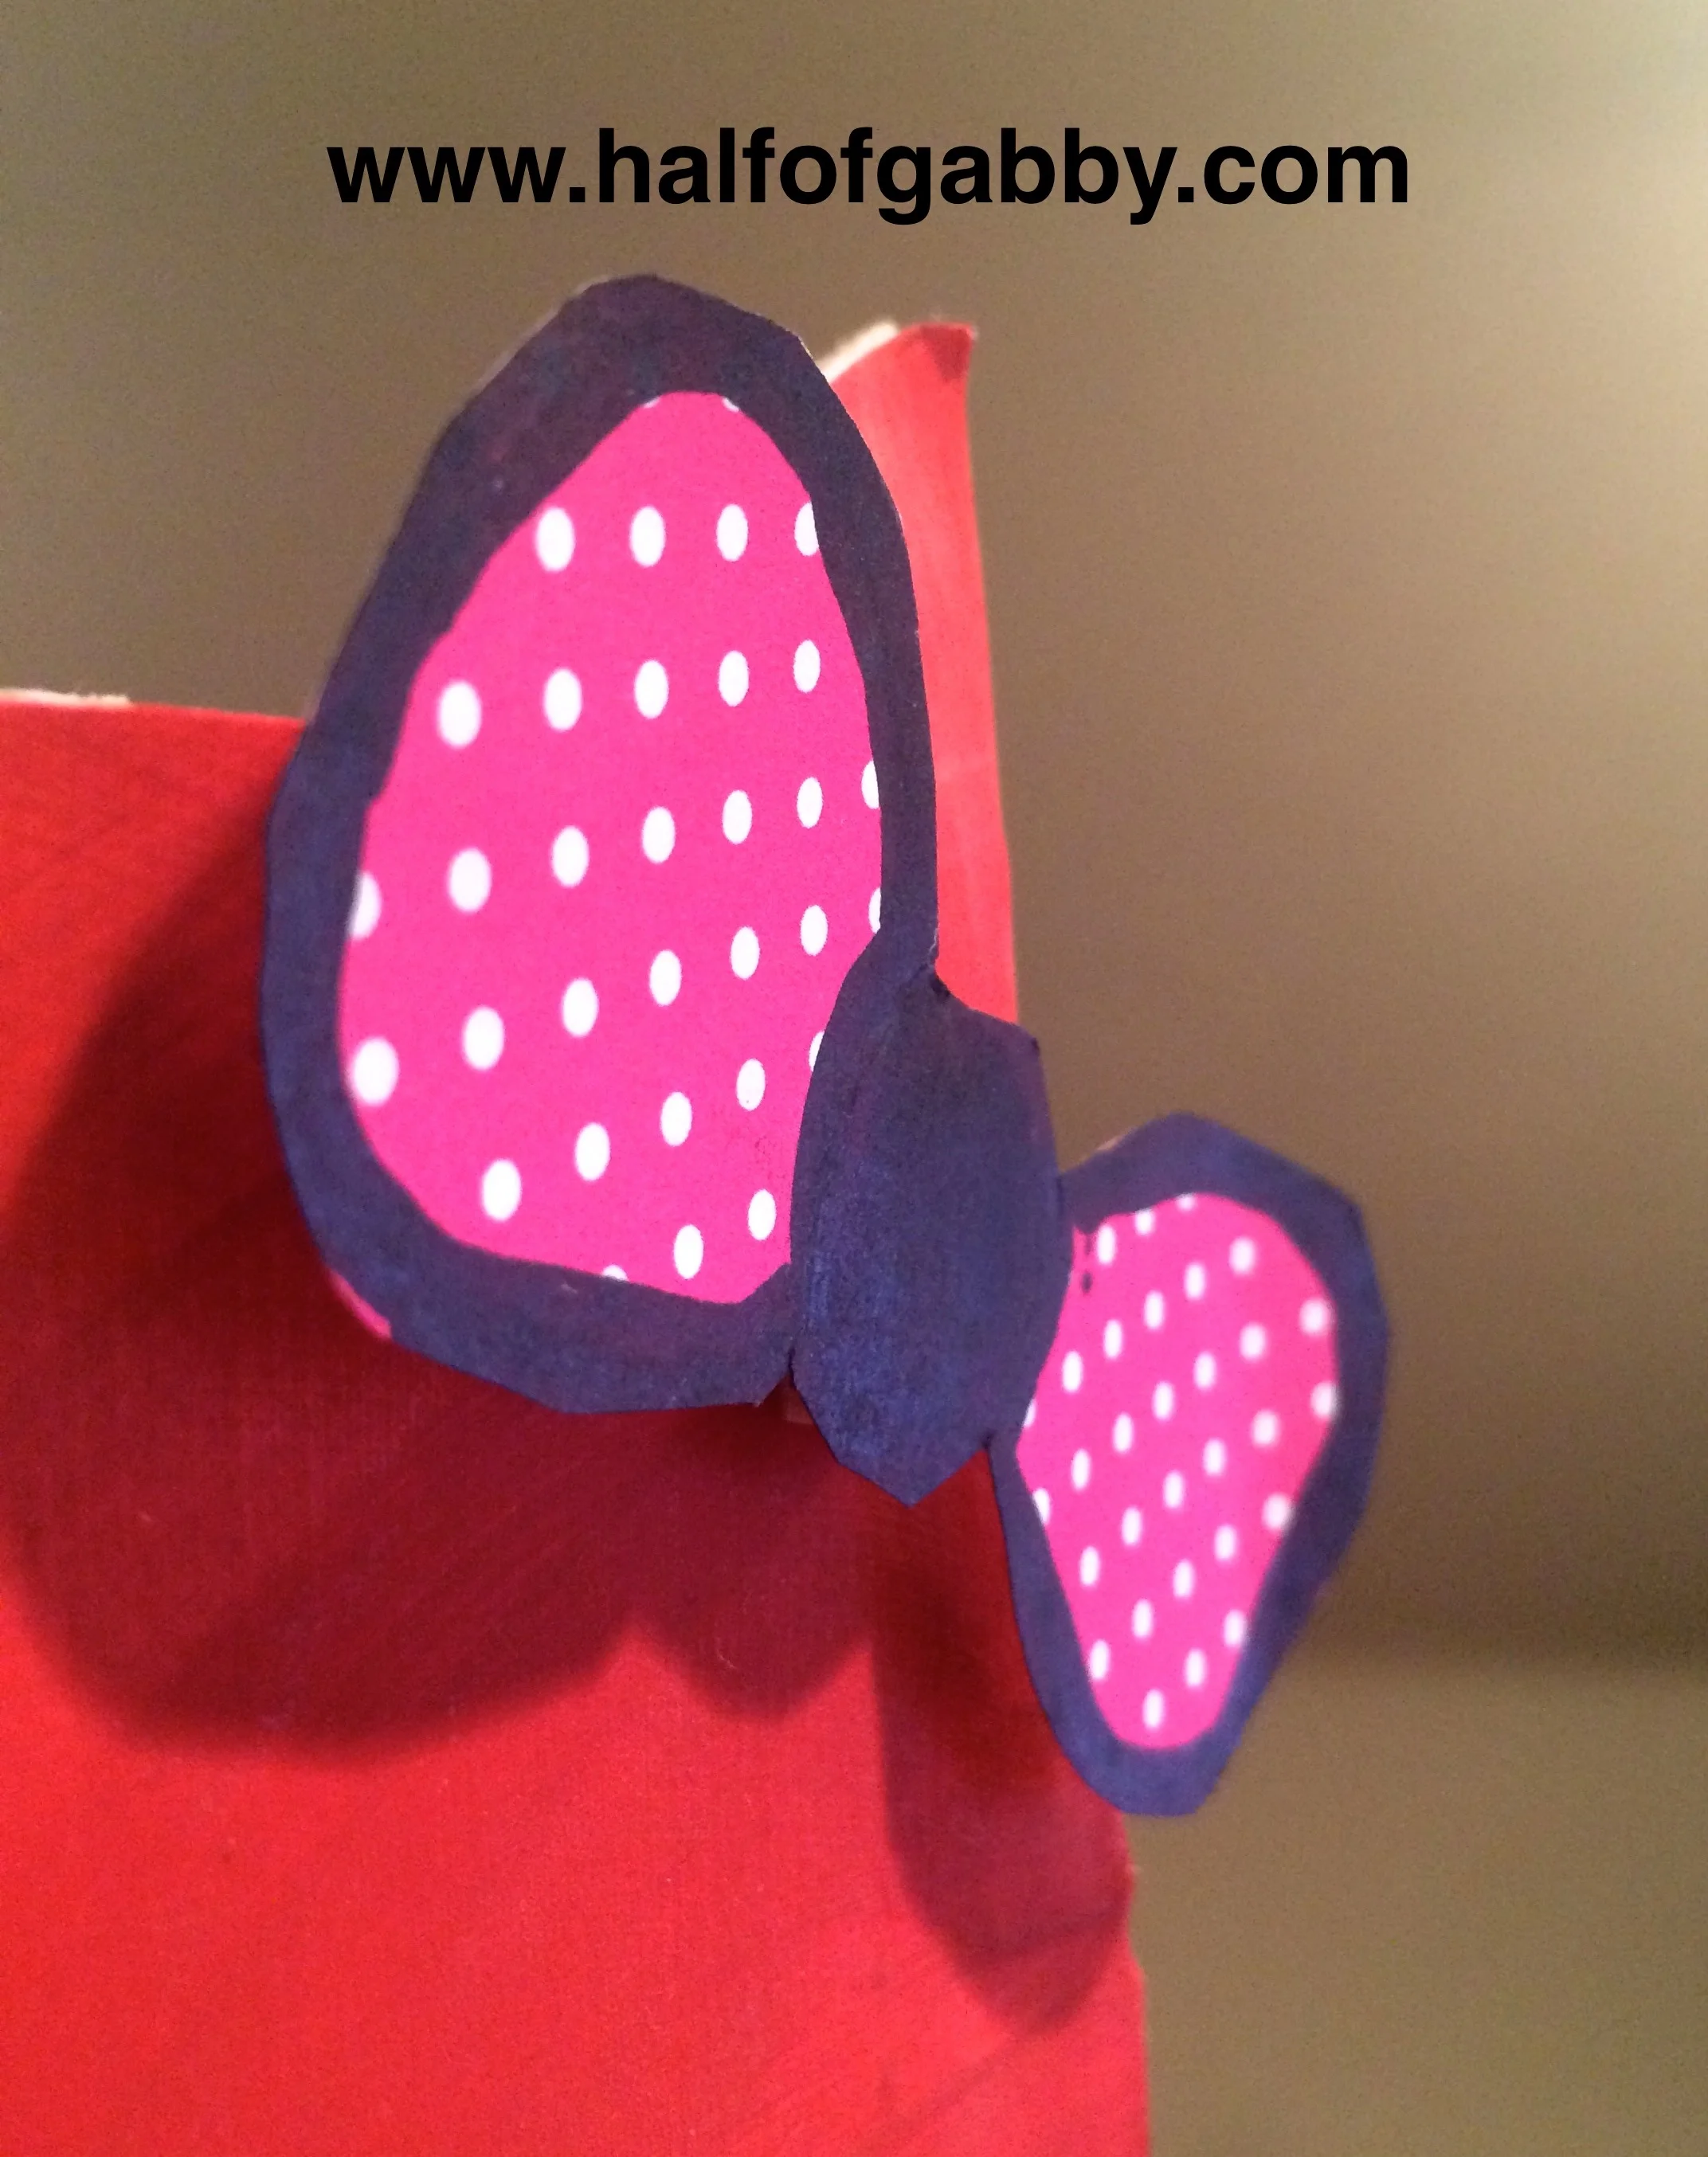
6. Time to make the bow!
You will be using your decorative paper to make the bow.
If you're feeling confident, you can simply turn your paper over and draw your bow and then cut out. Gia opted to make a template for her bow out of some of the white card stock. She then laid the template over her decorative paper, traced it, and cut it out.
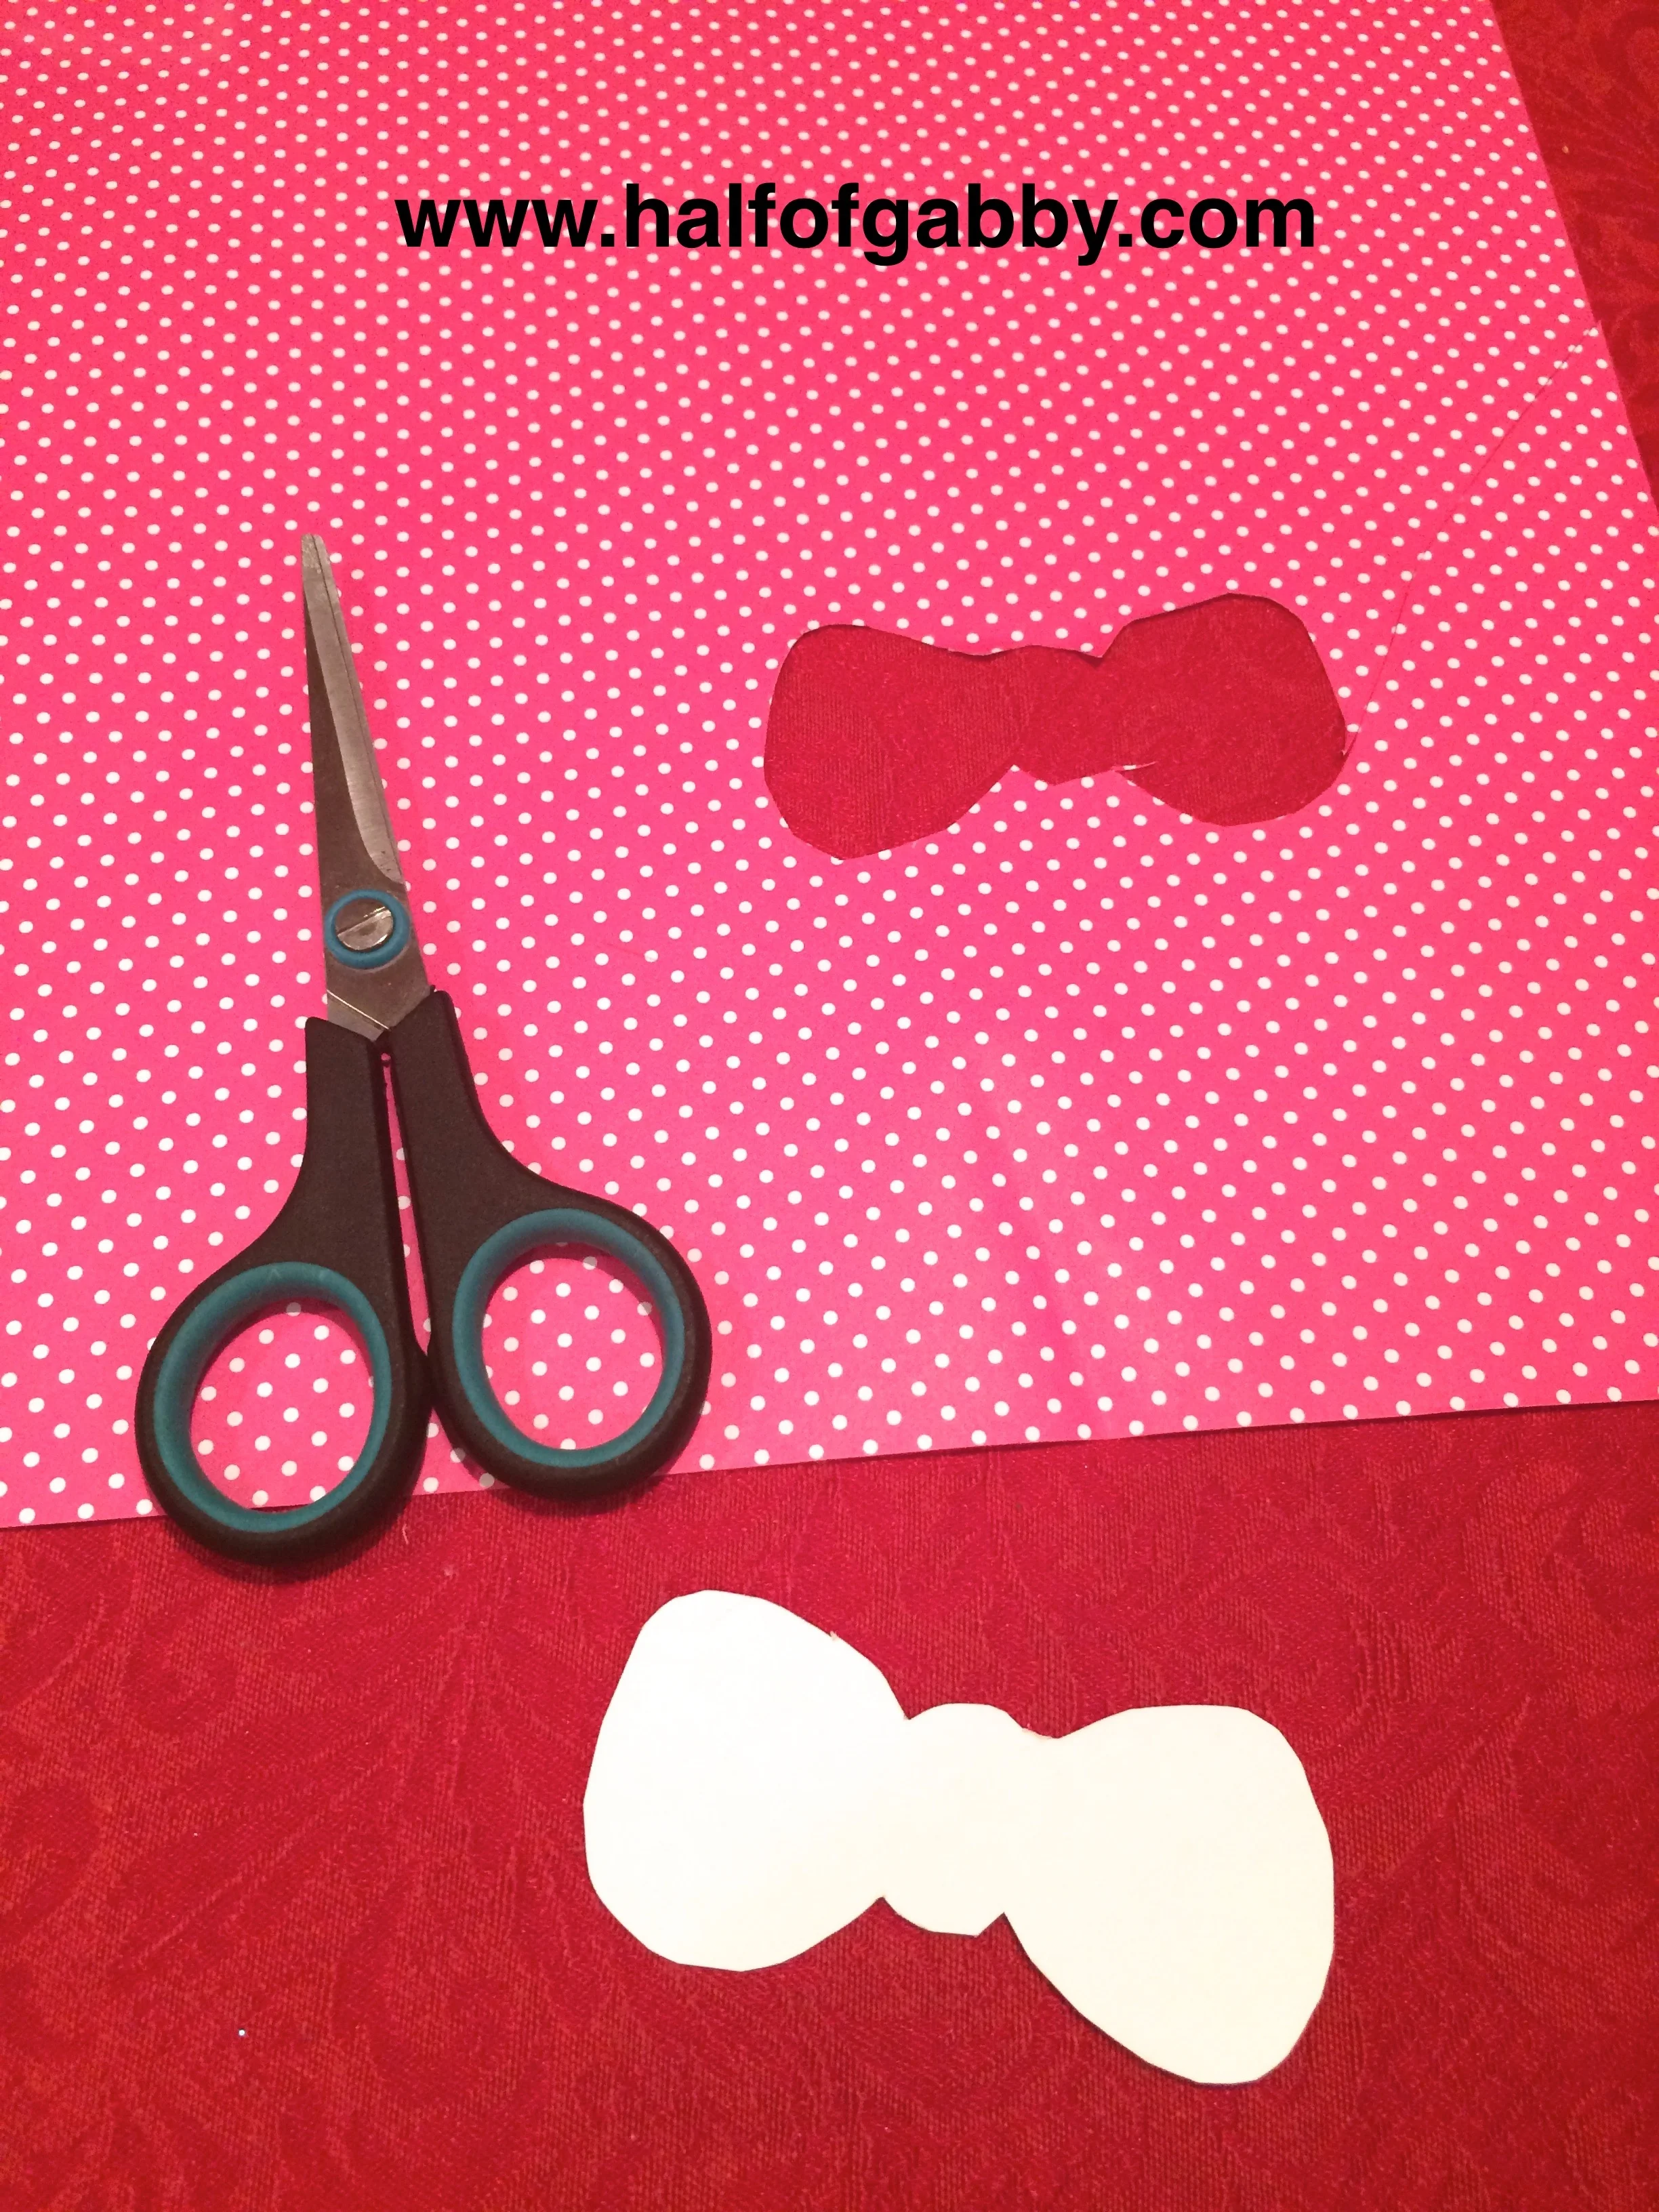
Then she outlined the bow with a black marker to make it stand out.
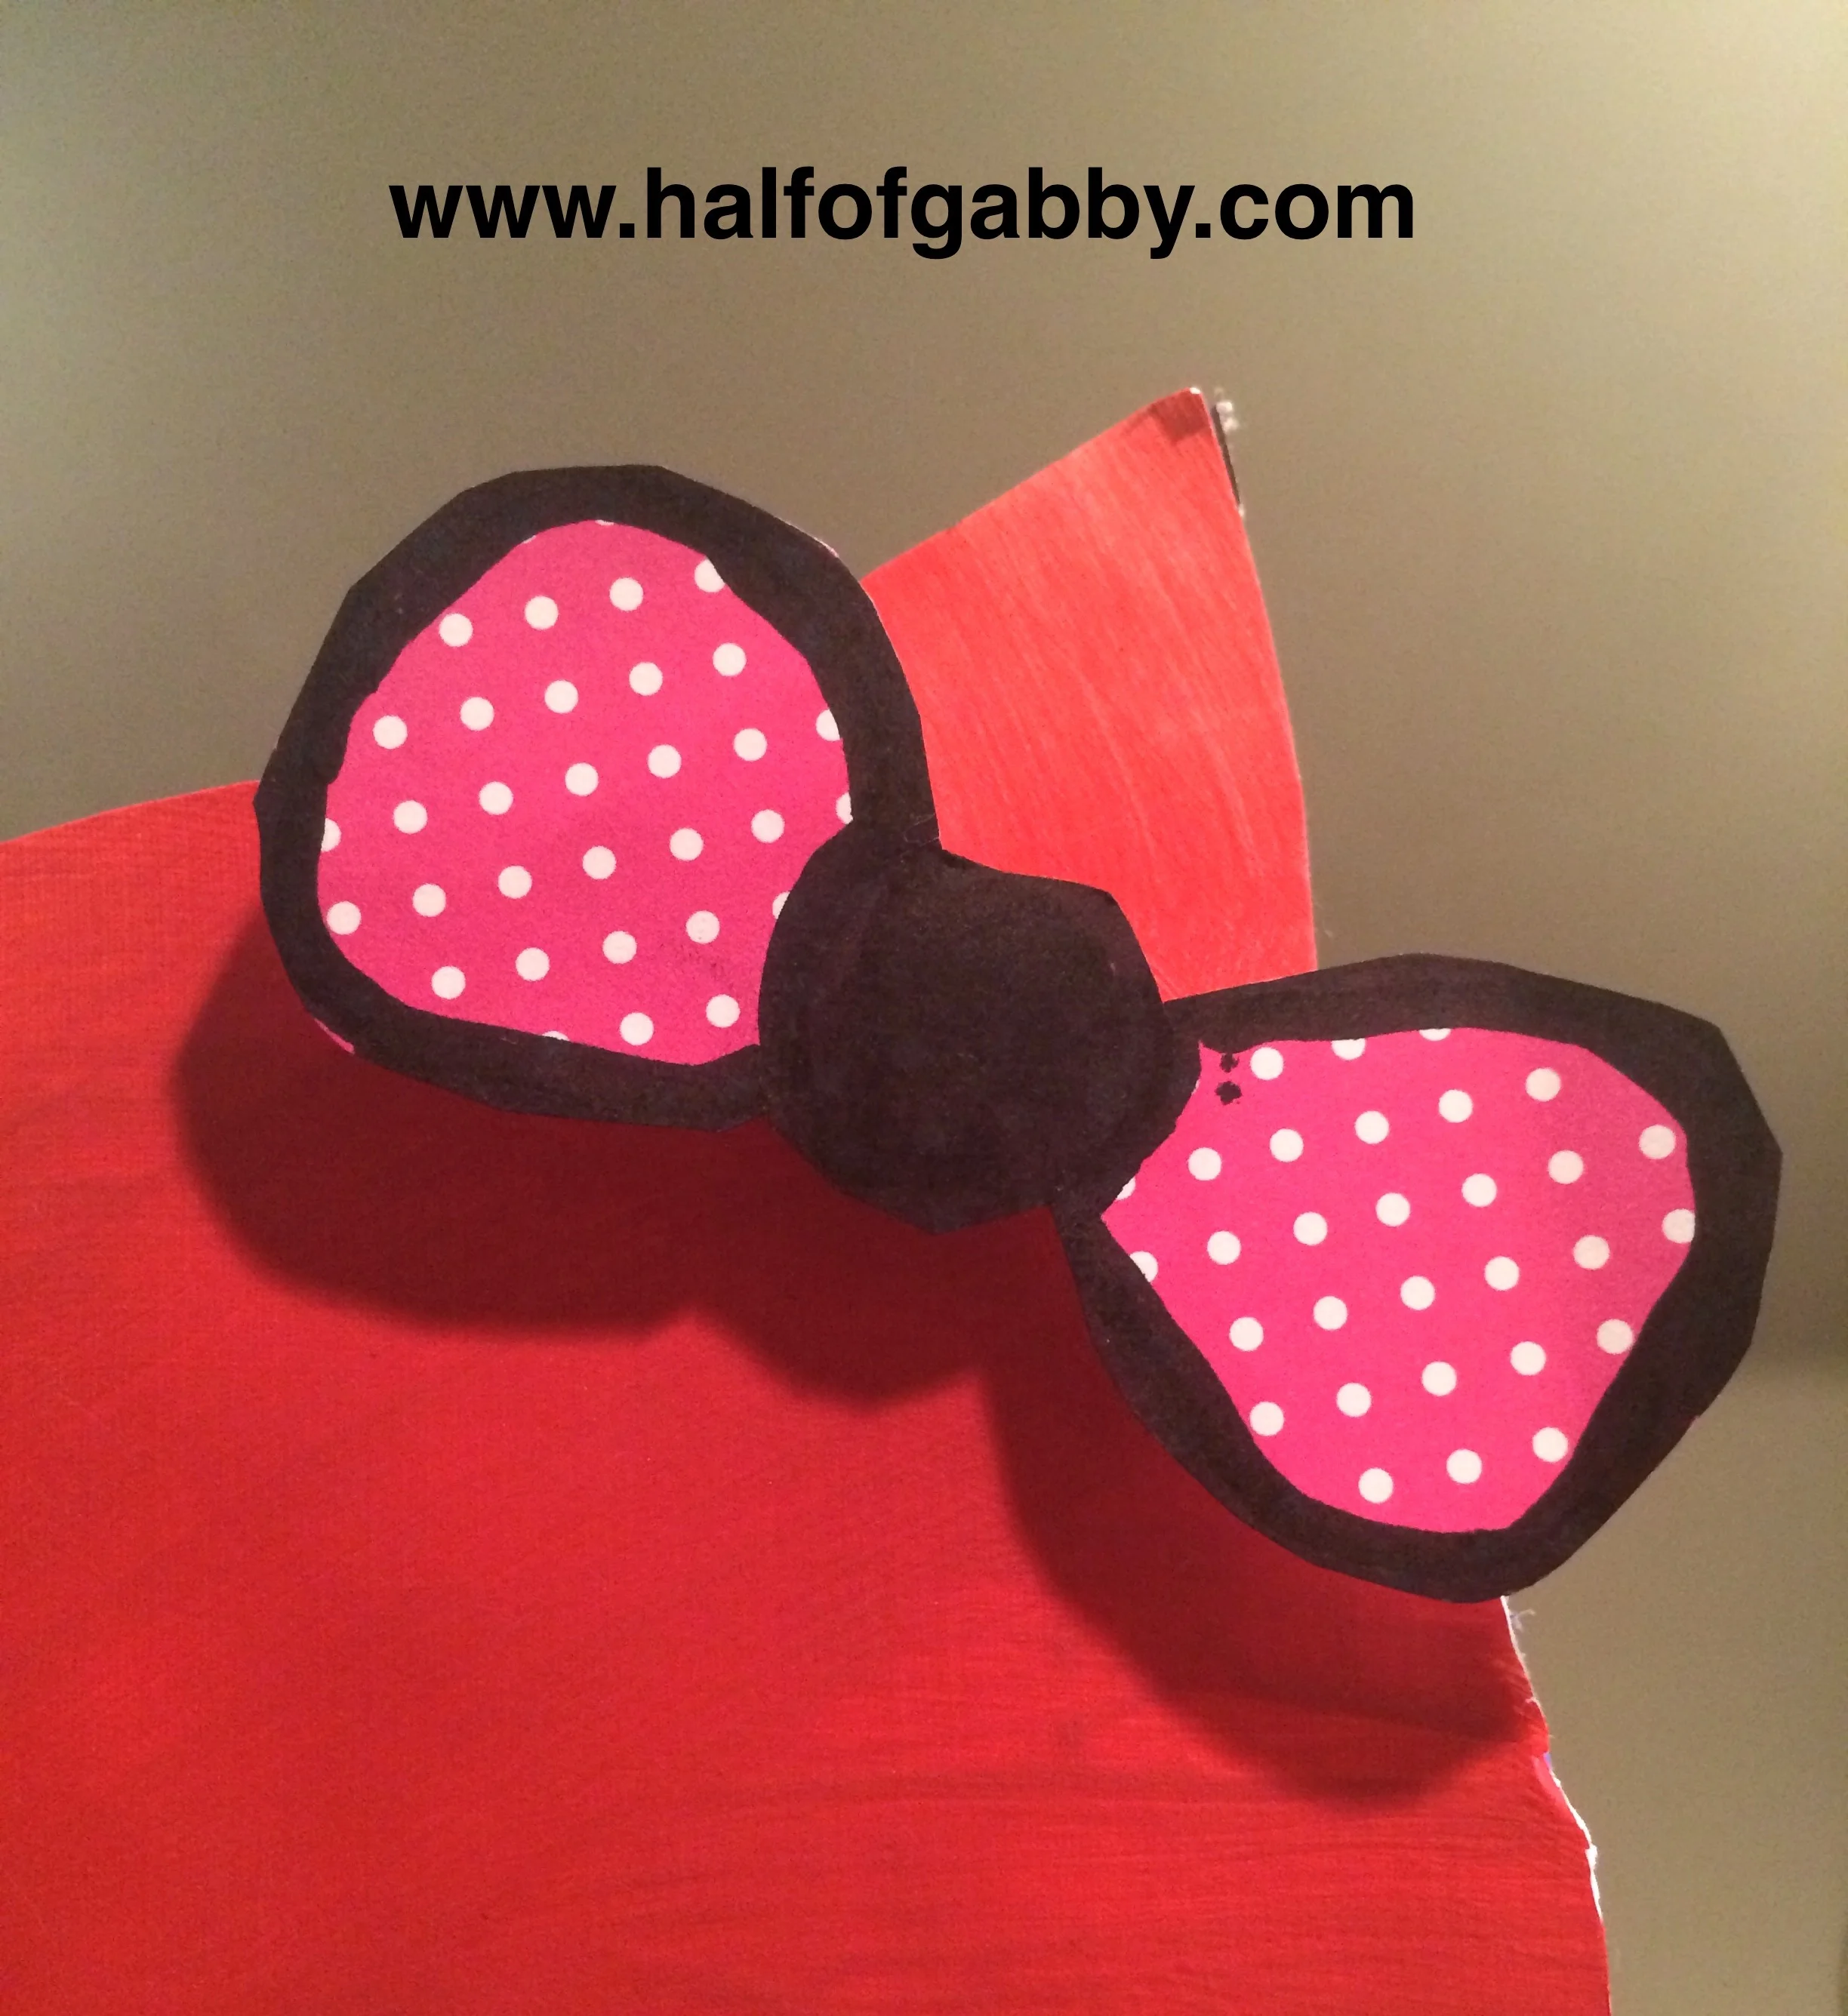
Gia attached her bow by using double-sided foam tape.
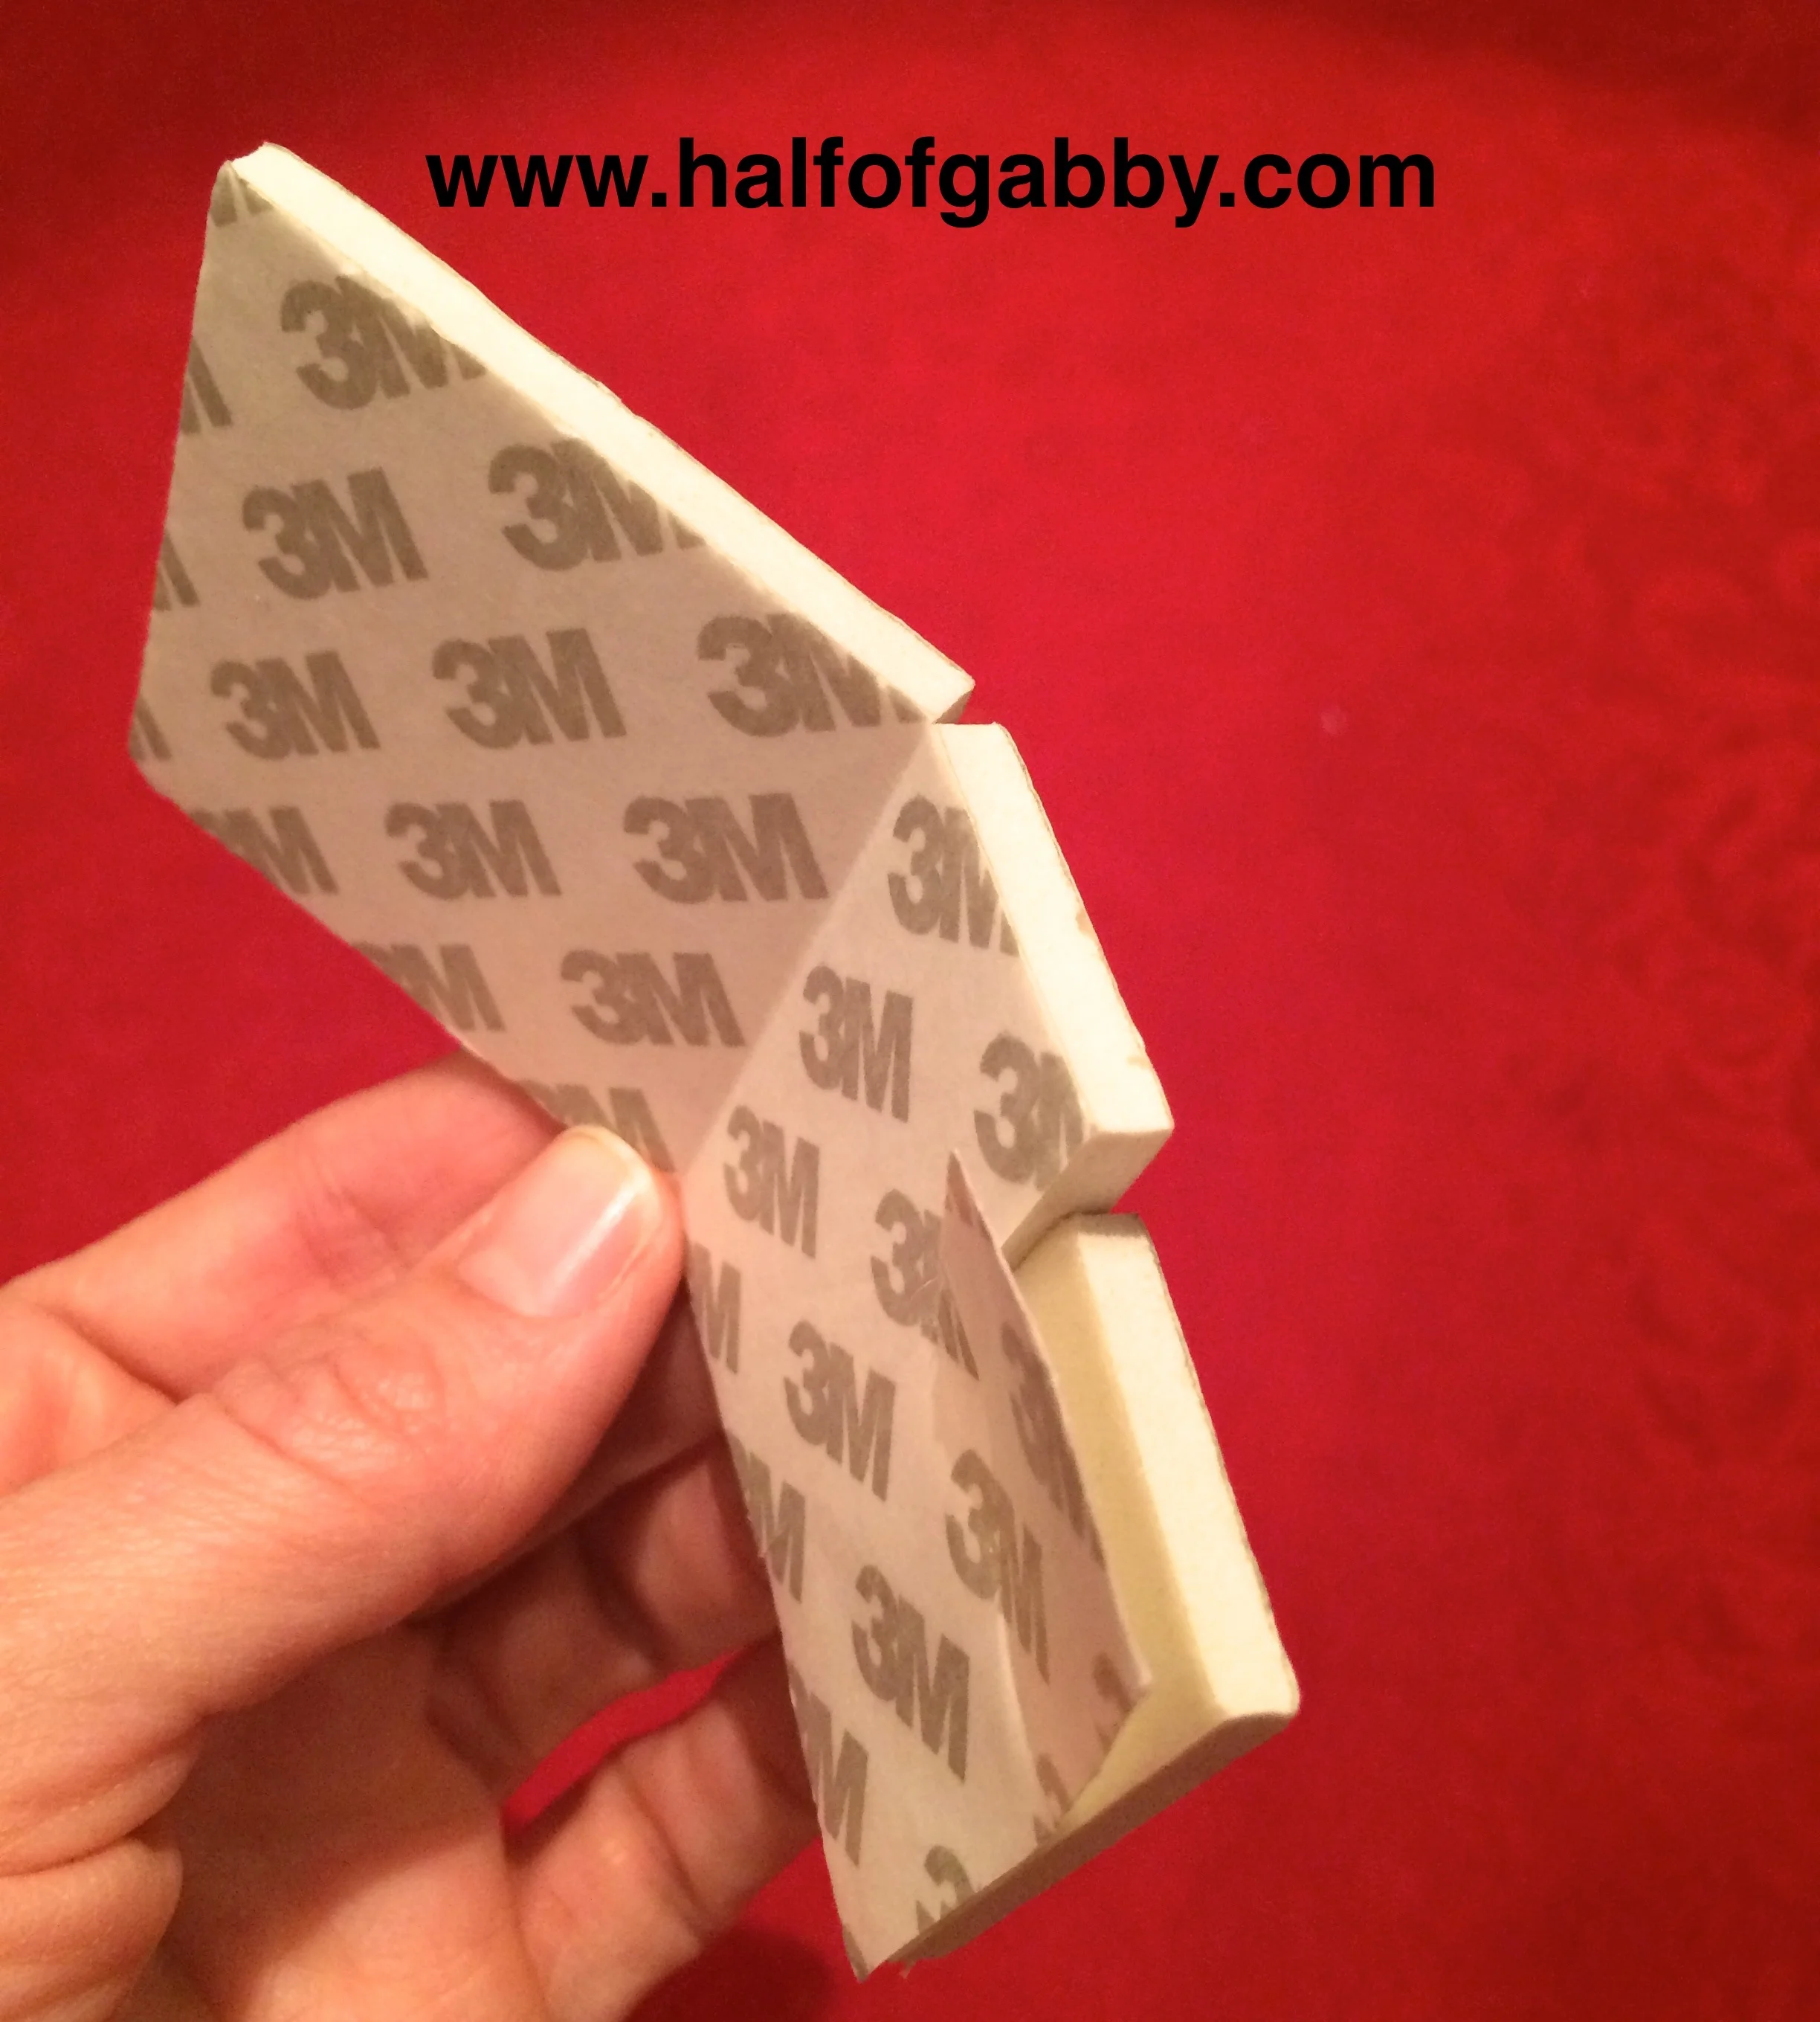
This gives the bow a three dimensional look.
However, if you don't have foam tape, you can simply glue your bow right to the face. Or you can cut out a couple little squares of cardboard, hot glue them together and then hot glue them between the face and the bow.
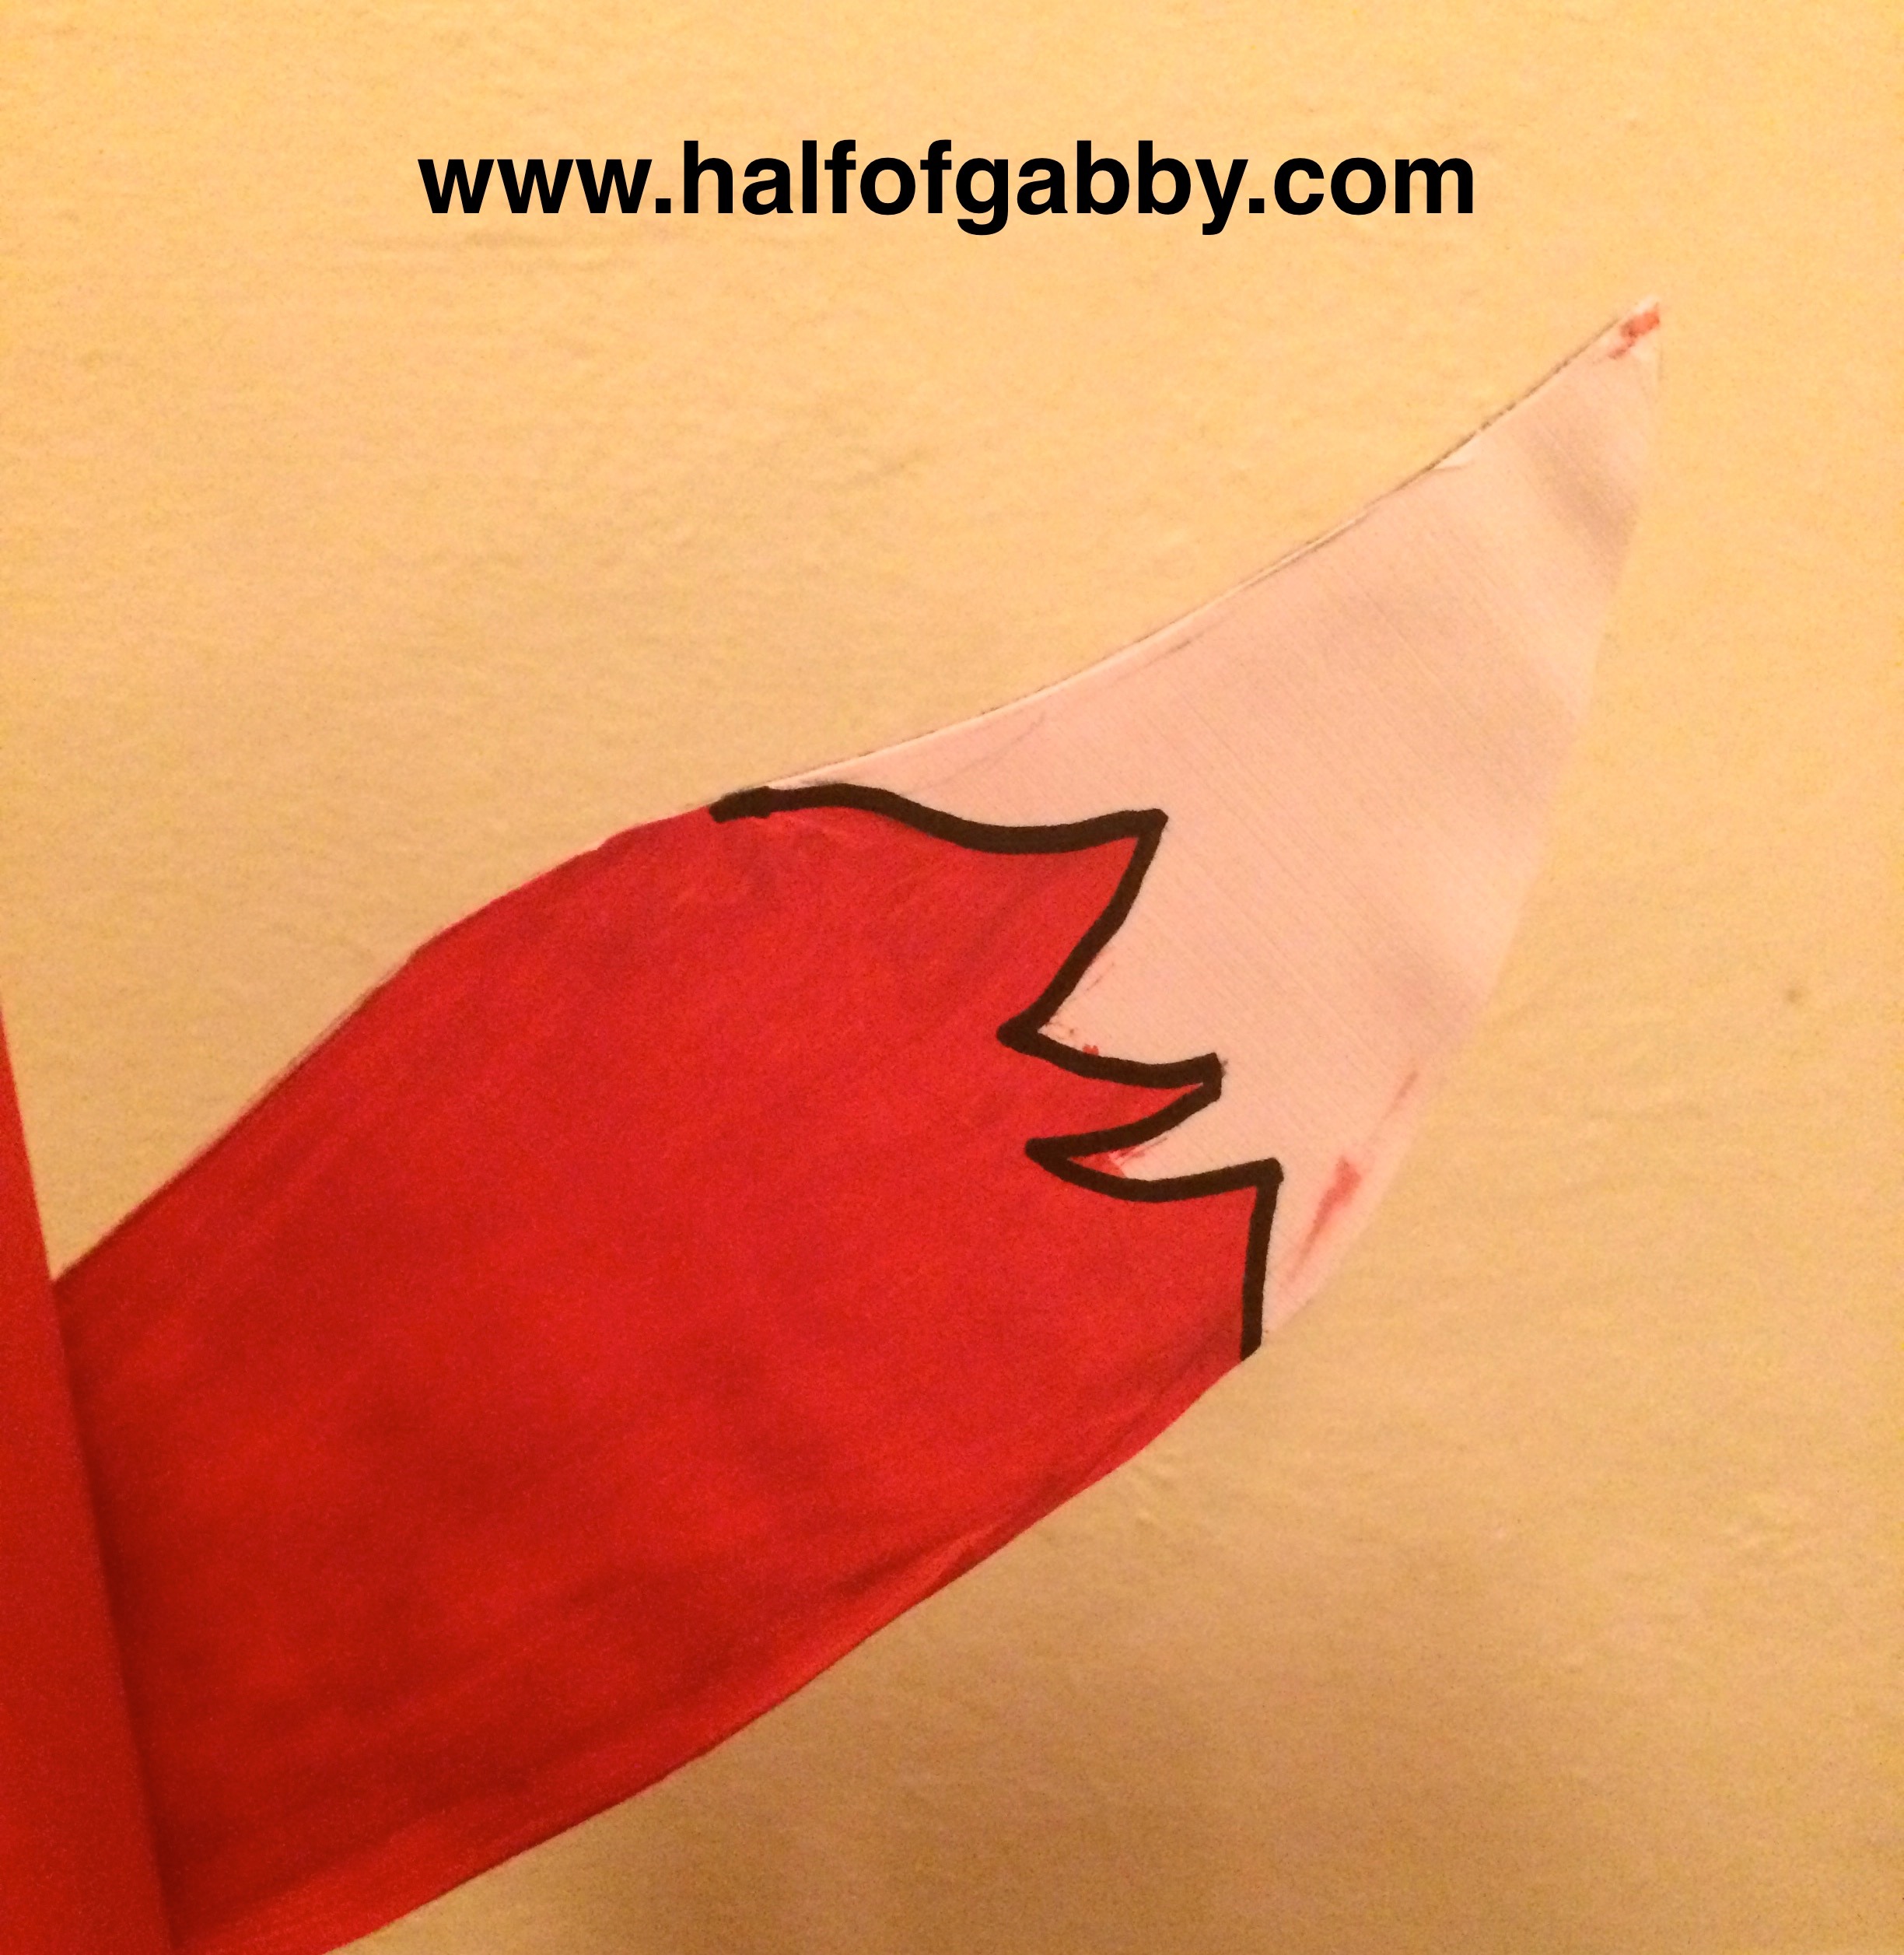
7. Make the tail.
On your white card stock, simply draw a tail and cut out. The tail can be any shape and size you would like. Gia drew her tail to be 9.5" long.
After you cut your tail out, draw a tip on it with a pencil and then paint the tail, except for the tip. You'll be going over the pencil with a black marker once the tail is done.
After you're done with your tail, you'll be hot gluing it to the cardboard just like you did with the fox's head.
And again, just like with the face, an adult will cut it out with a razor knife.
8. Hot glue your face and tail onto your box.

*Again, and adult should do the hot gluing (or supervise an older child).
ALMOST DONE!
9. Put the finishing touches on!
Go over the lines of the hair and tail with a black marker.
See how much better just a simple step makes?!
Gia did a super awesome job on her valentine fox box!
HAPPY VALENTINE'S DAY!
~~~
*The information on this site is not intended or implied to be a substitute for professional medical advice, diagnosis or treatment. All content in this article is for general information purposes only. I am not a doctor, nor am I a dietitian. Talk to your physician before making any changes in your diet or exercise regimen. The information found in this article is from various sources which include, but are not limited to, the sites listed above. I encourage you to do your own research and talk with your physician before making any changes in diet or exercise. What has worked for me may not work for you. This information in this article or on this website should never replace or serve as medical advice.
NEVER DISREGARD PROFESSIONAL MEDICAL ADVICE OR DELAY SEEKING MEDICAL TREATMENT BECAUSE OF SOMETHING YOU HAVE READ ON OR HAVE ACCESSED THROUGH THIS WEB SITE.
Please Note: The affiliate links provided in this article are for products I did not receive for free nor was I asked to do a product review.
*Affiliate Disclaimer: Half of Gabby has recently become an Amazon Affiliate. The Federal Trade Commission (FTC) requires all affiliates to put a disclaimer on their website/blog. Most disclaimers are so filled with confusing lingo that you don’t even understand what they're saying. I’m going to break it down for you the way I'd want it to be broken down for me. I’m not a fan of complicated and unclear regulation jargon. So here’s the dealio. Half of Gabby takes up a tremendous amount of my time. But because I love it so much, I really want to continue dedicating my time to it. For six years now, I have been providing product links to products that I use and love and in turn recommend them to my readers. These products have helped me maintain a healthy lifestyle and/or improve my family life. I have helped sell countless products for six years and have never received any commissions… Until now. As of September 15, 2016, I will be providing links just as I've always done, but now will receive a very small commission if you purchase an item through the affiliate link that I provide. An affiliate link is simply a link that brings you to a place where you can buy that product. I will not earn a commission by you simply clicking on the link, you must actually purchase the item(s) within 24 hours of putting it in your Amazon cart. Prices are exactly the same for you if you purchase through an affiliate link on Half of Gabby. You will NOT pay more by clicking through the link. My promise to you is that I will never recommend a product that I don’t fully 100% believe in and/or use myself and recommend to close friends and family. This will allow me to continue working hard on Half of Gabby without it using up time that I need to otherwise dedicate to contributing to my household. I'm happy to be able to continue my blog and to continue talking with, meeting, and helping people all over the world with their health journeys!